
How to edit product photos with Ideogram 4.5
A keyboard needs a clean listing image. A running shoe needs another colorway. A breakfast scene needs different props. Here are the images, the actual edit instructions, and the details to check after each change.
Product editing starts with a decision about what must stay recognizable. On a keyboard, that might be the key layout and legends. On a shoe, it is the silhouette, knit texture, and sole construction. Changing the backdrop is useful only if the product still reads as the product you started with.
Ideogram 4.5 lets you work from an existing image and describe a change. The examples below show how to break a larger brief into separate edits, keep track of the result, and catch changes you did not ask for.
About these examples
These are saved demonstrations from the Ideogram 4.5 gallery. Each block labeled “Saved edit” or “Saved starting prompt” contains the instruction recorded with the image shown. The shoes and toaster start from generated scenes; the keyboard starts from a supplied image whose capture history is not recorded. The sequences do not record settings, retries, or a customer production workflow. Use them to study the edits and compare the visible results.
Prepare the source and choose the tool
Start with the clearest image you have of the exact item. If you are editing a real product for sale, use its actual photograph. A generated concept can help you explore a design, but it cannot establish the shape of hardware or the text on packaging that was never visible in the source.
Keep an untouched master. Write a short brief before uploading: the change you need, the details to preserve, and where the image will appear. “Blue shoe for a product listing” leaves several decisions open. “Change the coral knit upper to slate blue; retain the cream sole, laces, angle, and stone backdrop” gives you a result you can assess against the brief.
Choose the workflow that matches the job:
- Precise Edit: change an existing image with a focused instruction, with optional masks and guiding references.
- Image with Ideogram 4.5 selected: combine visual references and an edit instruction. Selecting 4.5 explicitly keeps this guide's model choice clear; Auto chooses a model for you.
- Studio: assemble image and text layers, work through canvas versions, and prepare a layout. Its AI edit tools are separate from Precise Edit.
To start in Precise Edit, open an image's page and select Edit, or find Precise Edit in Apps. Put the main photo in Image and the instruction in What should change?. Choose Quality and Number of images, check the displayed cost, and select Apply edit. It requires a paid plan or purchased credits. The editing guide explains the available entry points.
Start with one output while you are testing the wording. Keep a successful version before moving to the next change. The saved gallery sequences below illustrate the instructions and their results; their generation settings are not available, so the examples are not a recipe for reproducing identical pixels.
For a sequence of changes, make the accepted result the input to the next edit. Open that result and select Edit again. In the keyboard example, the teal recolor starts from the accepted packshot; the desk scene starts from the teal version. For independent alternatives, return to a shared approved source instead.
Example 1: turn a keyboard image into a packshot and a desk scene
Select any example image to inspect it at full size.
A keyboard is a useful stress test for product imagery because its identity is in many small details: the number of keys, their sizes, printed legends, and accent colors. A convincing desk scene can still be unusable if a modifier key disappears.
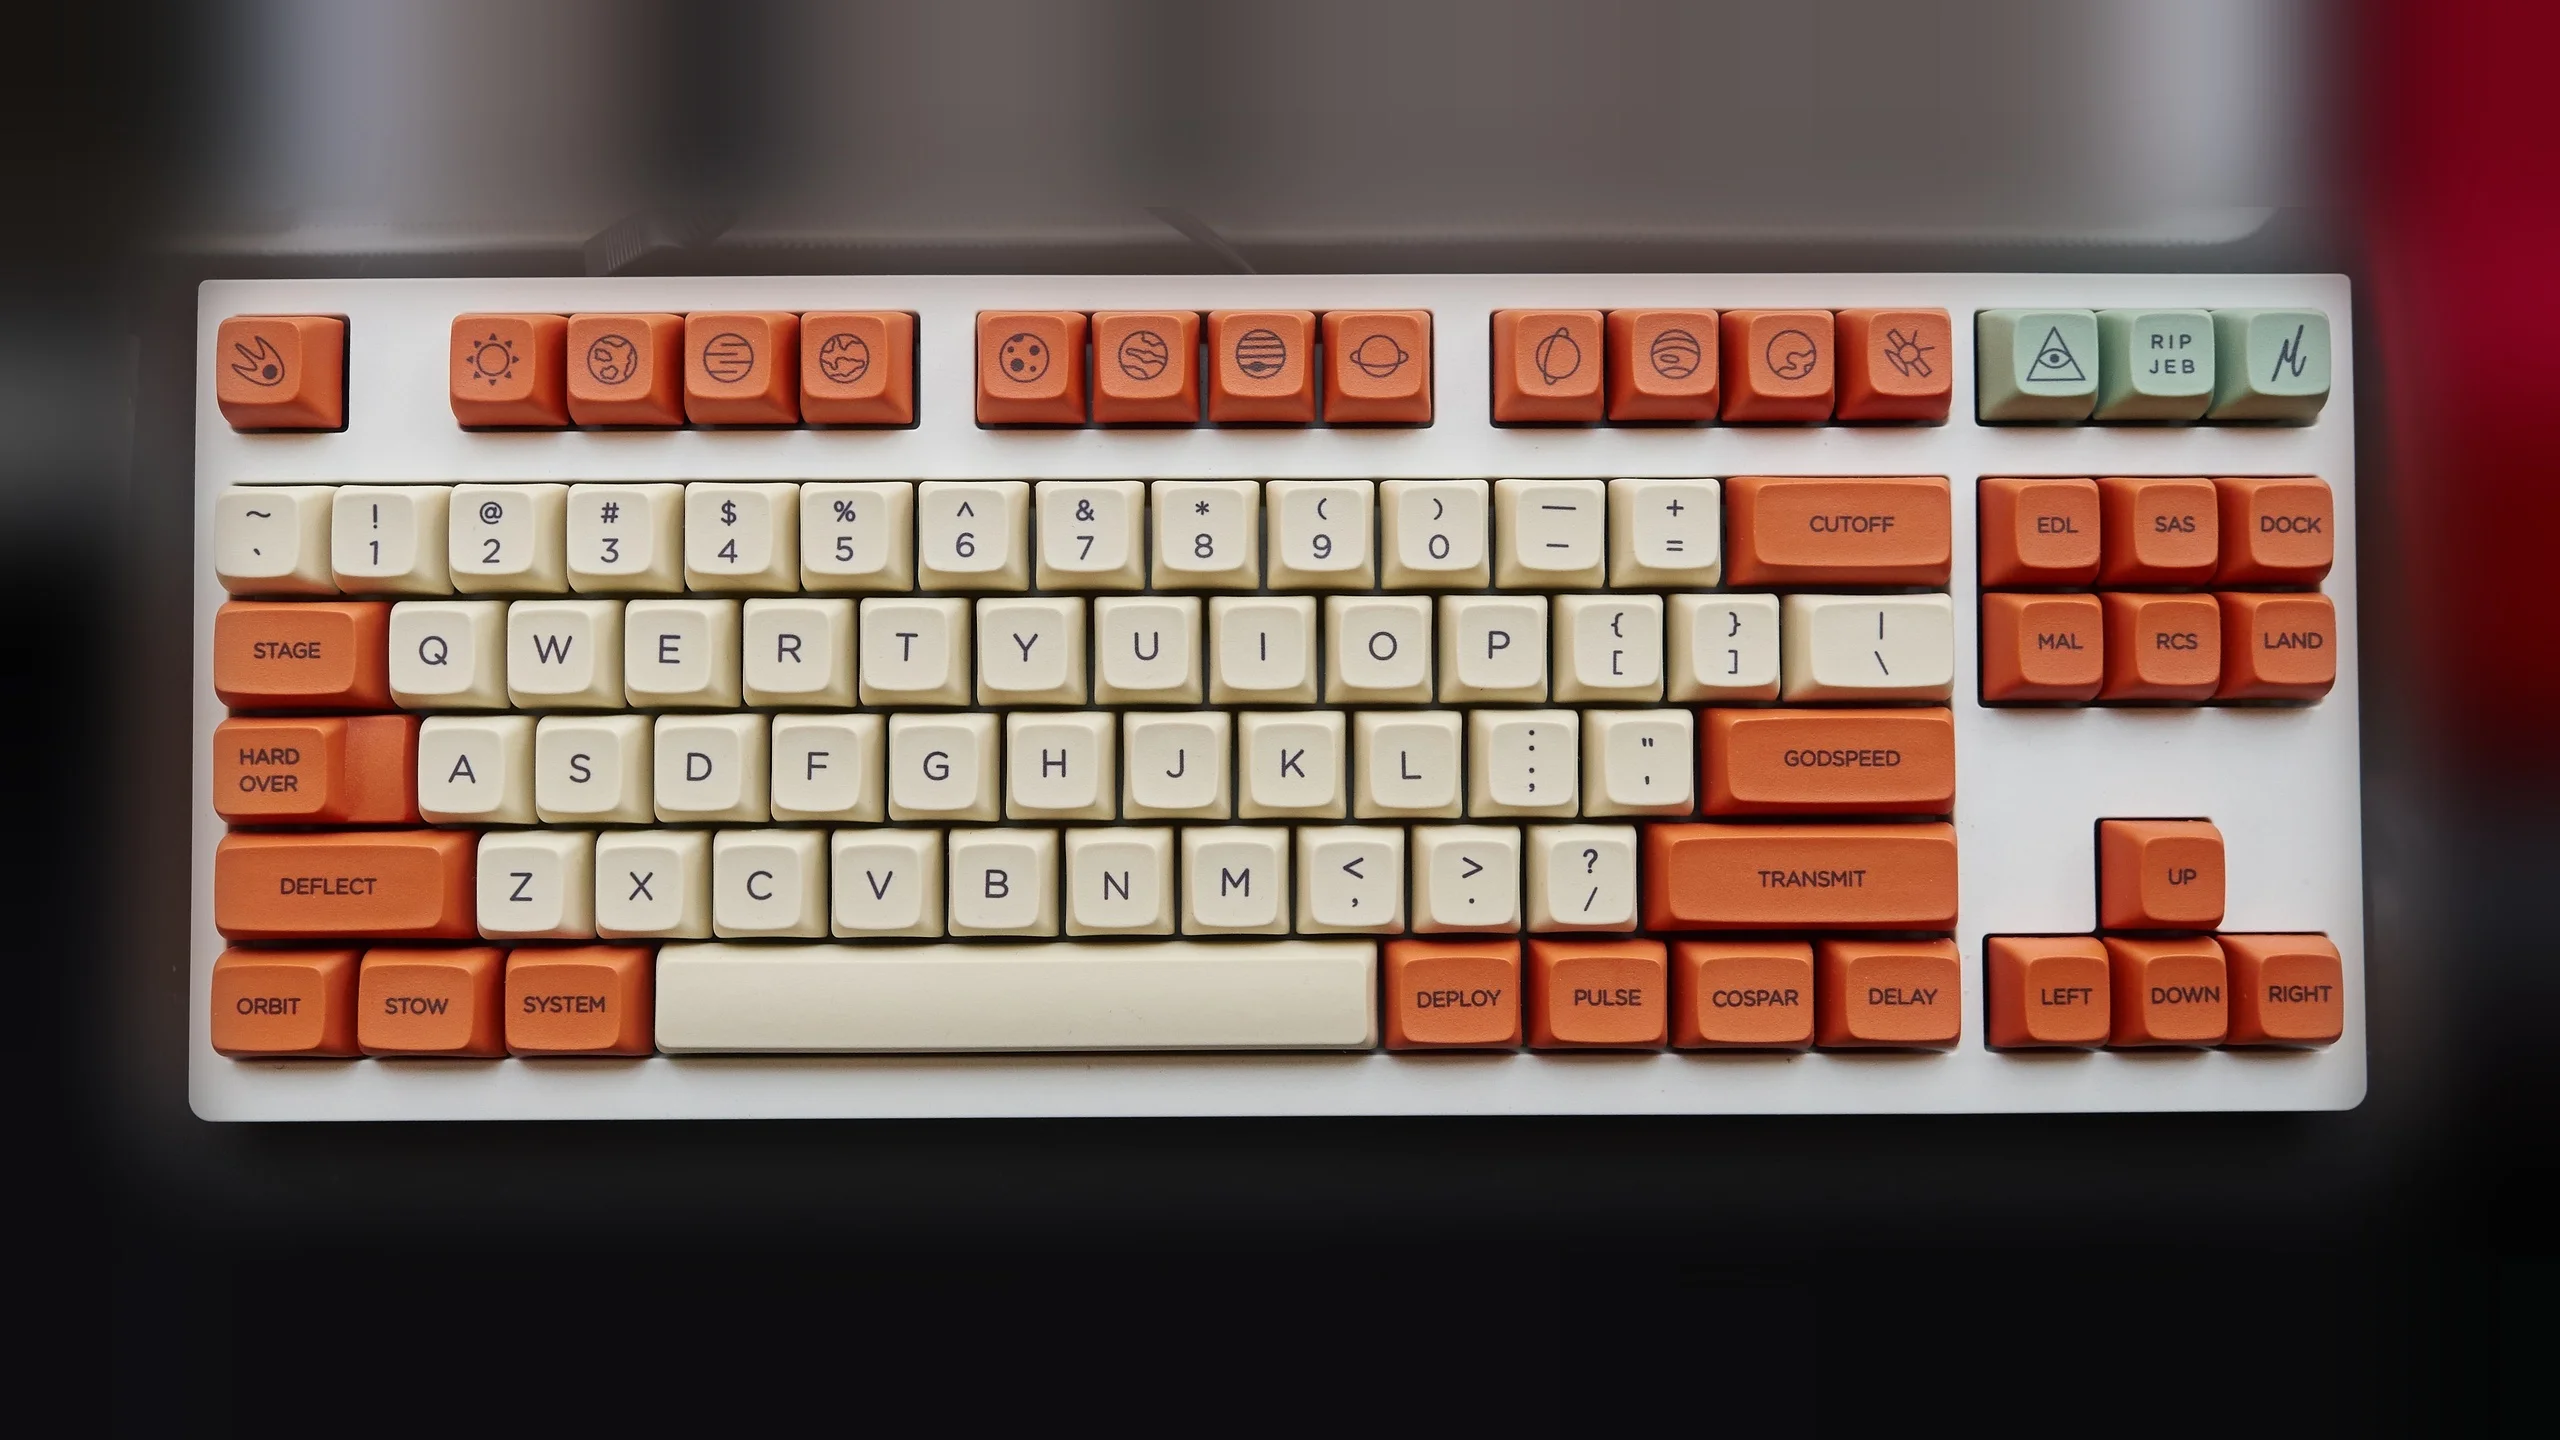
First edit: replace the background while naming the fragile details
The saved instruction asks for a complete studio backdrop and a contact shadow. It also names the keycap legends and colors, rather than leaving “keep the product” to cover every detail.
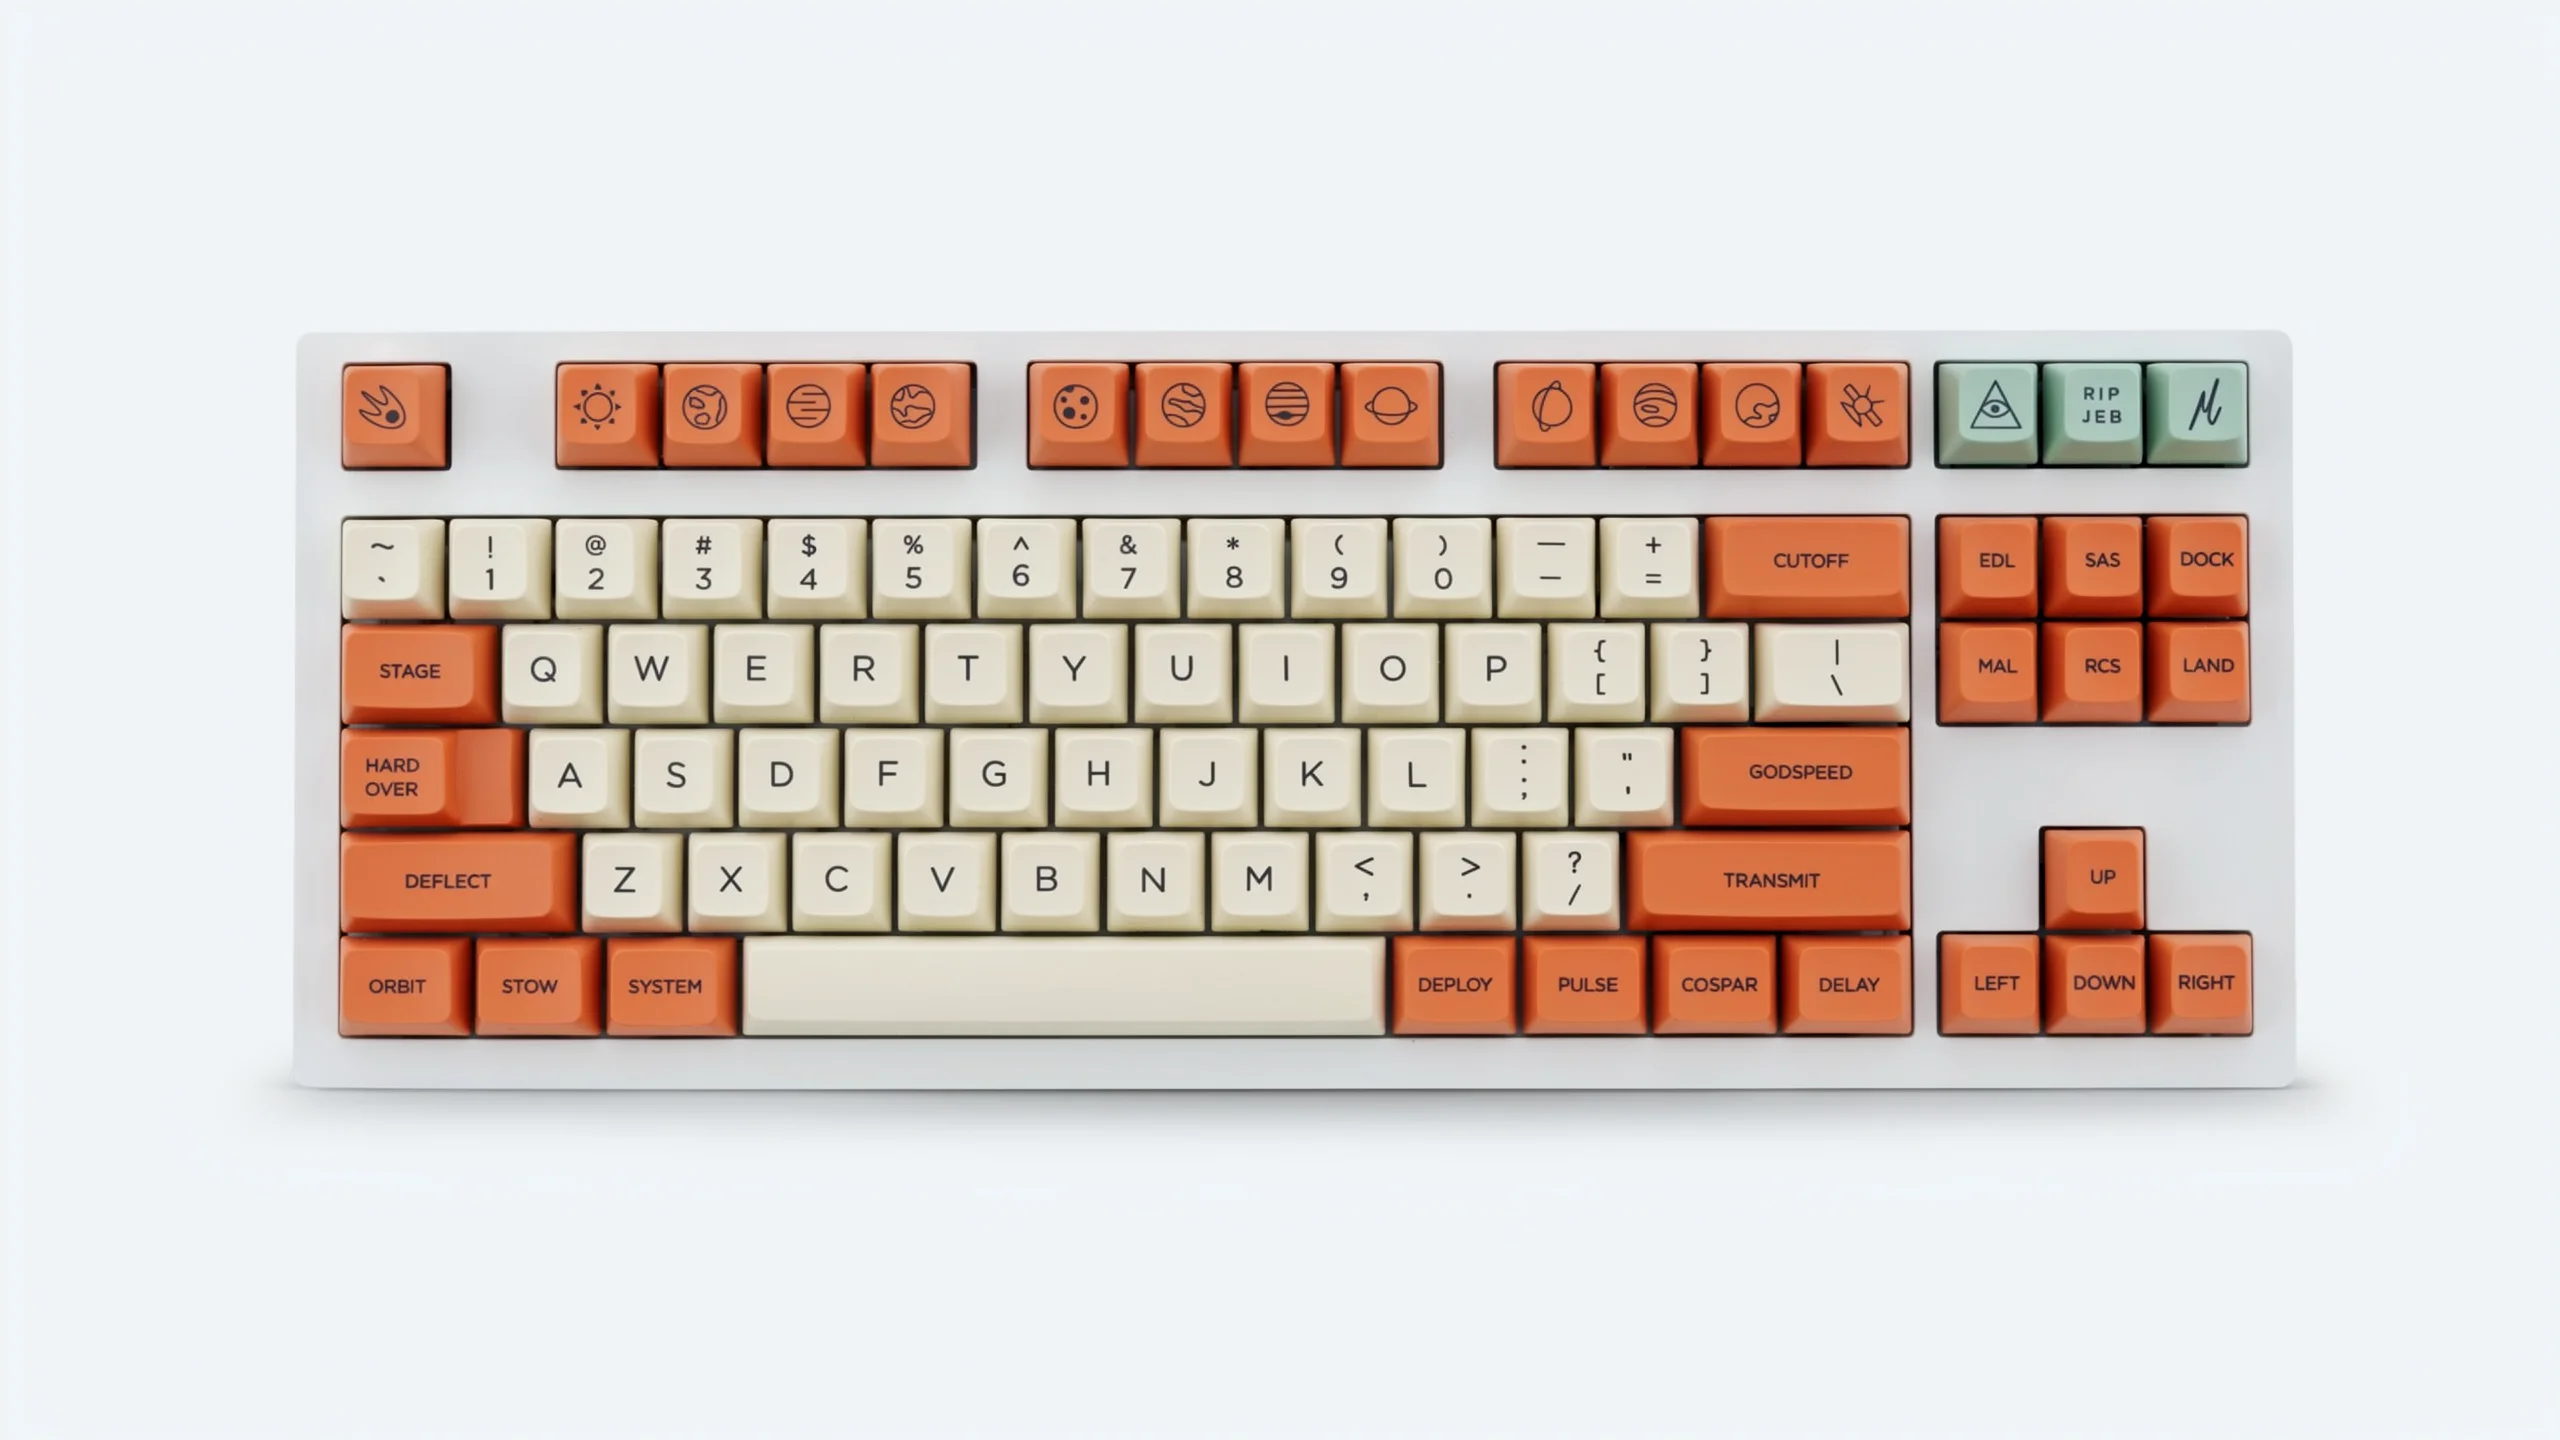
Saved edit 1 prompt
Turn this into a clean e-commerce packshot: rebuild the ENTIRE background edge to edge as one seamless pure white studio sweep with a soft natural contact shadow — no frame, border or tone step anywhere. Keep the product exactly as it is — shape, materials, lighting and every logo, label and letter on it unchanged — and fully in frame. Keep every keycap legend and colour exactly as they are.
Notice the difference between the request and the acceptance check. The prompt asks for pure white, but this displayed result has a pale cool backdrop. If a listing requires an exact white background, inspect the exported pixels and finish the background accordingly. The words “pure white” alone do not certify the file.
Compare the corners of the case, the space bar, and the right-hand key cluster with the original at full size. For a transparent cutout, use Background Remover and place the result on the required background. Background replacement and a transparent cutout are different deliverables.
Second edit: change only the accent keys
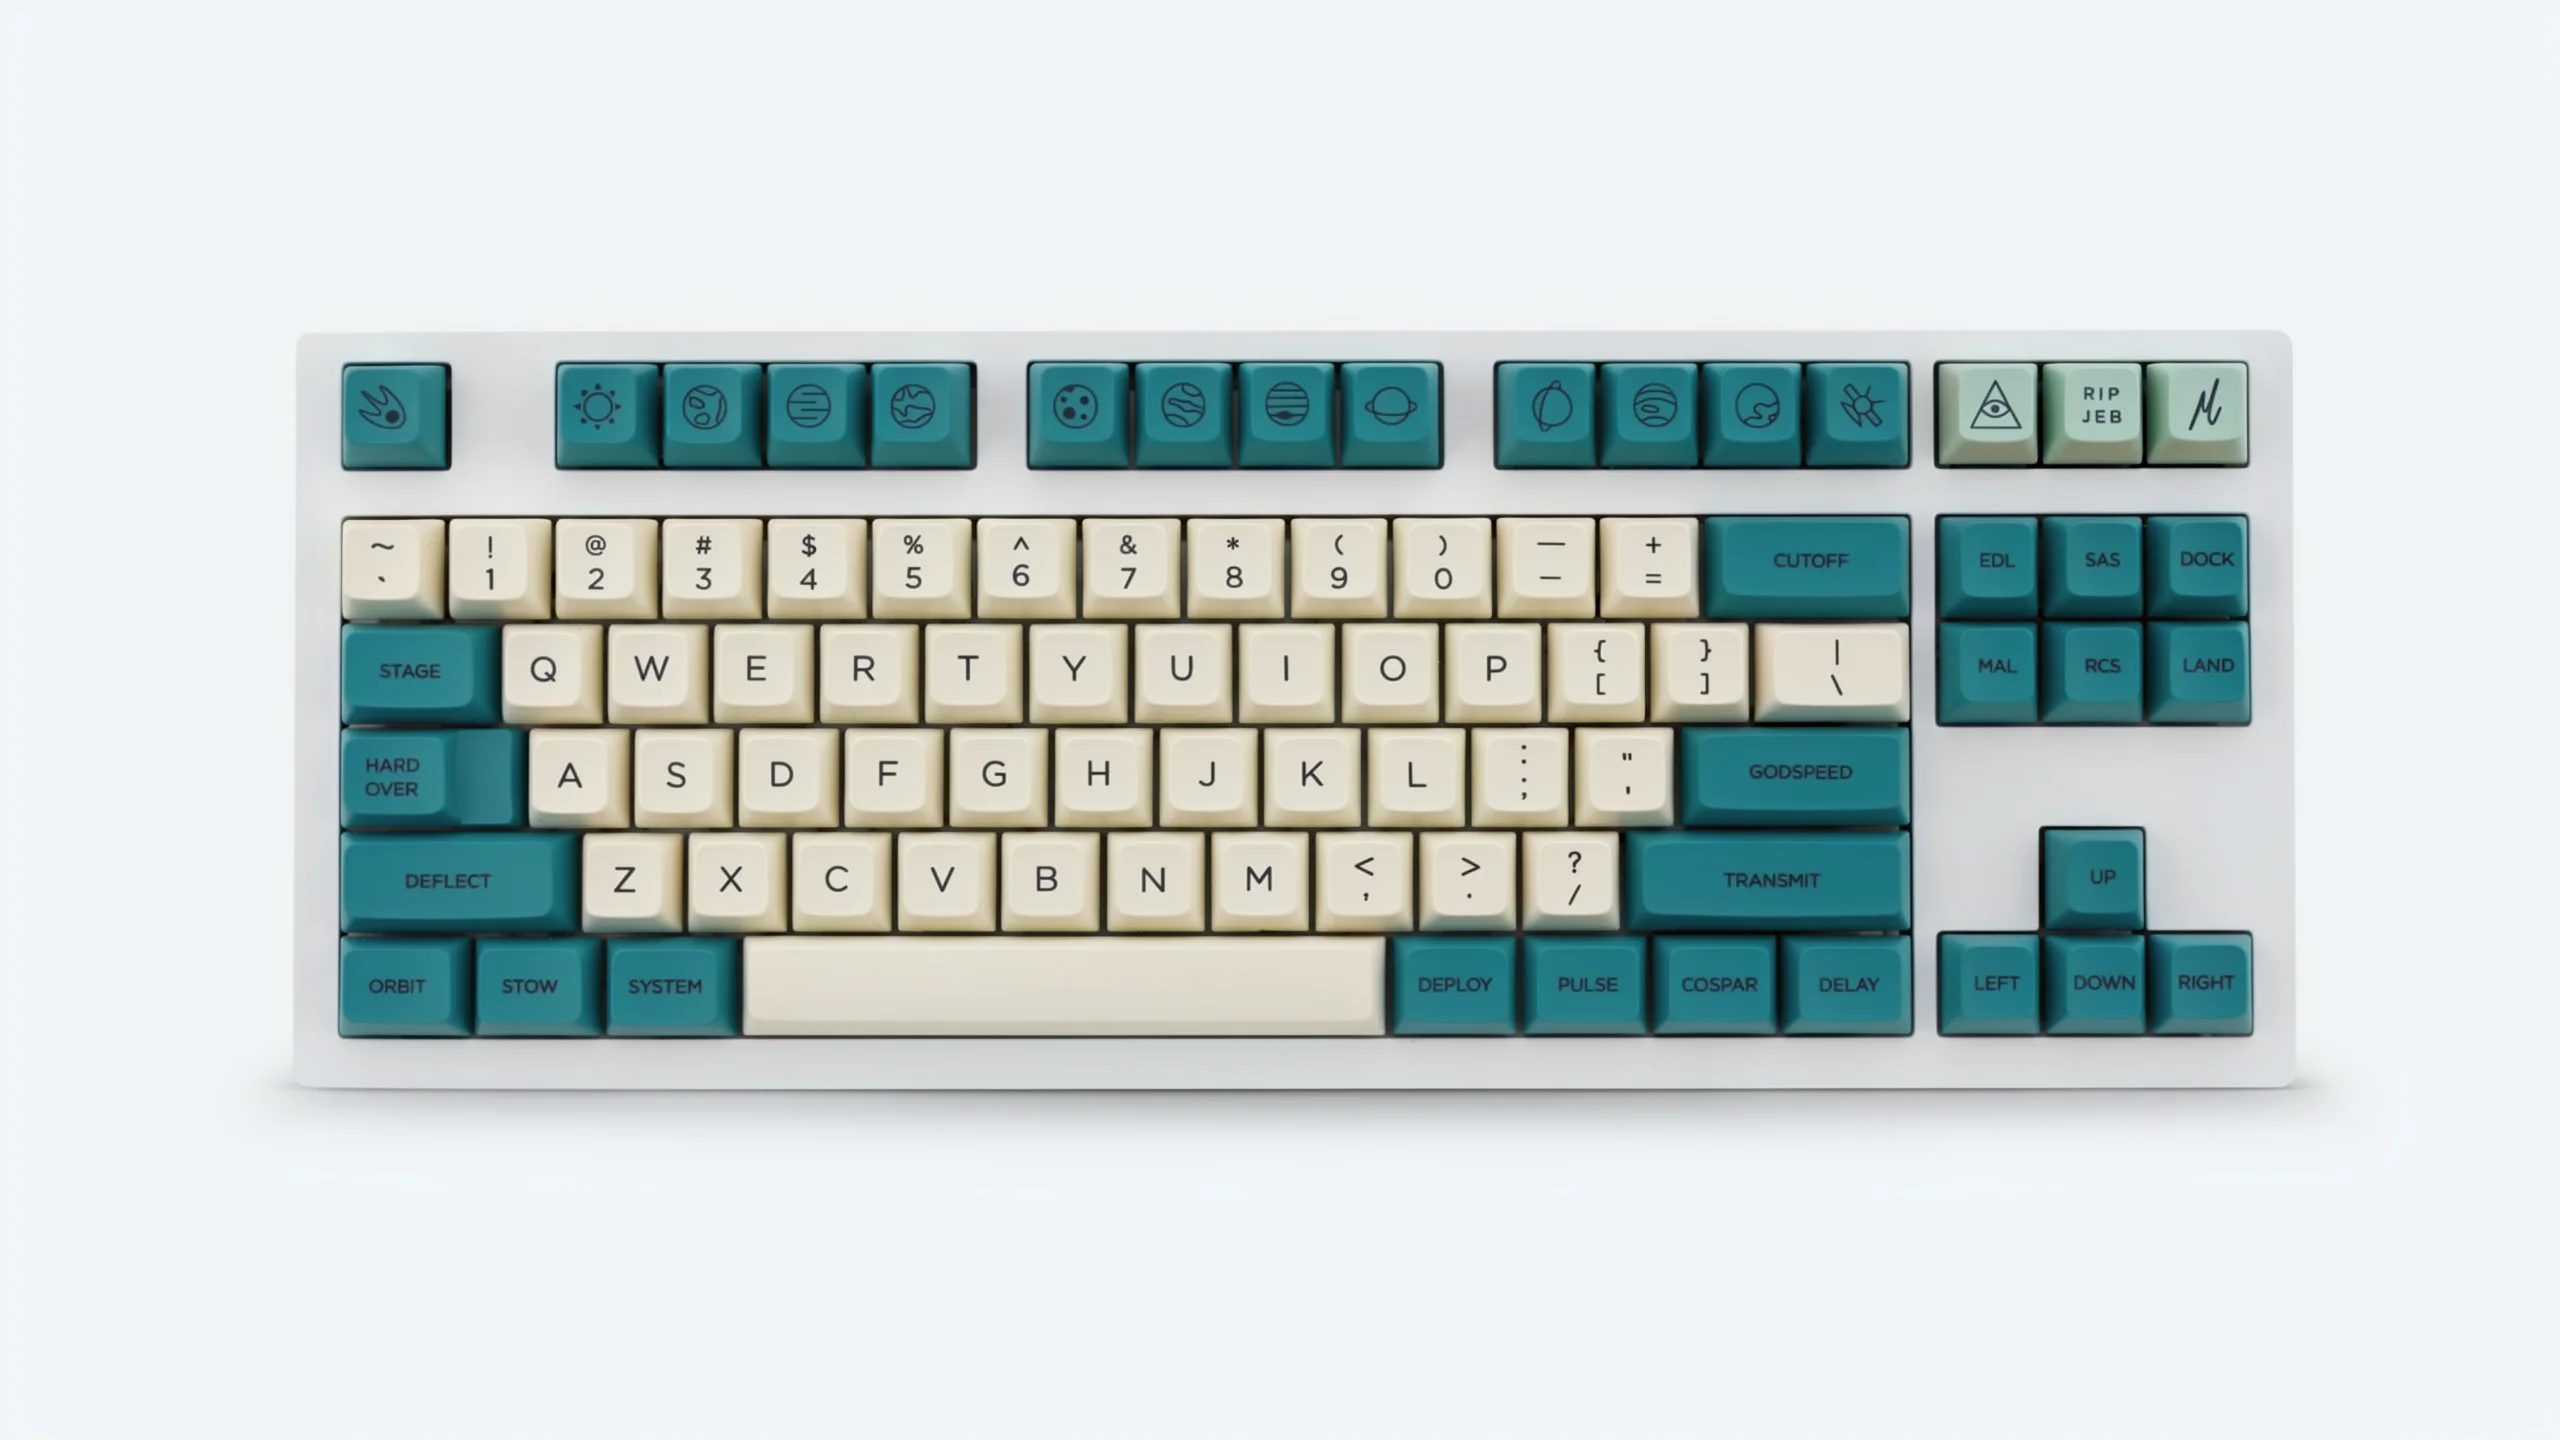
Saved edit 2 prompt
Change the orange keycaps to a deep teal, keeping every cream keycap, every legend and the white case. Keep everything else in the image exactly the same, including every logo and all text on the product.
“The orange keycaps” identifies a set of objects by their existing color. The rest of the instruction separates those keys from the cream ones and the case. That is more useful than “make the keyboard teal,” which leaves the scope of the recolor open.
Check the tiny legends independently of the color change. At thumbnail size, a key can look correct because its shape and contrast are plausible. Open the result and read the letters, numbers, and symbols. An instruction to preserve text is a reason to check it carefully, not evidence that every character survived.
Third and fourth edits: build the lifestyle setting in stages
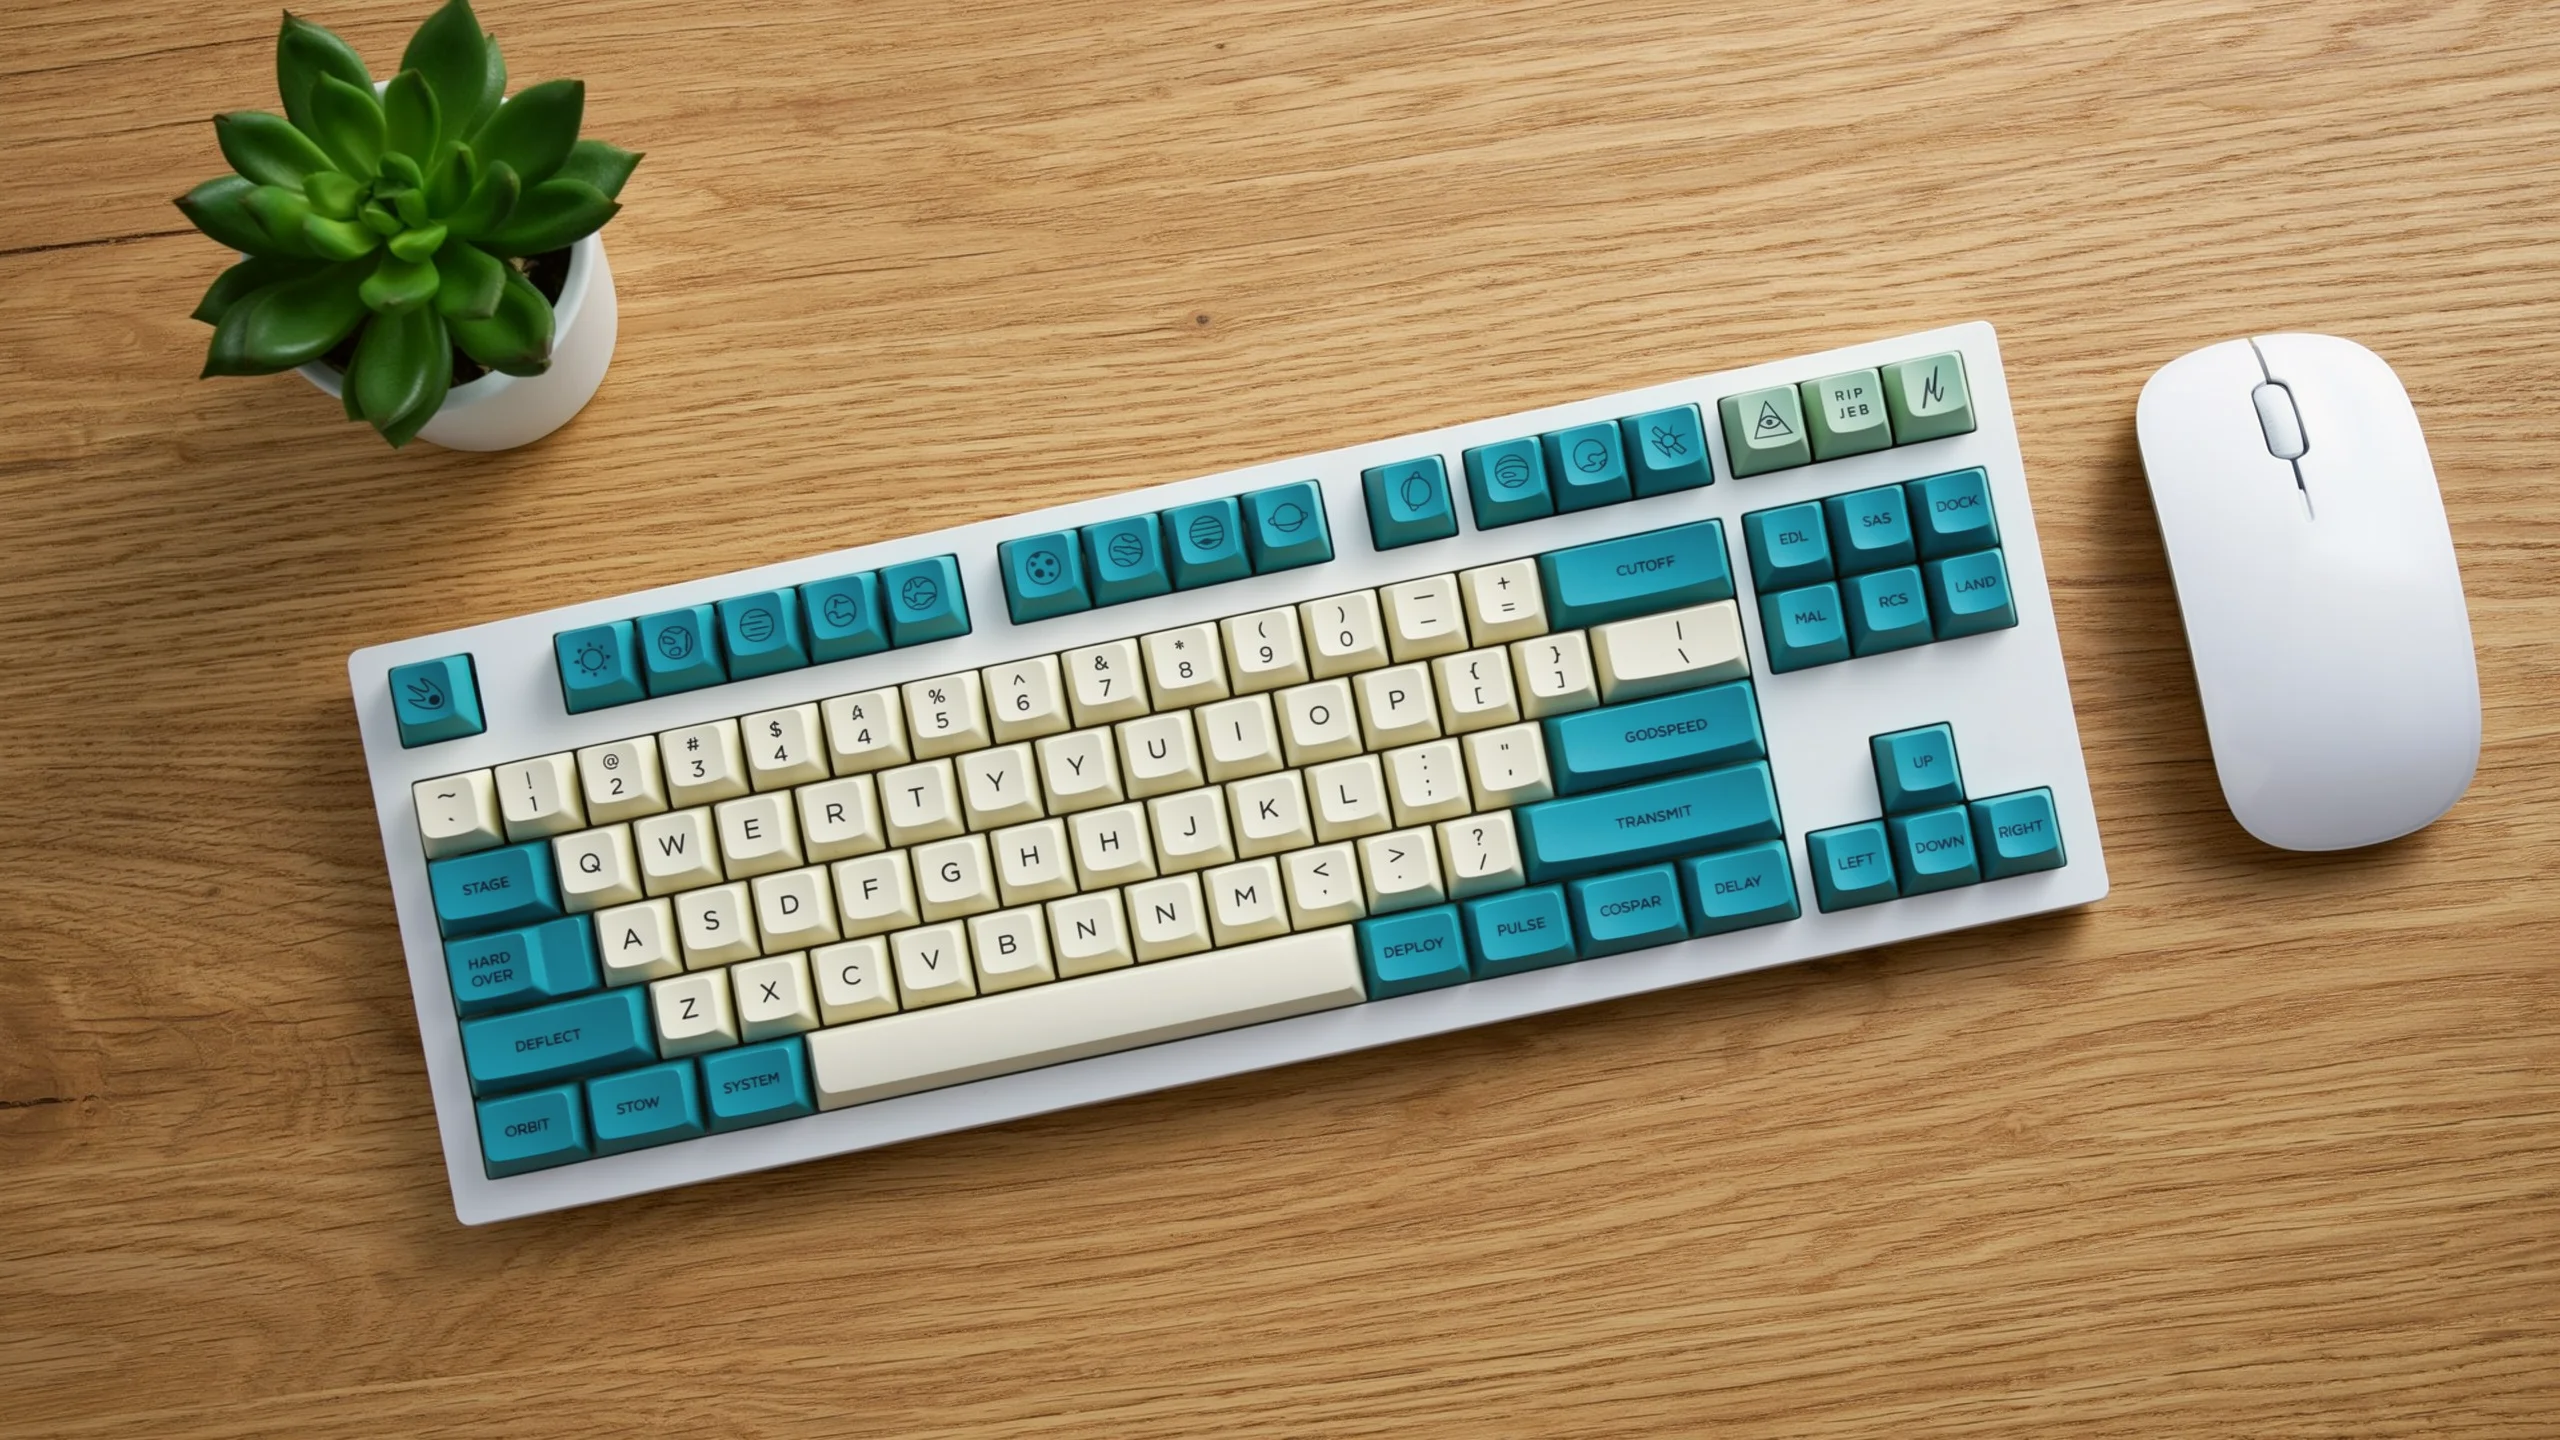
Saved edit 3 prompt
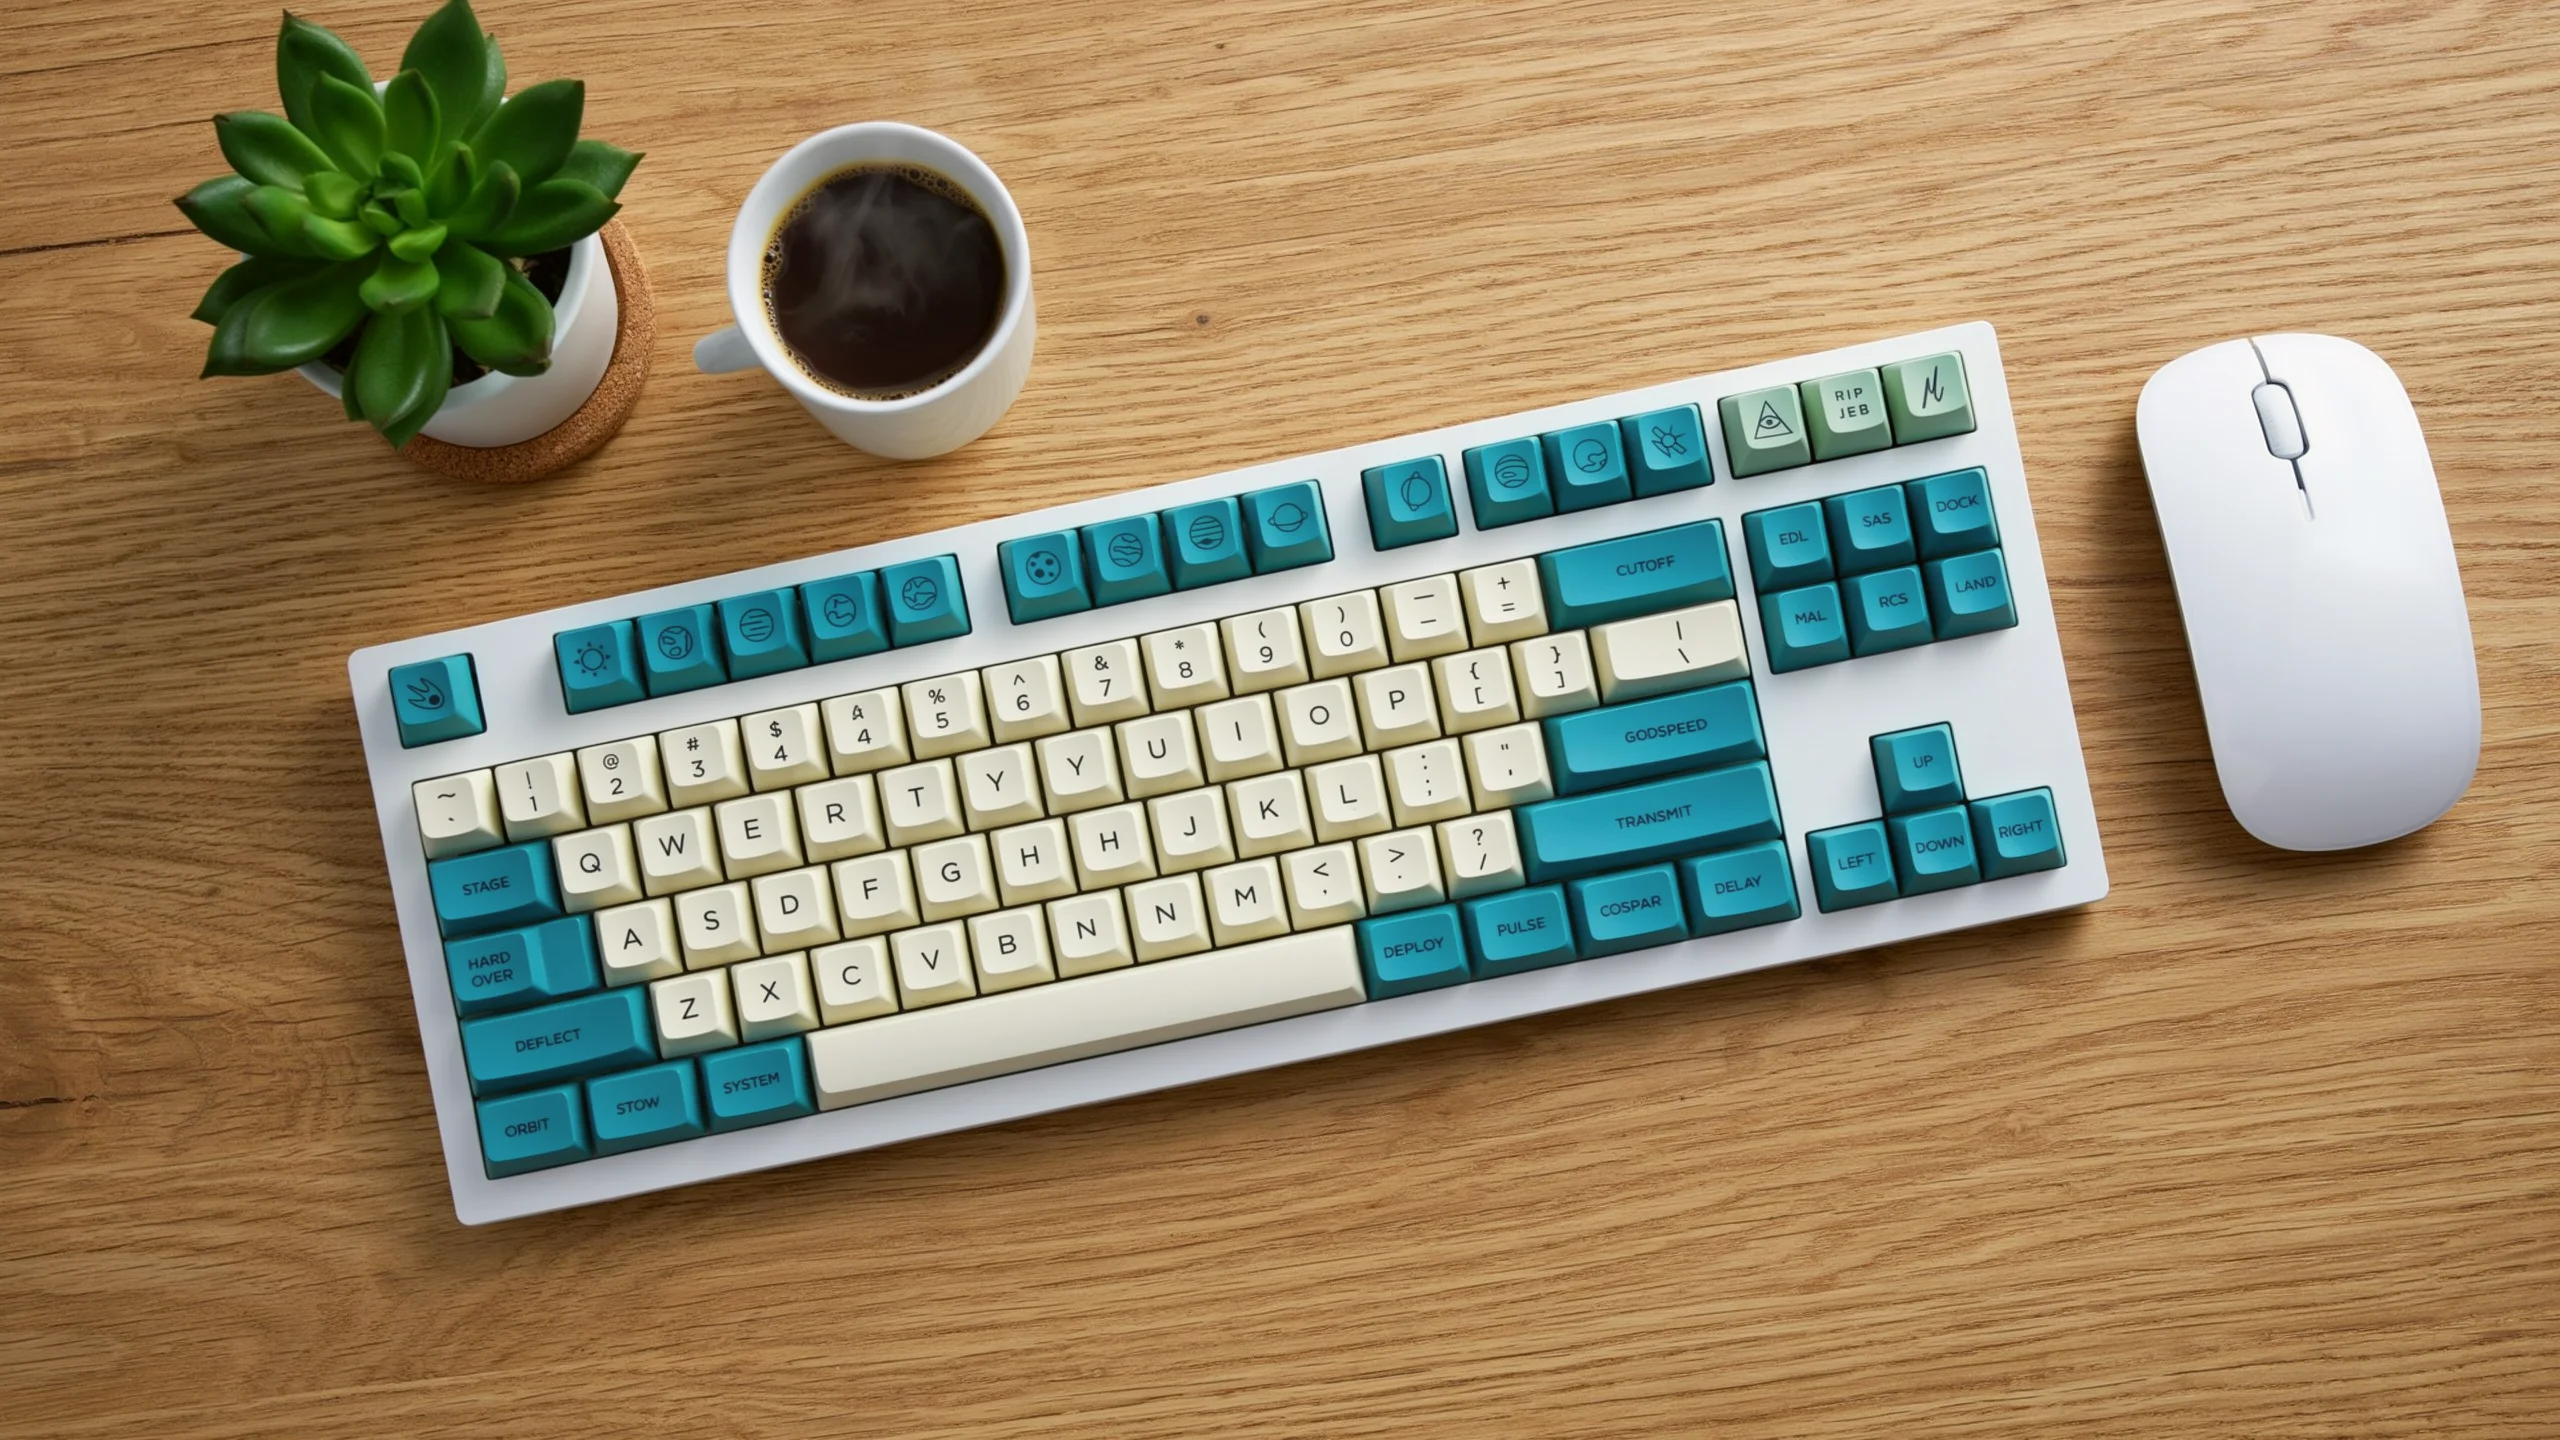
Place the keyboard on a light oak desk with a white mouse and a small plant, seen from slightly above, real contact shadow. Same keyboard, same legends, large in frame.
This instruction changes the environment and viewpoint together. “Large in frame” protects the product's importance in the composition; “real contact shadow” asks it to sit on the desk rather than float above it. Inspect the case's perspective and the rows of keys again because a new viewpoint asks the model to reconstruct them.
Saved edit 4 prompt
Add a steaming cup of coffee on a coaster beside the keyboard. Keep everything else in the image exactly the same, including every logo and all text on the product.
Adding the coffee is a separate decision. If it crowds the layout, you can return to the desk version without also losing the teal keycaps or the background work. Compare this result with edit 3: the subject should remain large enough for the intended placement, and new props should not hide the product's edges.
Example 2: separate a shoe's colorway from its lighting
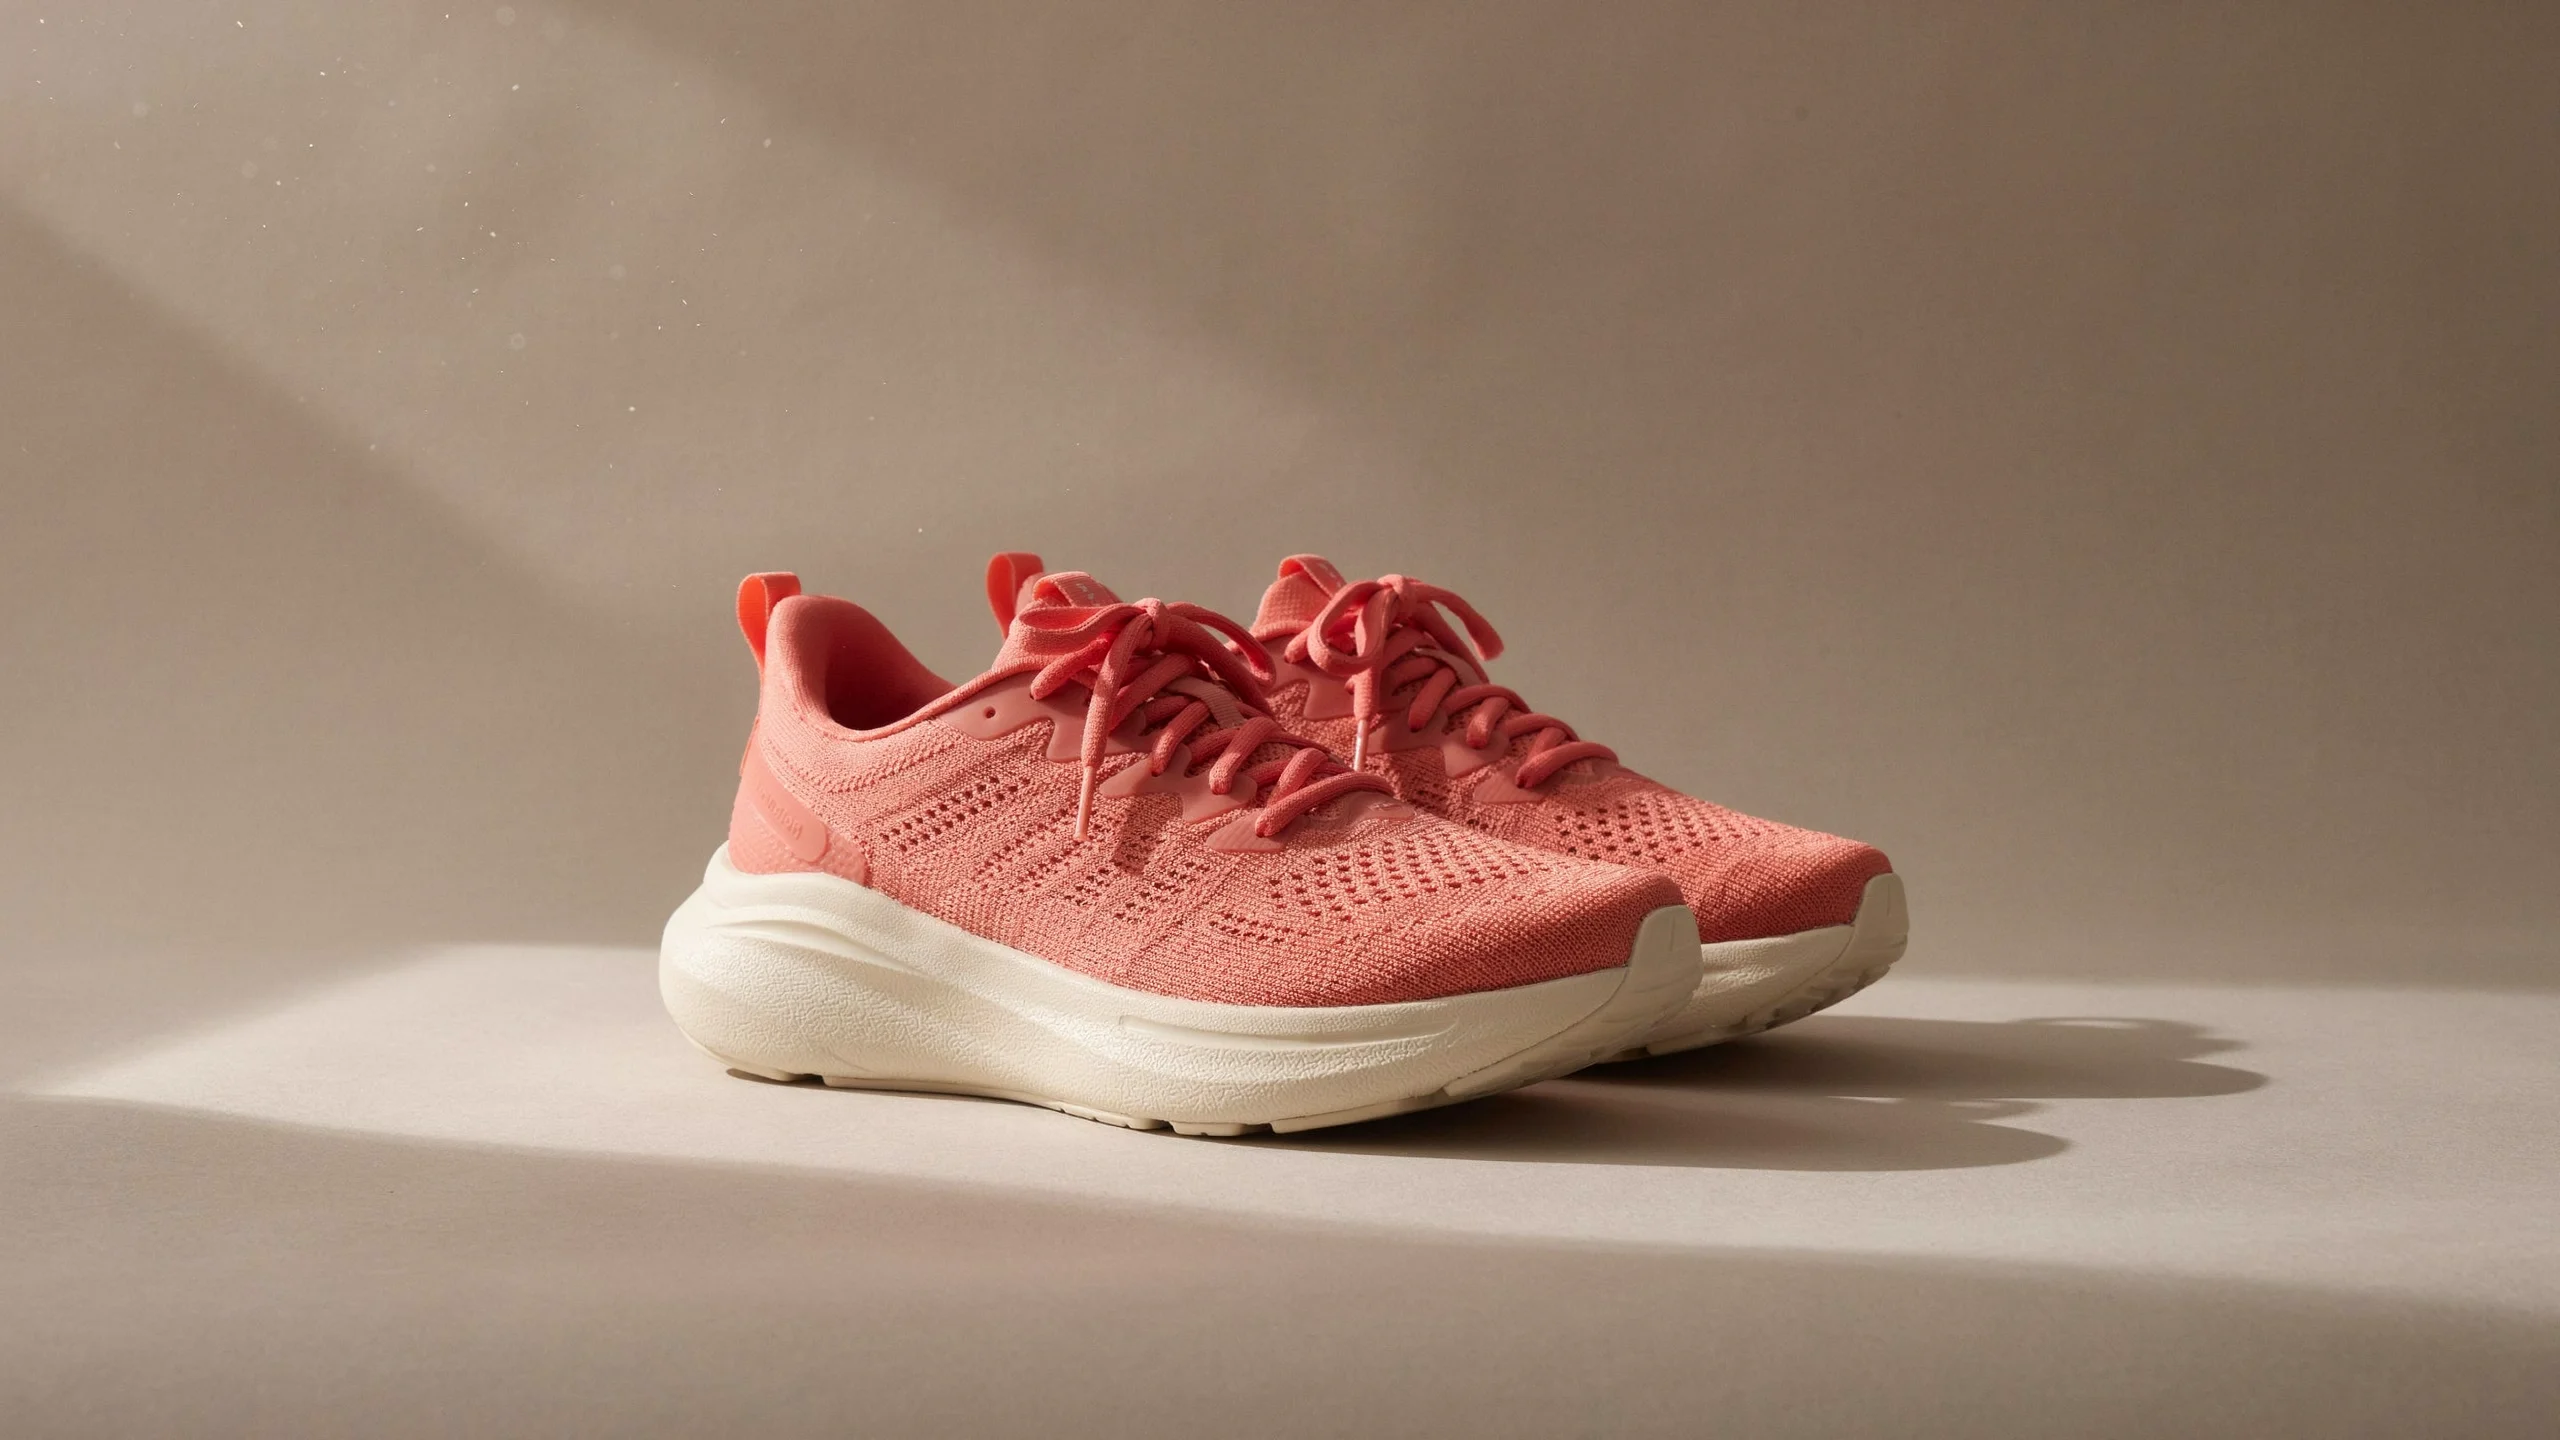
The running-shoe sequence starts with a generated coral knit pair on a warm stone sweep. It then changes four different parts of the image. Working through them separately makes it easier to see whether a change belongs to the product, the backdrop, or the light.
Saved starting prompt
Premium e-commerce campaign photograph, 16:9, shot on a medium-format camera, true-to-life materials and colour, soft natural shadows, crisp focus on the product, no text, no logos. A pair of knit running shoes with a chunky sole in neon coral knit, on a seamless paper sweep in a soft warm stone colour, gentle window light from the left.
Change the knit color before changing the sole
Saved edit 1 prompt
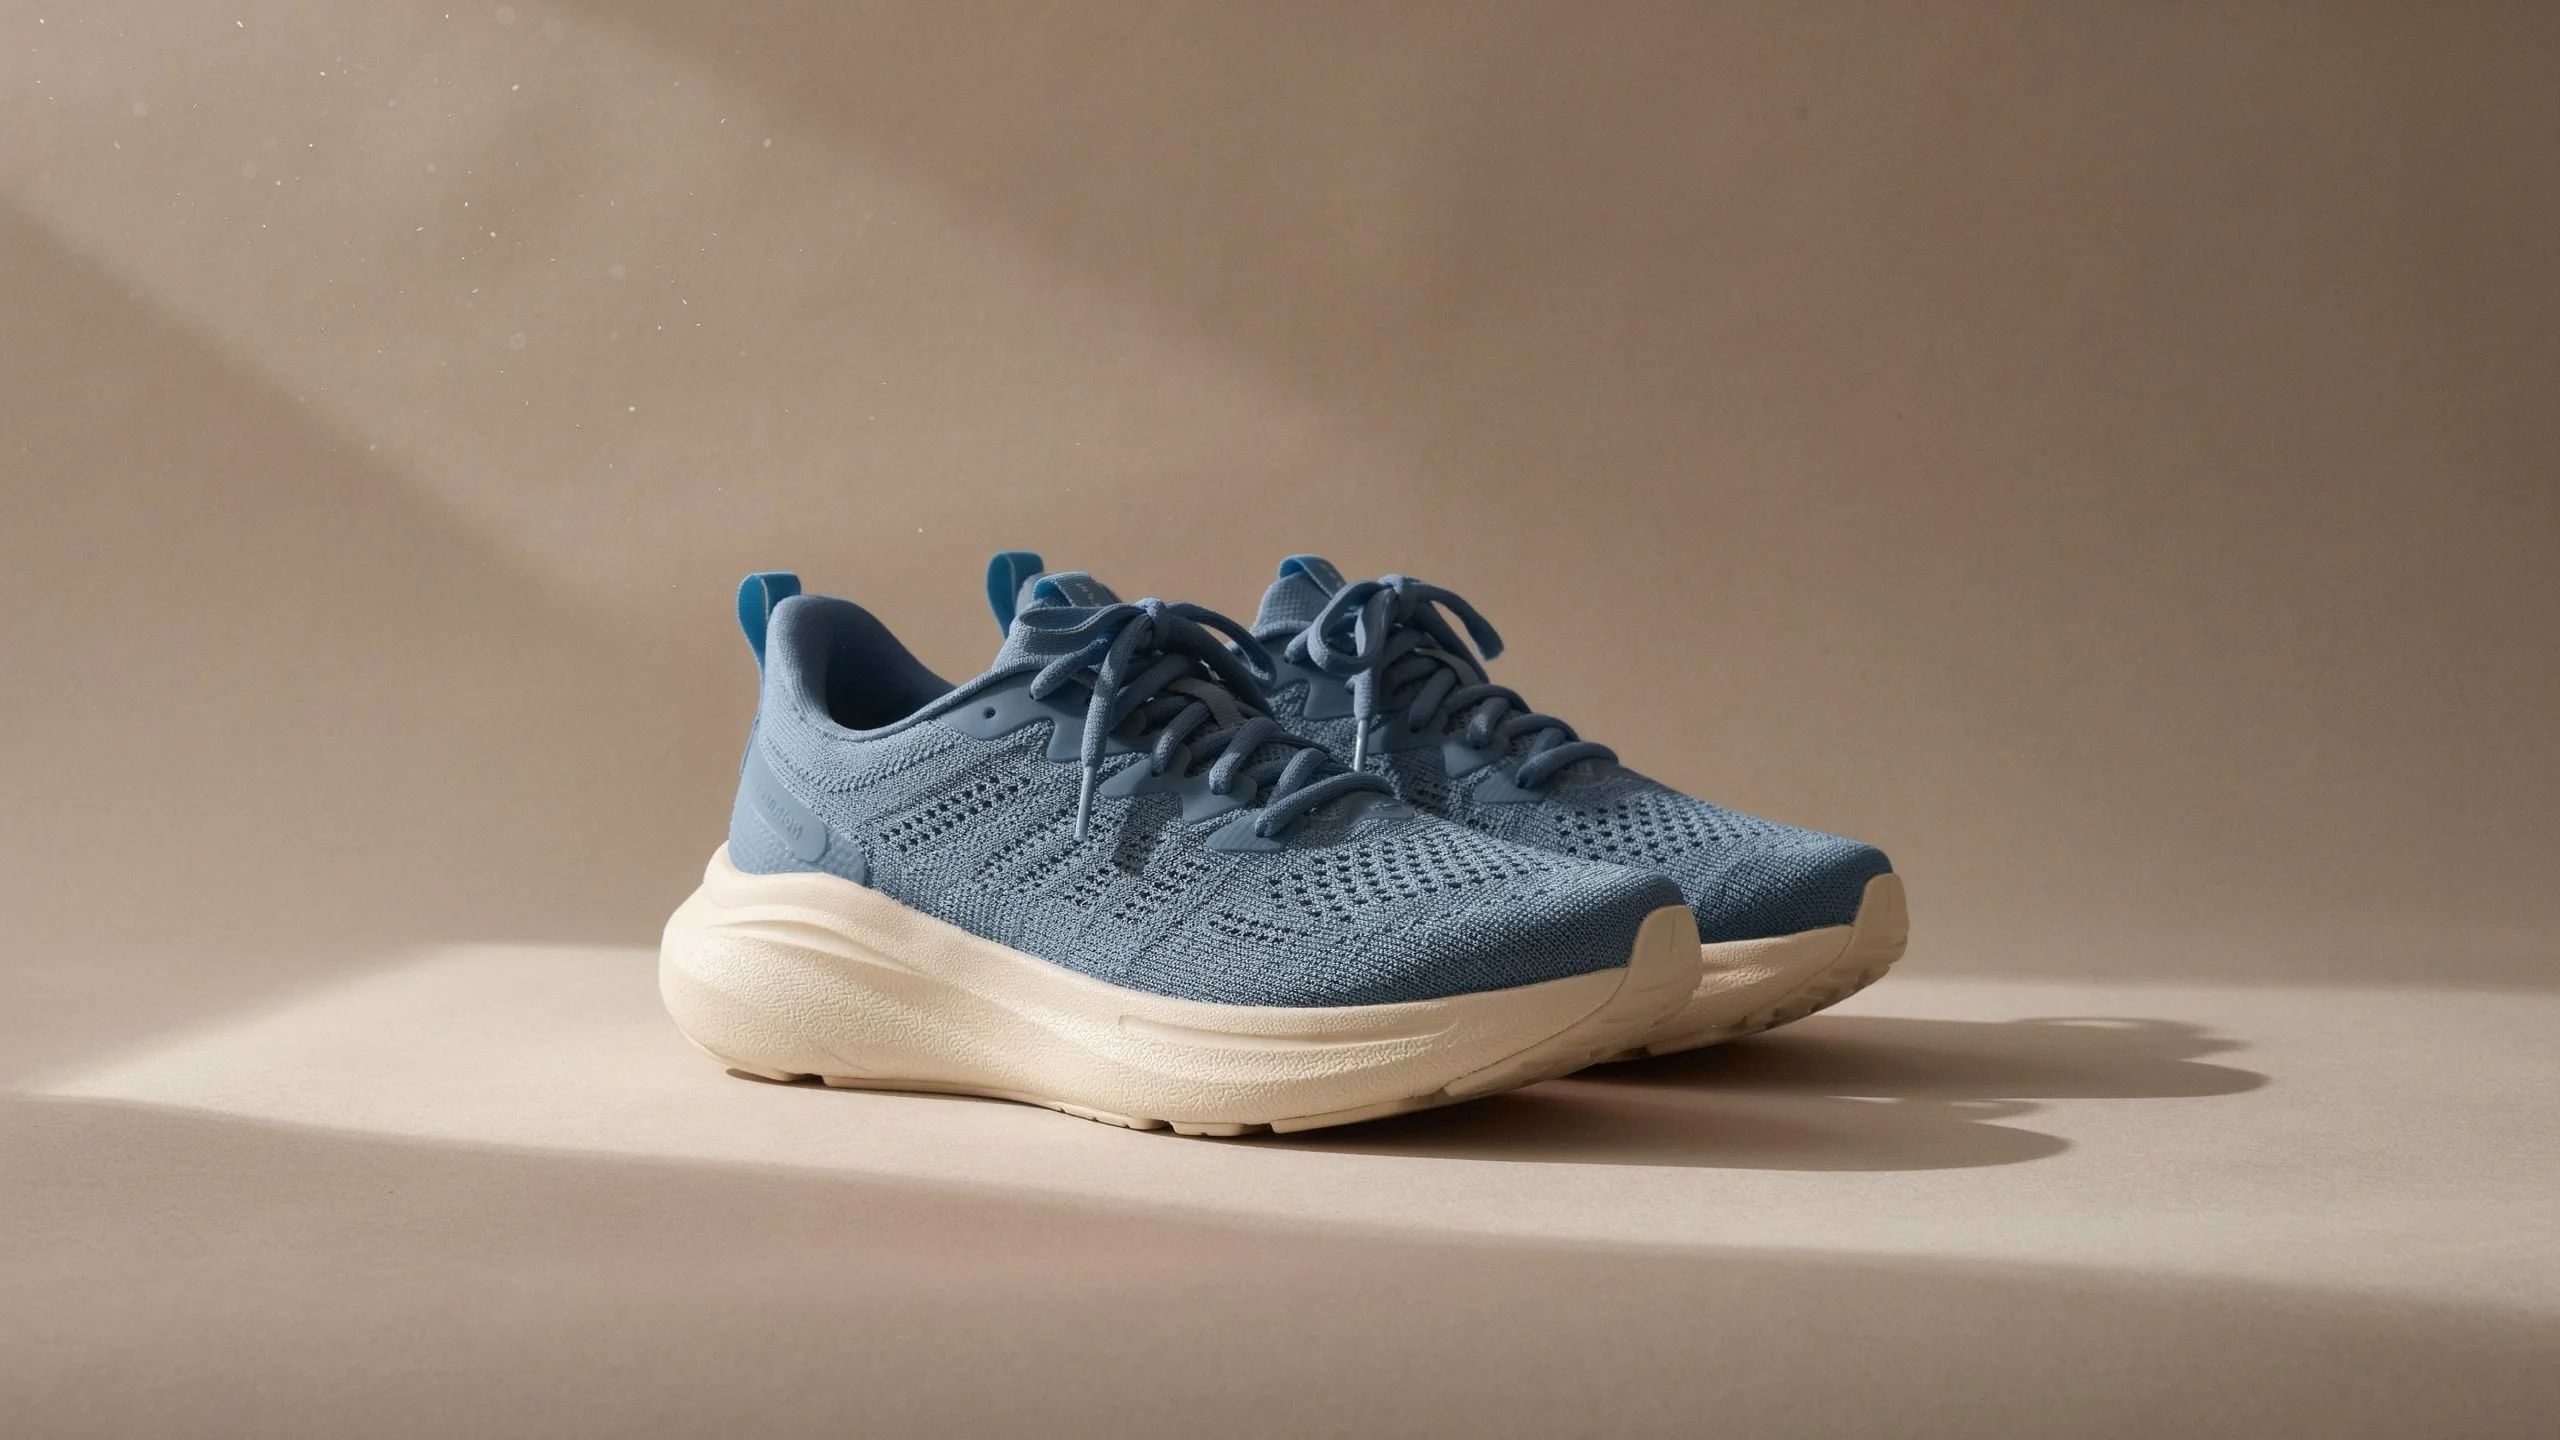
Change the product's colour and finish to slate-blue knit. The product keeps its exact shape, size, proportions, details and position; the camera, framing and everything not mentioned stay exactly the same.
The first edit changes the upper's color and leaves the sole as a separate feature to review. Look at the knit openings, lace loops, and boundary where the upper meets the sole. These are better comparison points than the overall impression that the shoe is now blue.
Saved edit 2 prompt
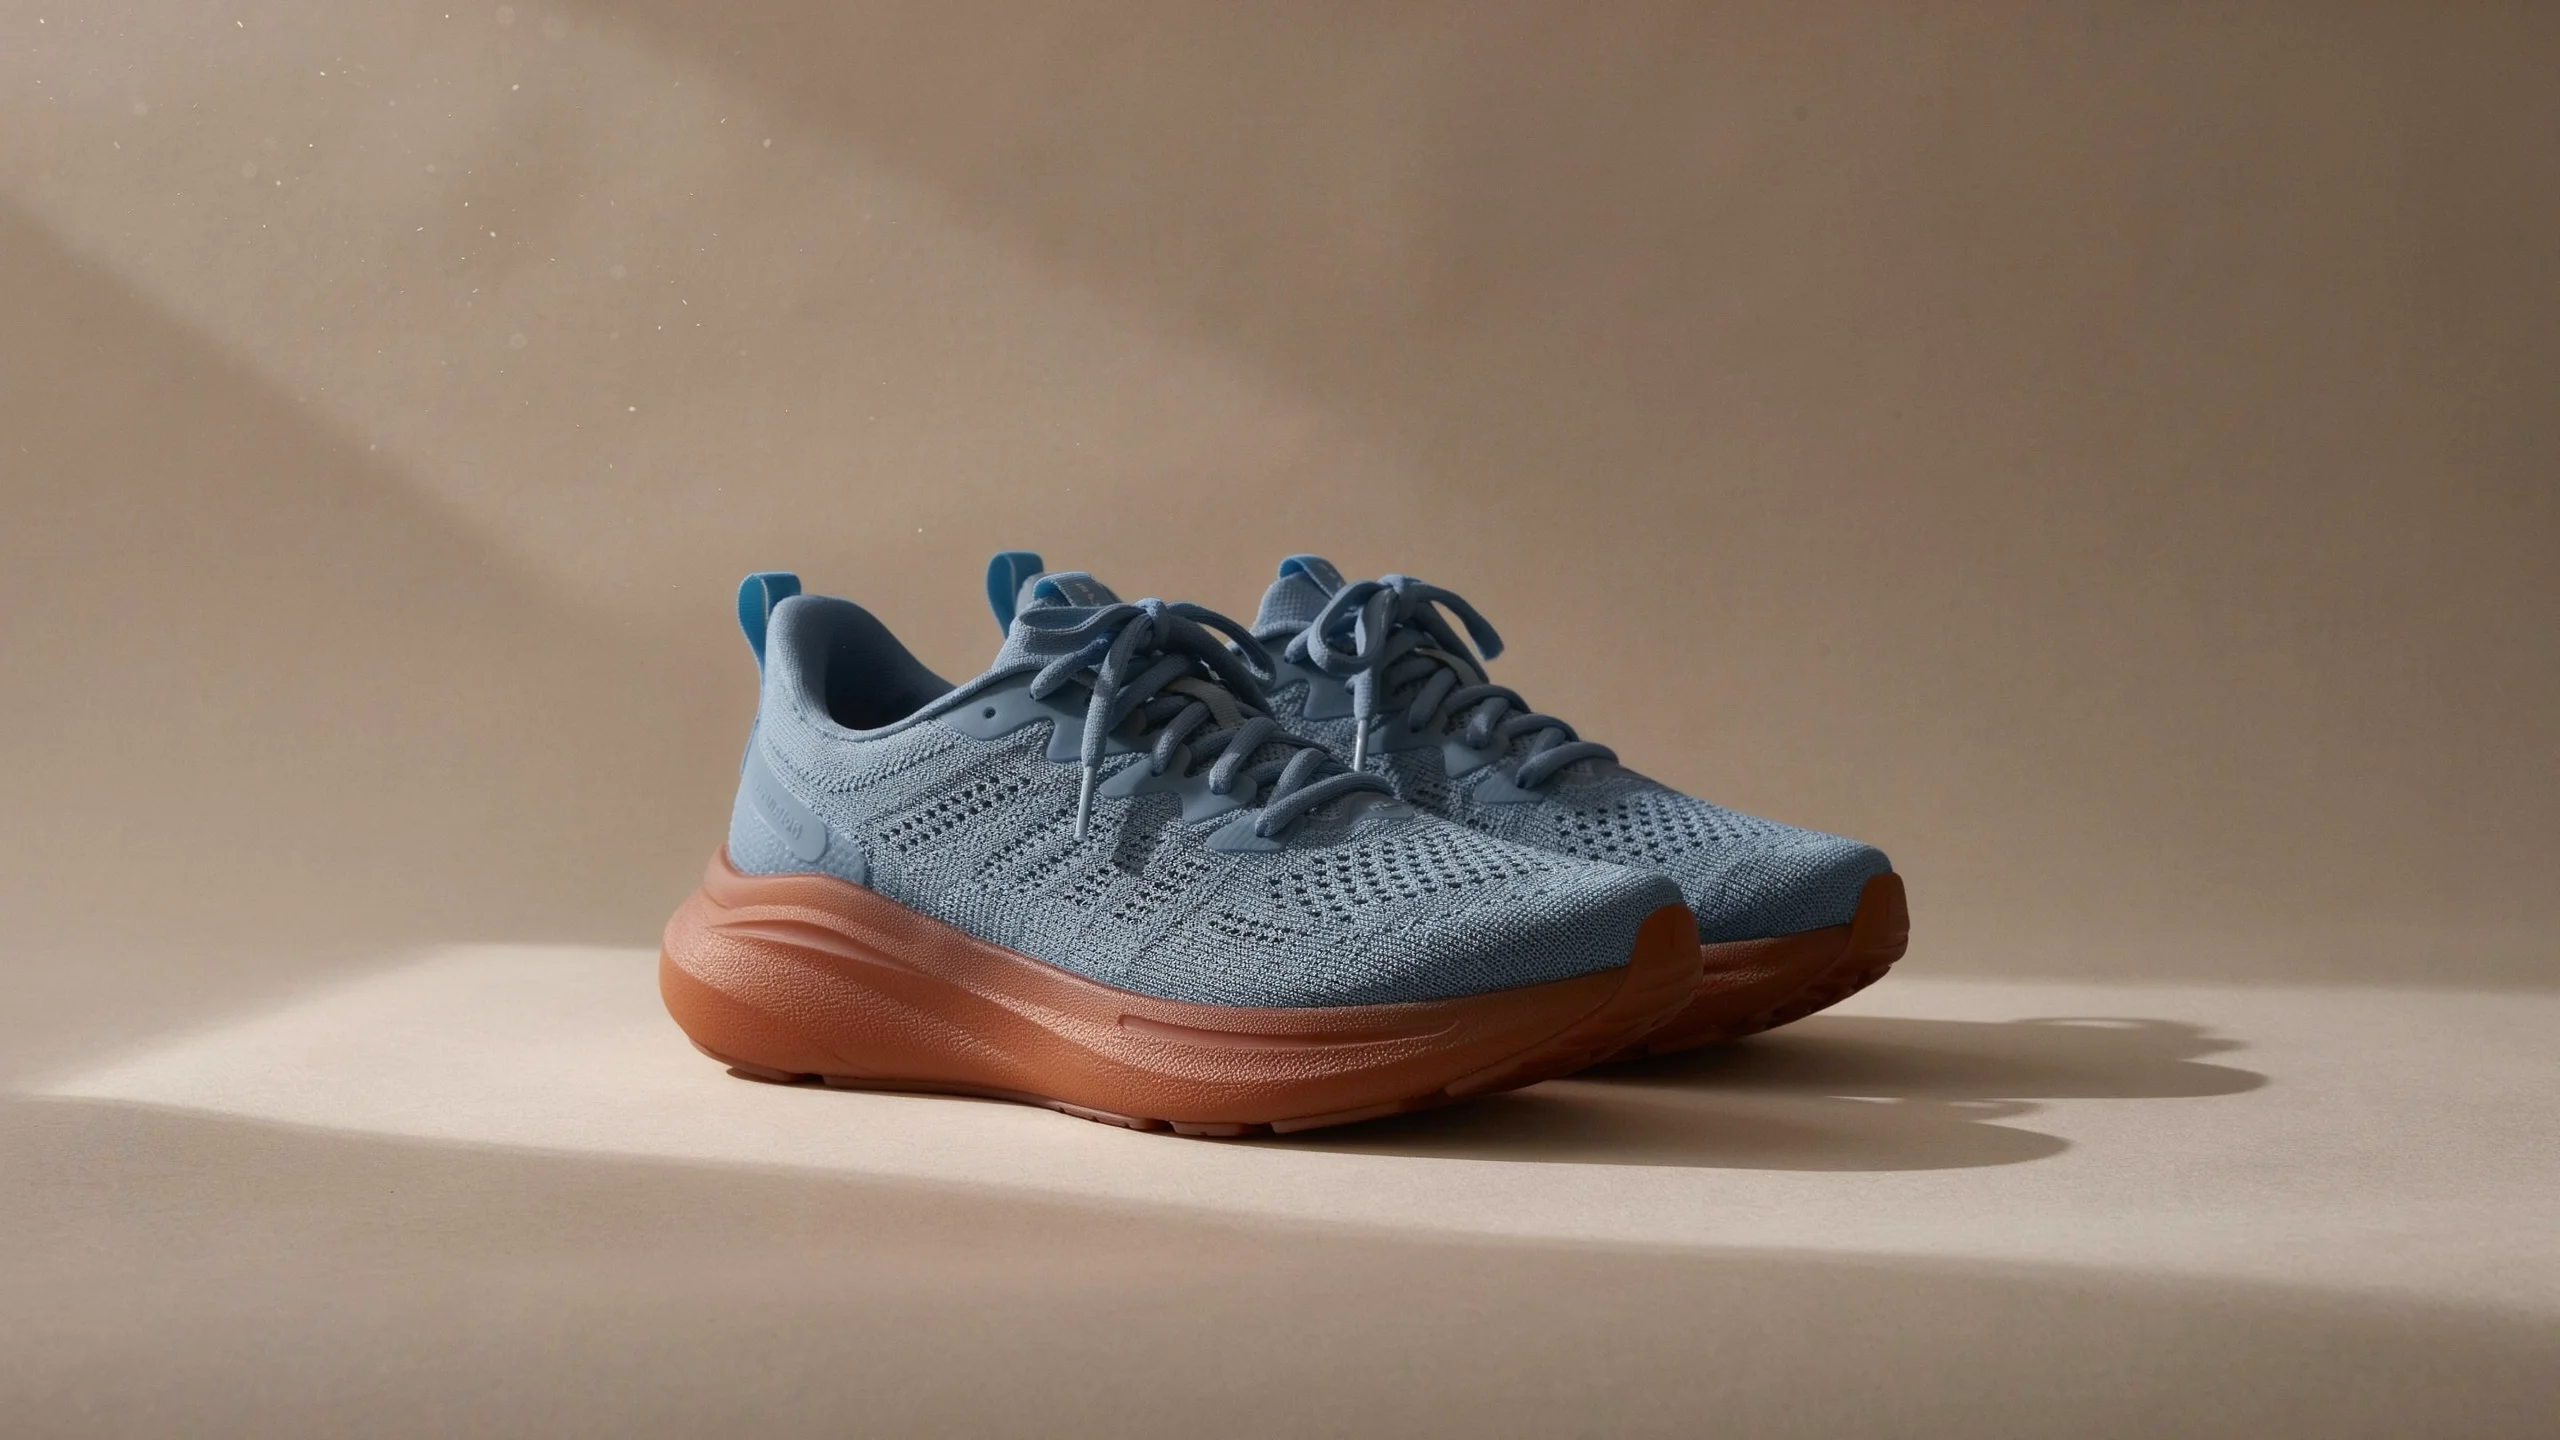
Change the white midsole to a translucent gum-brown sole. The product keeps its exact shape, size, proportions, details and position; the camera, framing and everything not mentioned stay exactly the same.
The second instruction targets the white midsole and requests a translucent gum-brown treatment. In the saved result, the sole reads as brown. Whether it has the translucency and construction needed for a particular design requires a closer review. A material word in a prompt does not establish a manufacturable product.
For a real range, branch each colorway from an approved source rather than repeatedly recoloring the last variant. That gives each option the same reference point. Keep the colorway name with the file so a warm-lit campaign image is not accidentally treated as the color reference for the catalog.
Change the sweep, then judge the effect of warmer light
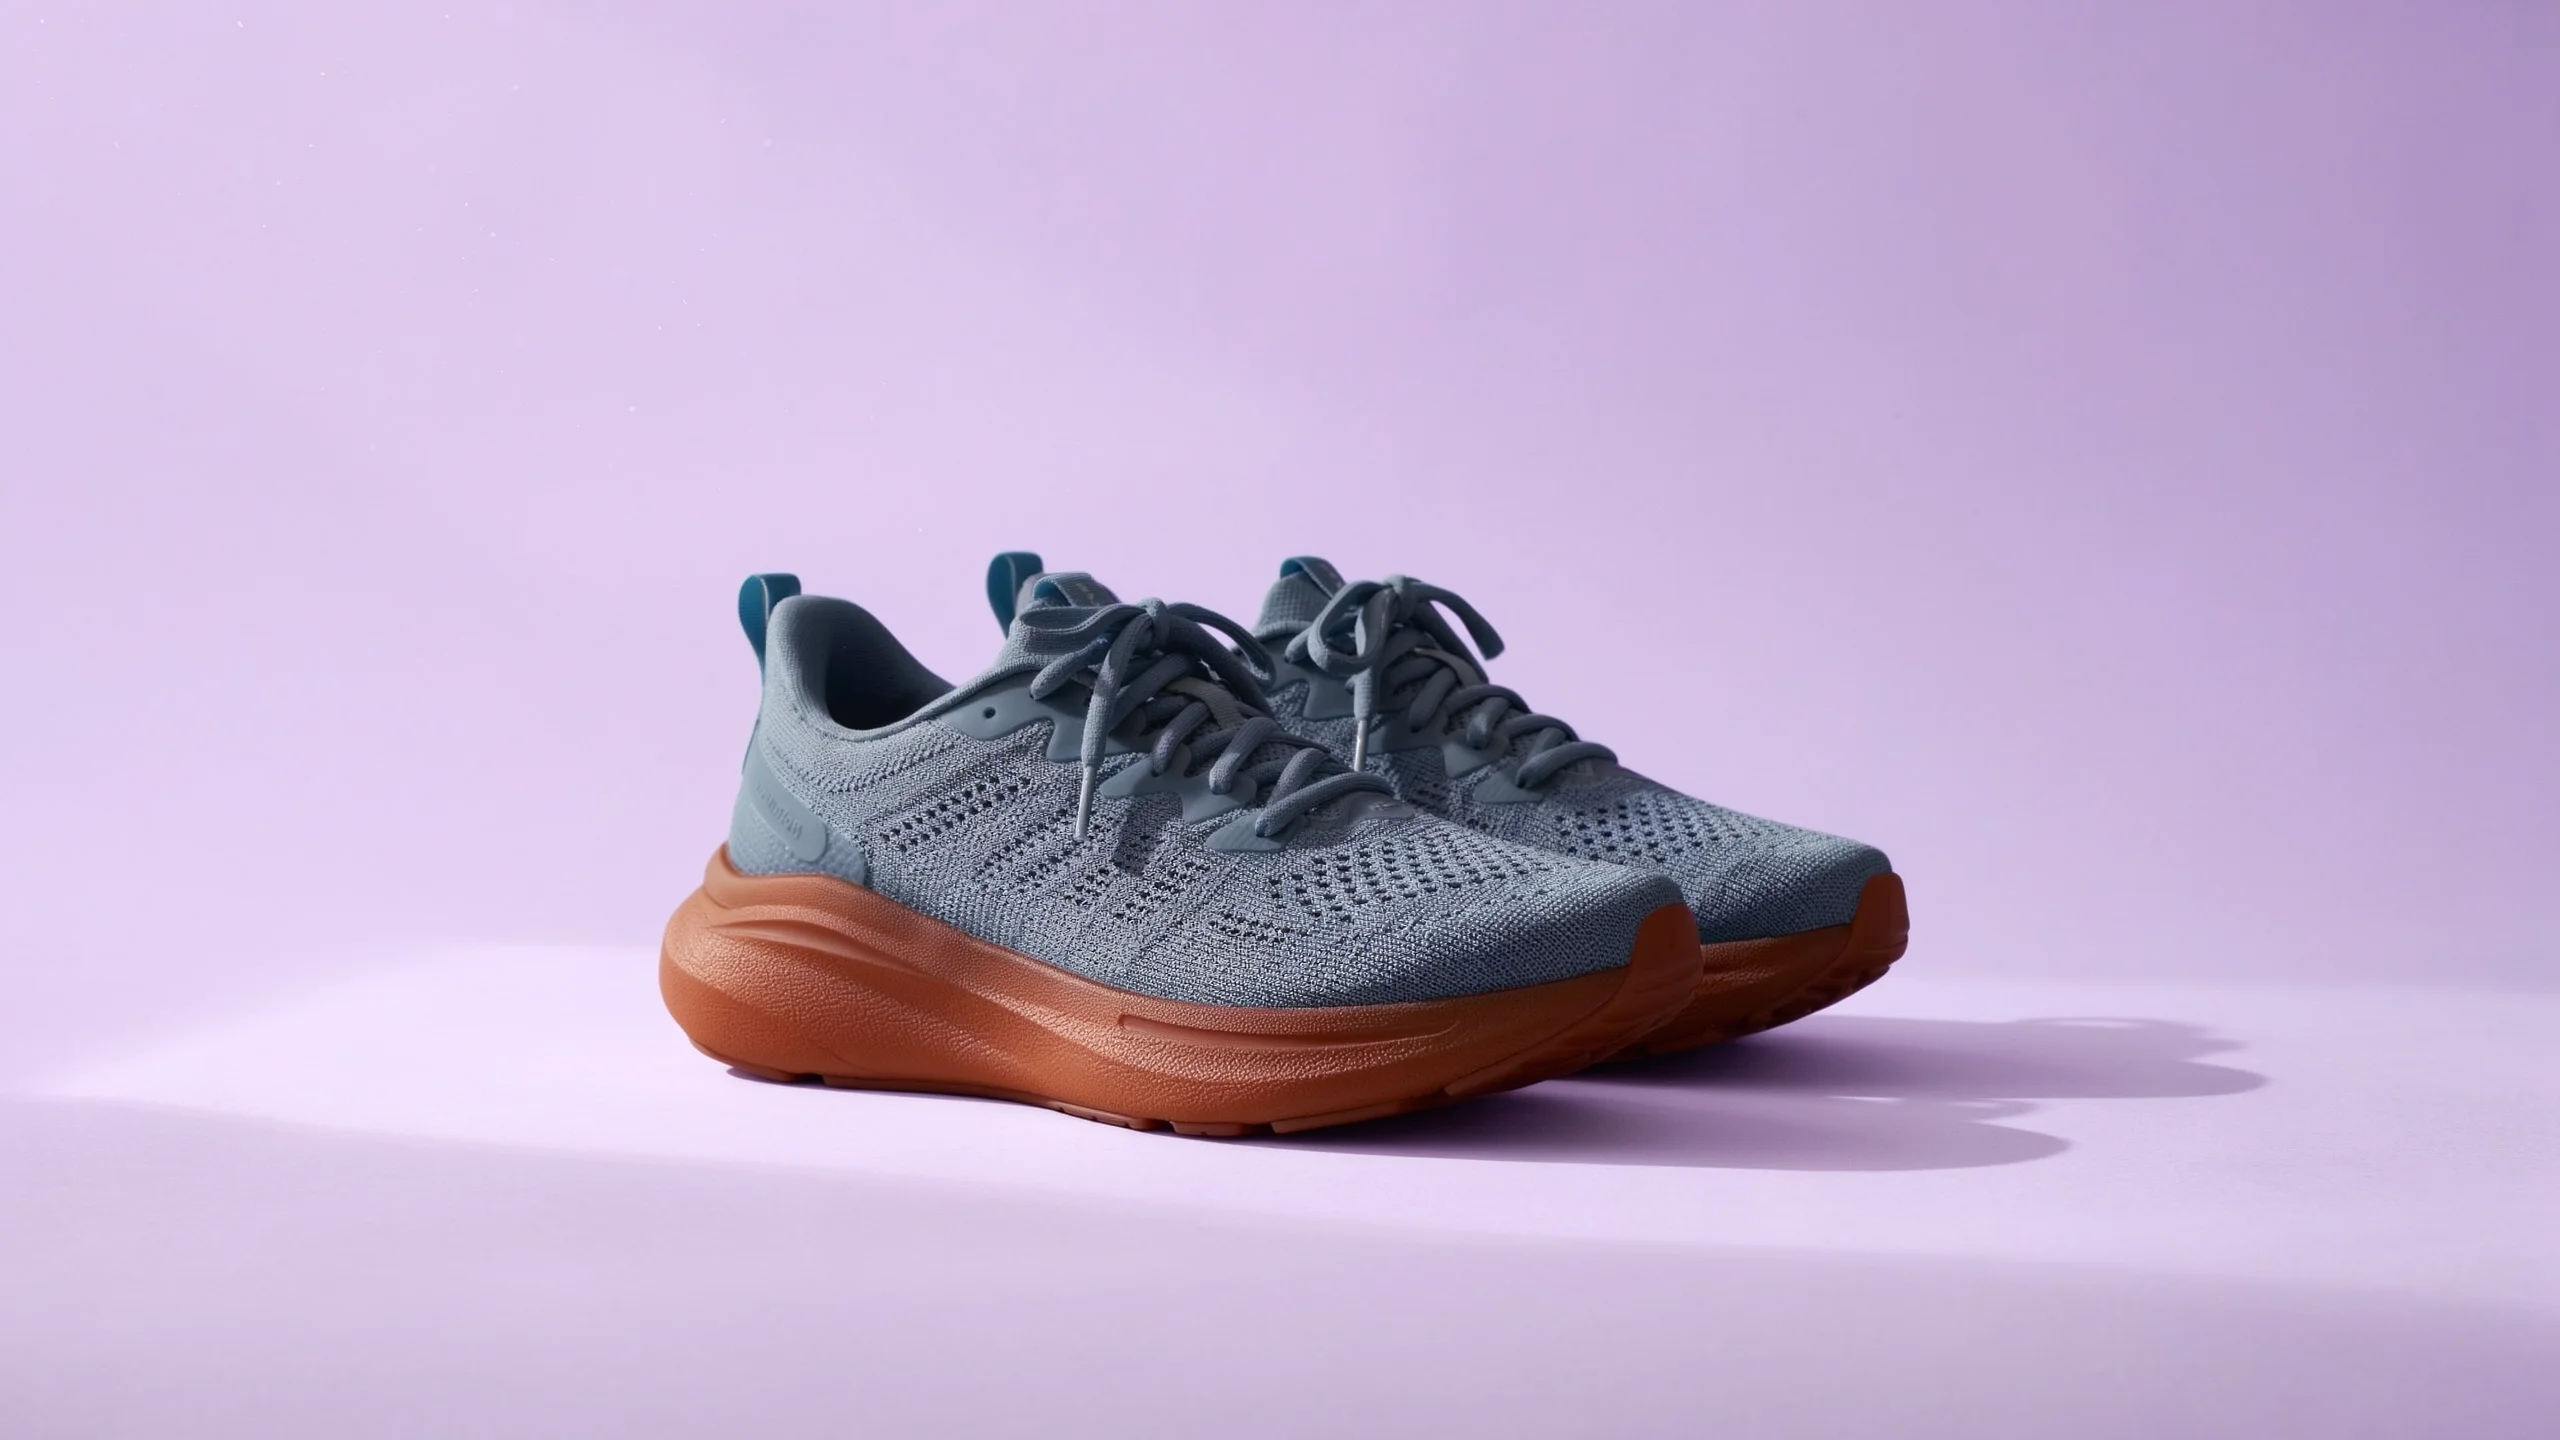
Saved edit 3 prompt
Change the backdrop sweep to a soft pale lilac. The product keeps its exact shape, size, proportions, details and position; the camera, framing and everything not mentioned stay exactly the same.
This is a backdrop brief. Check the shoe edges for lilac spill and compare the upper with edit 2. If a background change also shifts the product color, return to the previous version and narrow the change, using a mask where helpful.
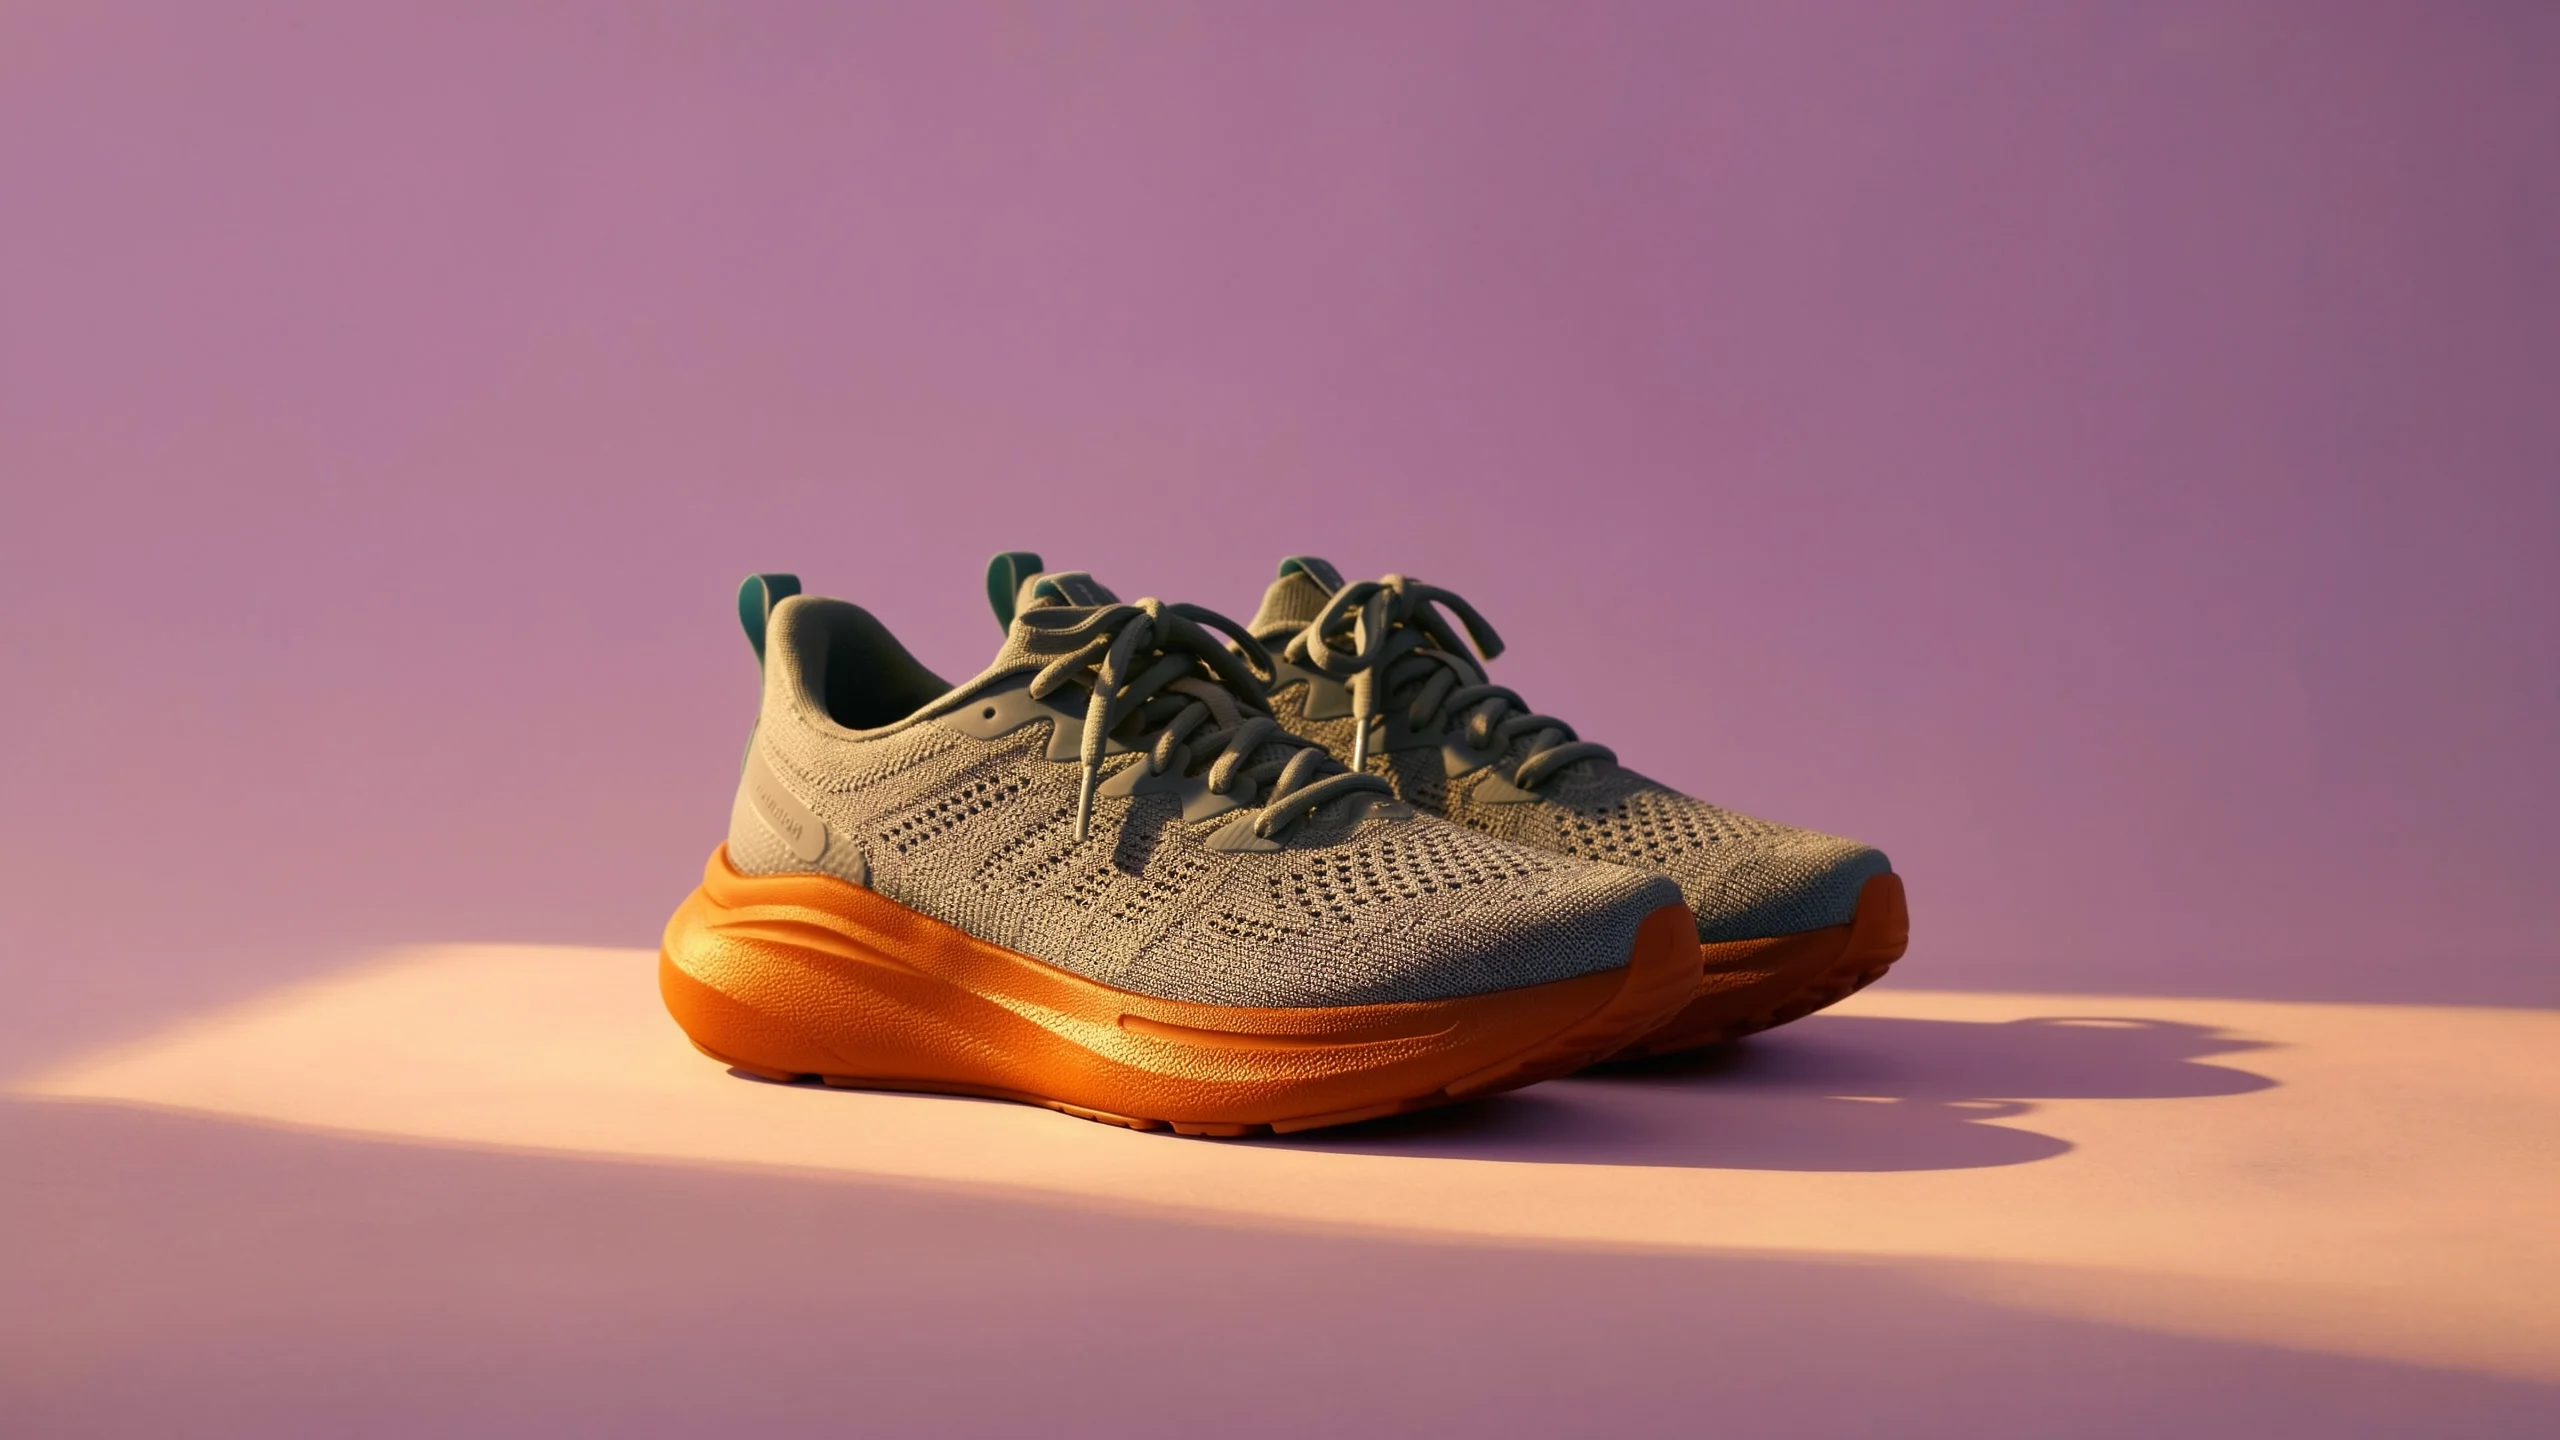
Saved edit 4 prompt
Make it warm golden late-afternoon light from the left, with long soft shadows across the sweep — natural light only. The product keeps its exact shape, size, proportions, details and position; the camera, framing and everything not mentioned stay exactly the same.
The final image visibly warms the shoes as well as the scene. That is an important creative tradeoff: light changes how a color appears. This version can communicate a different mood, while the earlier neutral version is easier to use for comparing colorways. Pick the version for its job rather than assuming the last edit is the best deliverable.
If your task is specifically to recolor a garment in an existing photo, the separate Colorways app provides a focused workflow. For fabric, pattern, or surface-reference changes, see Material Swap. These are alternative tools to choose for the task; the examples above use the saved 4.5 gallery sequence.
Example 3: change the styling around a toaster
A campaign refresh may keep the same product and change the story around it. This generated breakfast scene begins with a mint toaster, blueberries, a cream towel, and a rosemary sprig. The next edits build a red-and-strawberry direction one item at a time.
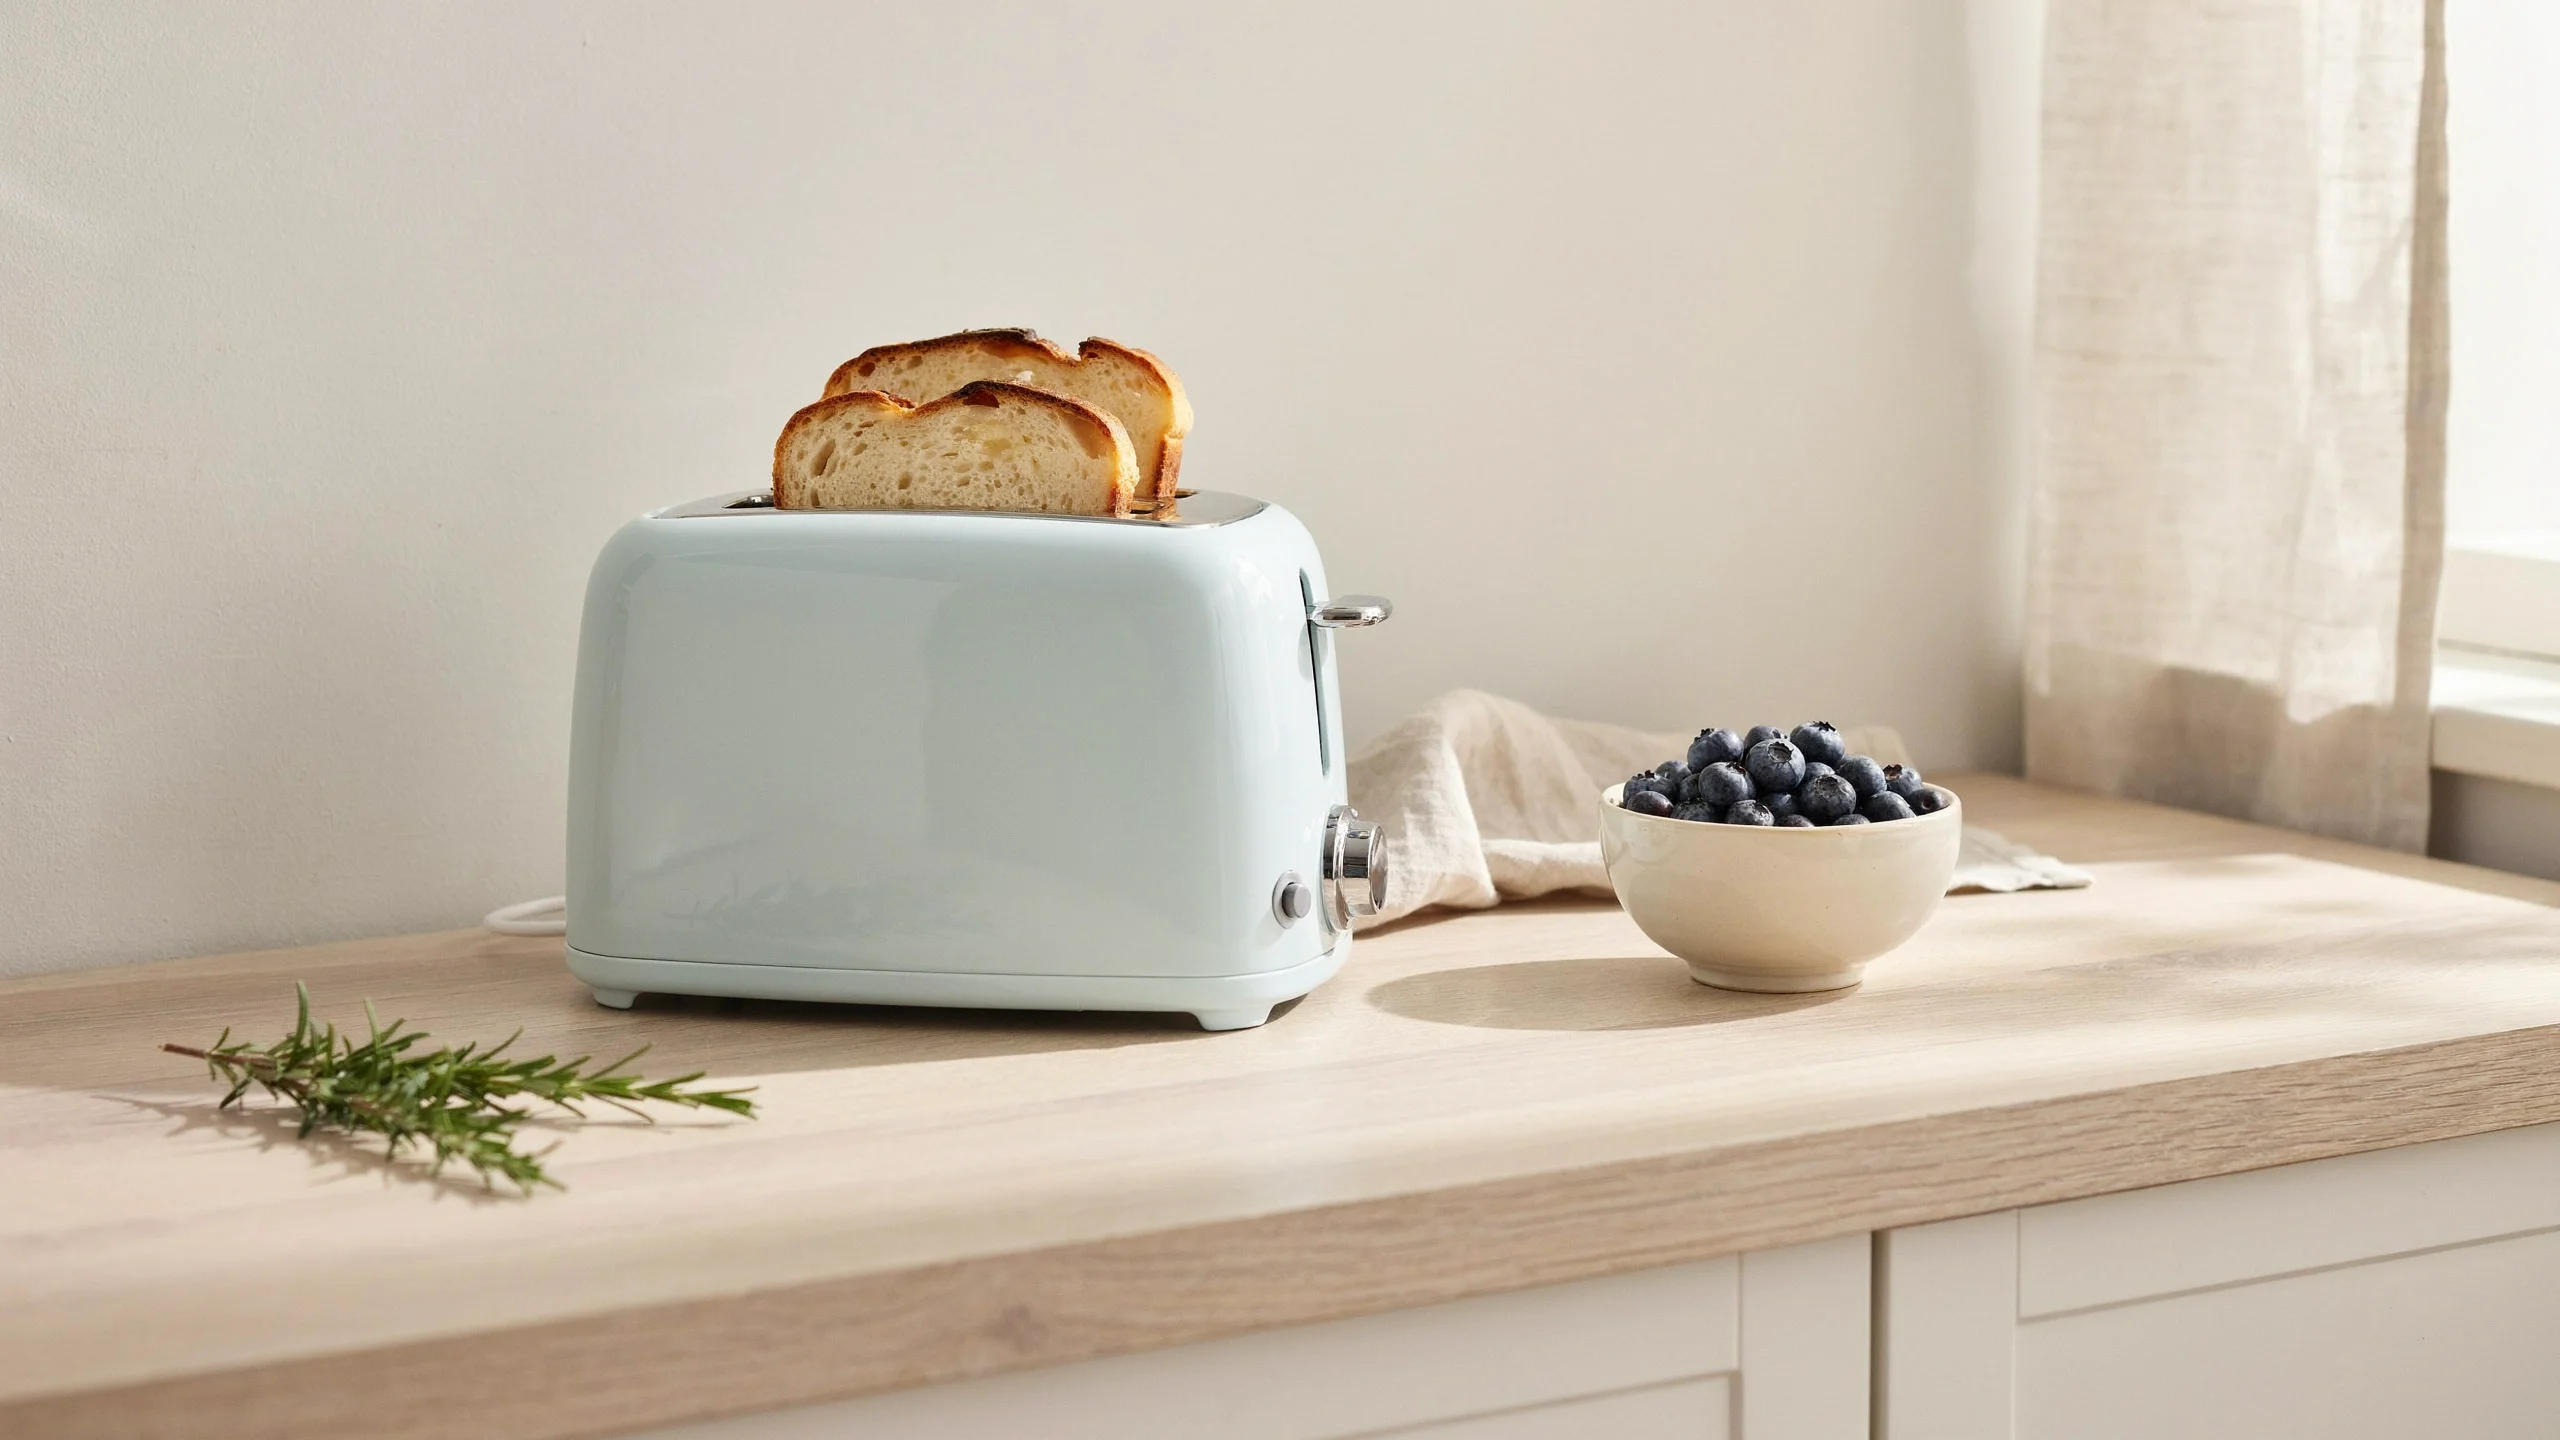
Saved starting prompt
Premium e-commerce campaign photograph, 16:9, shot on a medium-format camera, true-to-life materials and colour, soft natural shadows, crisp focus on the product, no text, no logos. A retro two-slice toaster in pastel mint, in a bright, calm Scandinavian home setting with pale oak and linen, morning light.
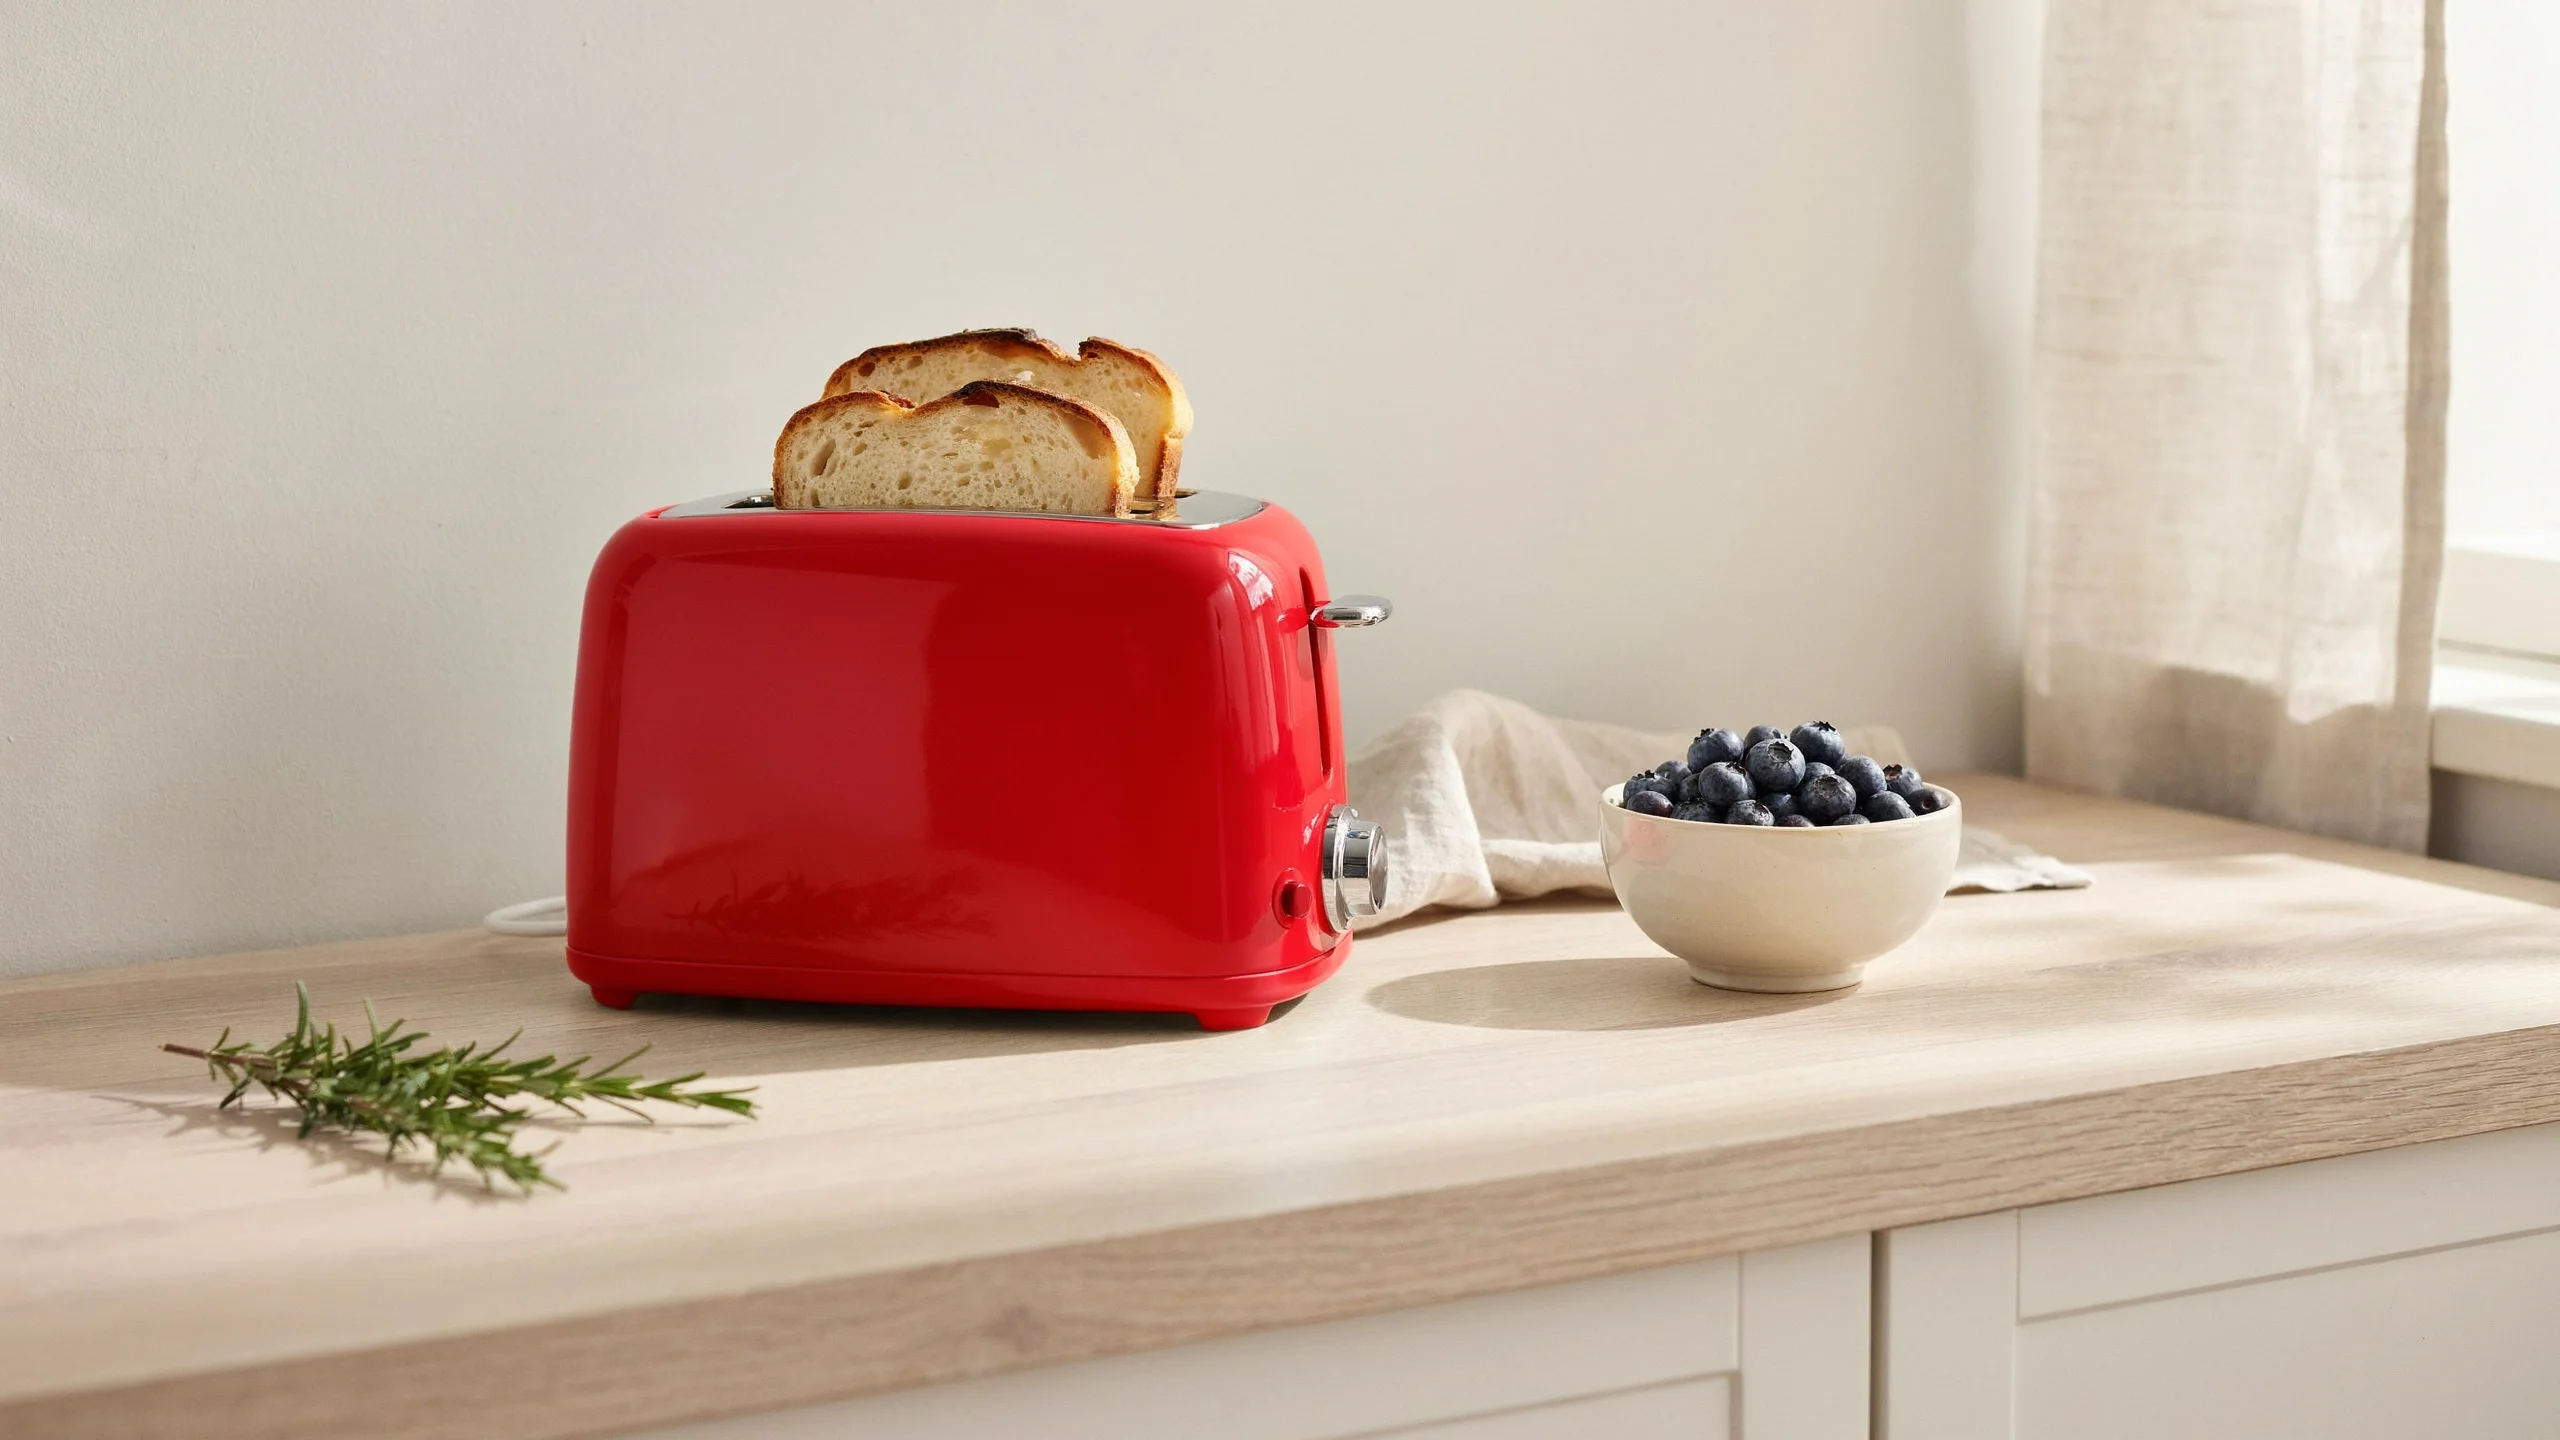
Saved edit 1 prompt
Change the product's colour and finish to cherry red. The product keeps its exact shape, size, proportions, details and position; the camera, framing and everything not mentioned stay exactly the same.
After the red finish is established, the later prompts repeat “cherry-red finish” and “chrome details.” They restate the approved product while directing attention to something else in the frame.
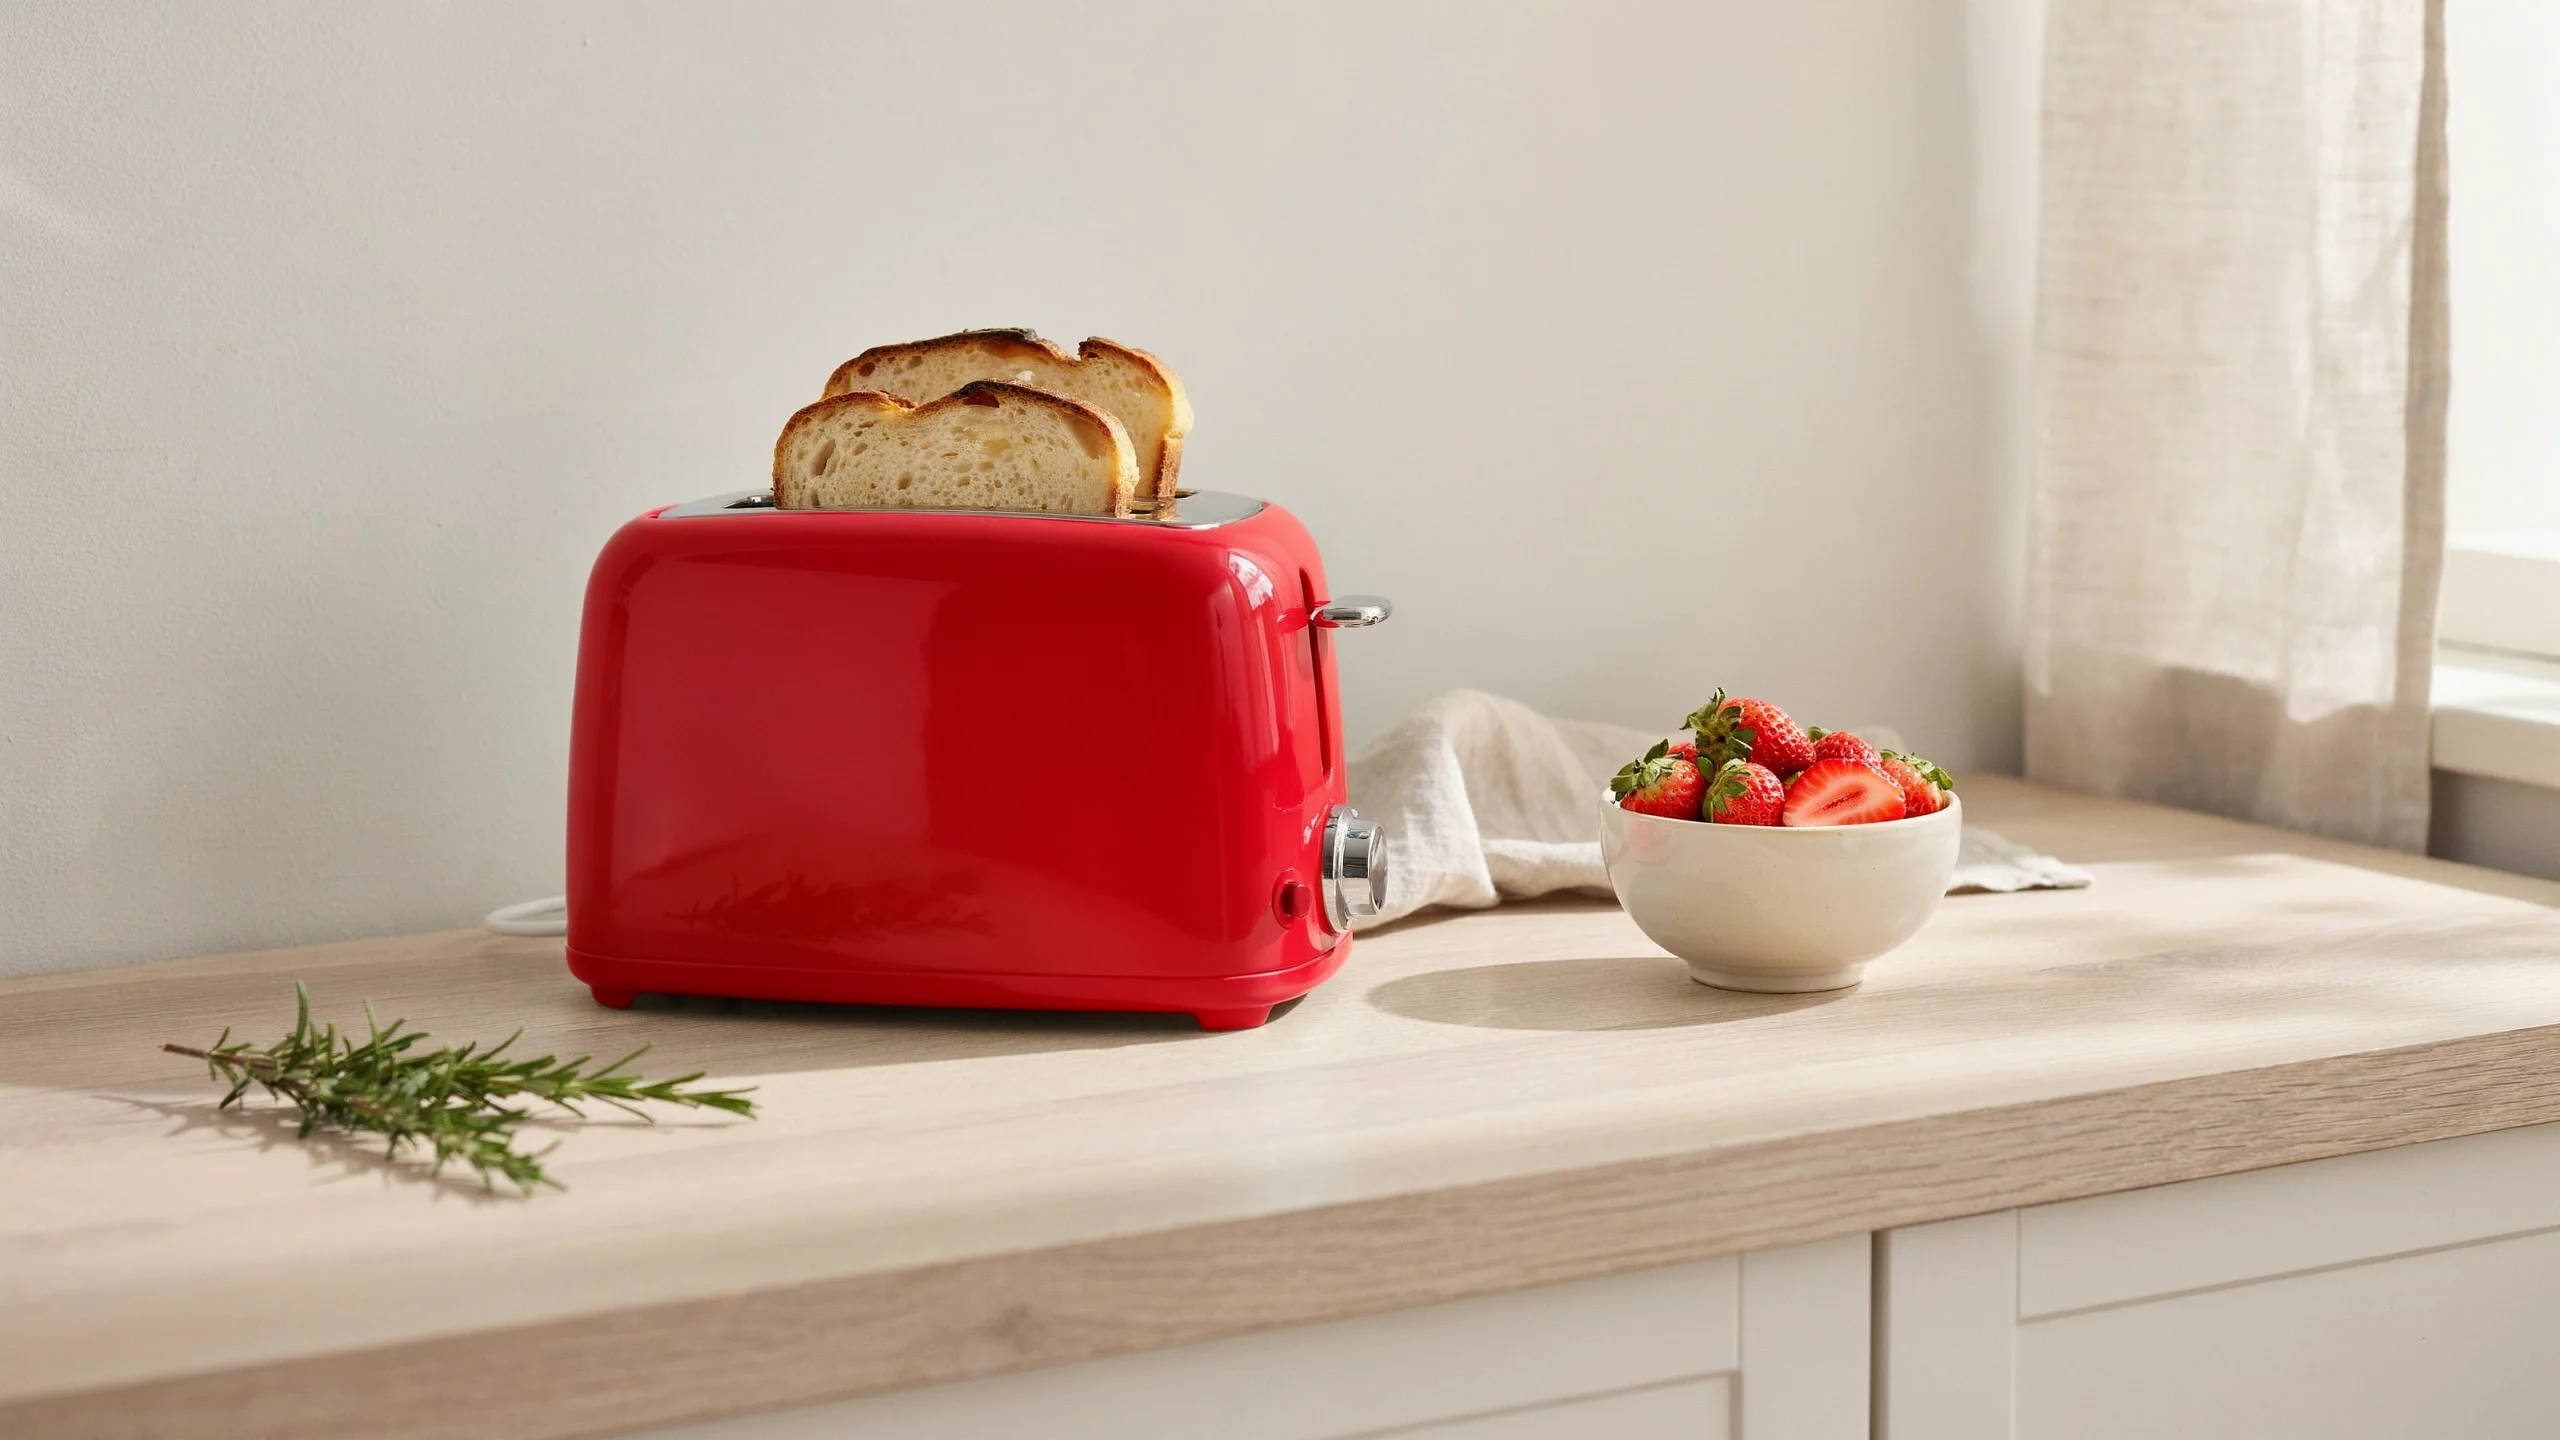
Saved edit 2 prompt
Change the blueberries in the bowl to fresh ripe strawberries, some halved, filling the same bowl. The toaster keeps its exact shape, cherry-red finish, chrome details and position; the camera, framing and everything not mentioned stay exactly the same.
“Filling the same bowl” tells the model to replace the fruit within a known container. Check the bowl's position and rim, the fruit's scale, and the toaster's lever and slots. Naming the surrounding object makes this a smaller brief than asking for an entirely new breakfast arrangement.
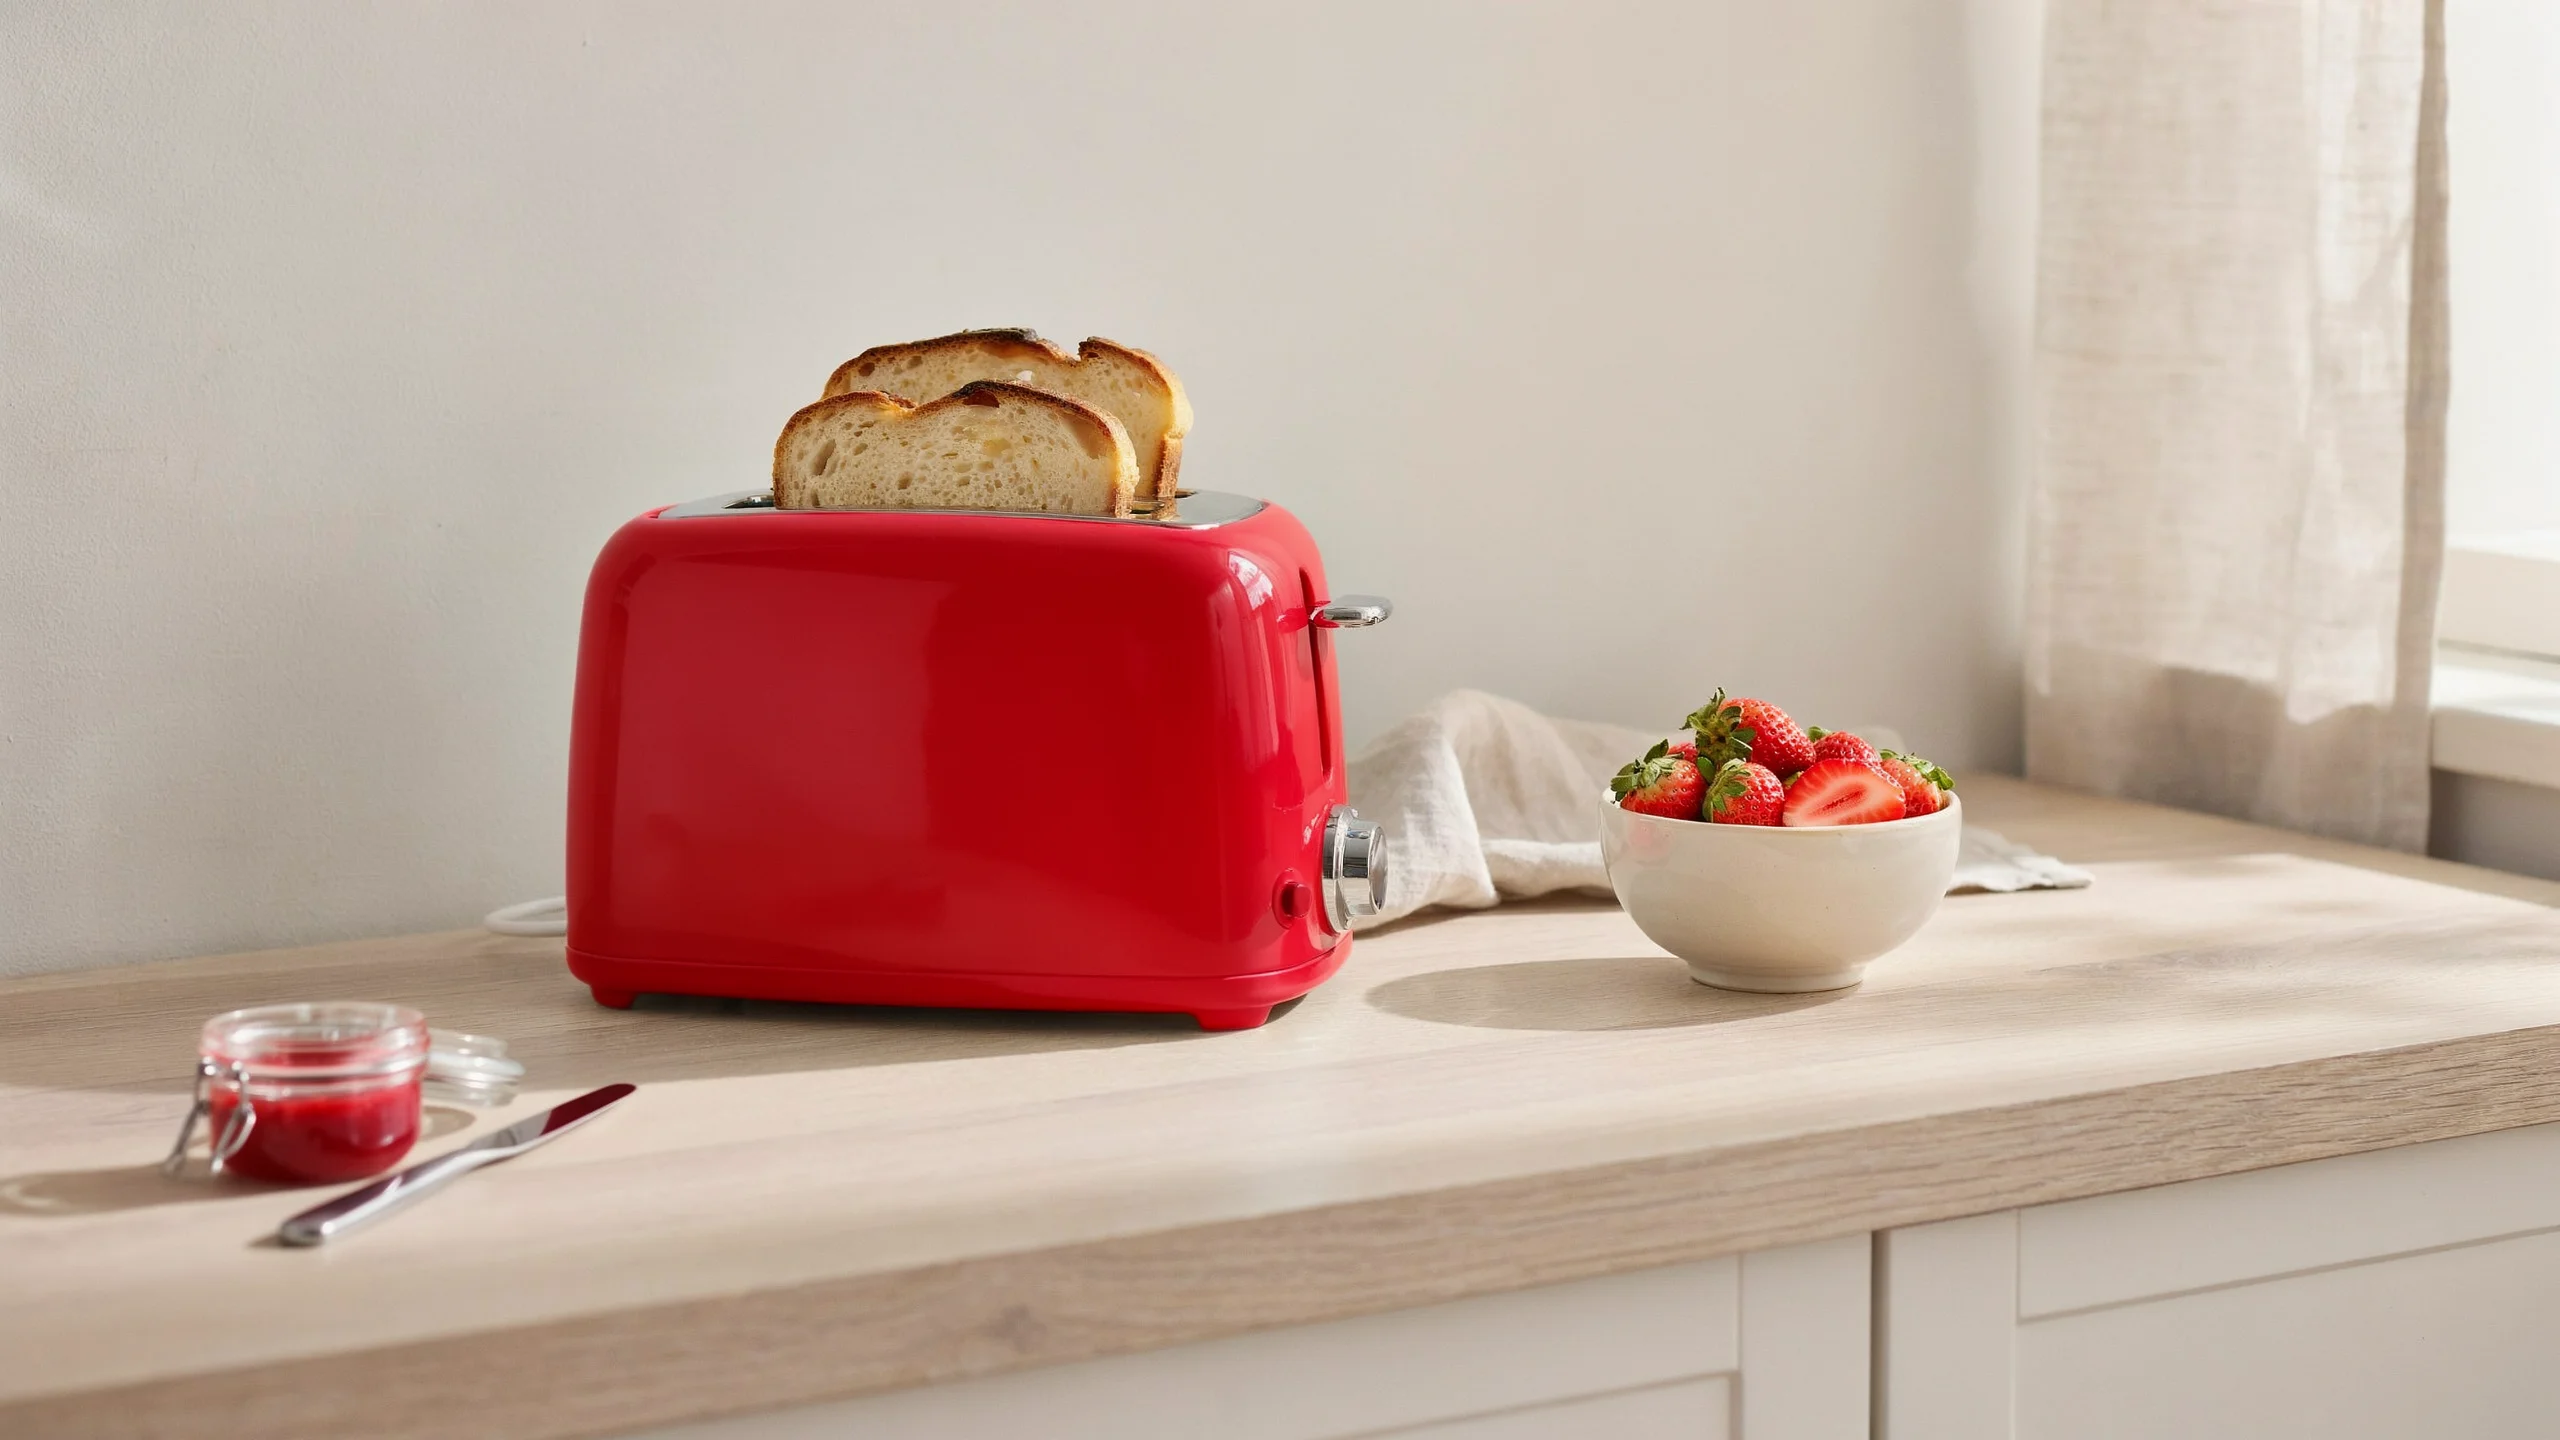
Saved edit 3 prompt
Replace the rosemary sprig with a small glass jar of strawberry jam and a butter knife resting beside it. The toaster keeps its exact shape, cherry-red finish, chrome details and position; the camera, framing and everything not mentioned stay exactly the same.
This is a replacement with two new objects. The instruction identifies what should leave the scene as well as what should arrive. Check the jar's contact with the counter, the knife's shape, and whether either object is cut off by the frame.
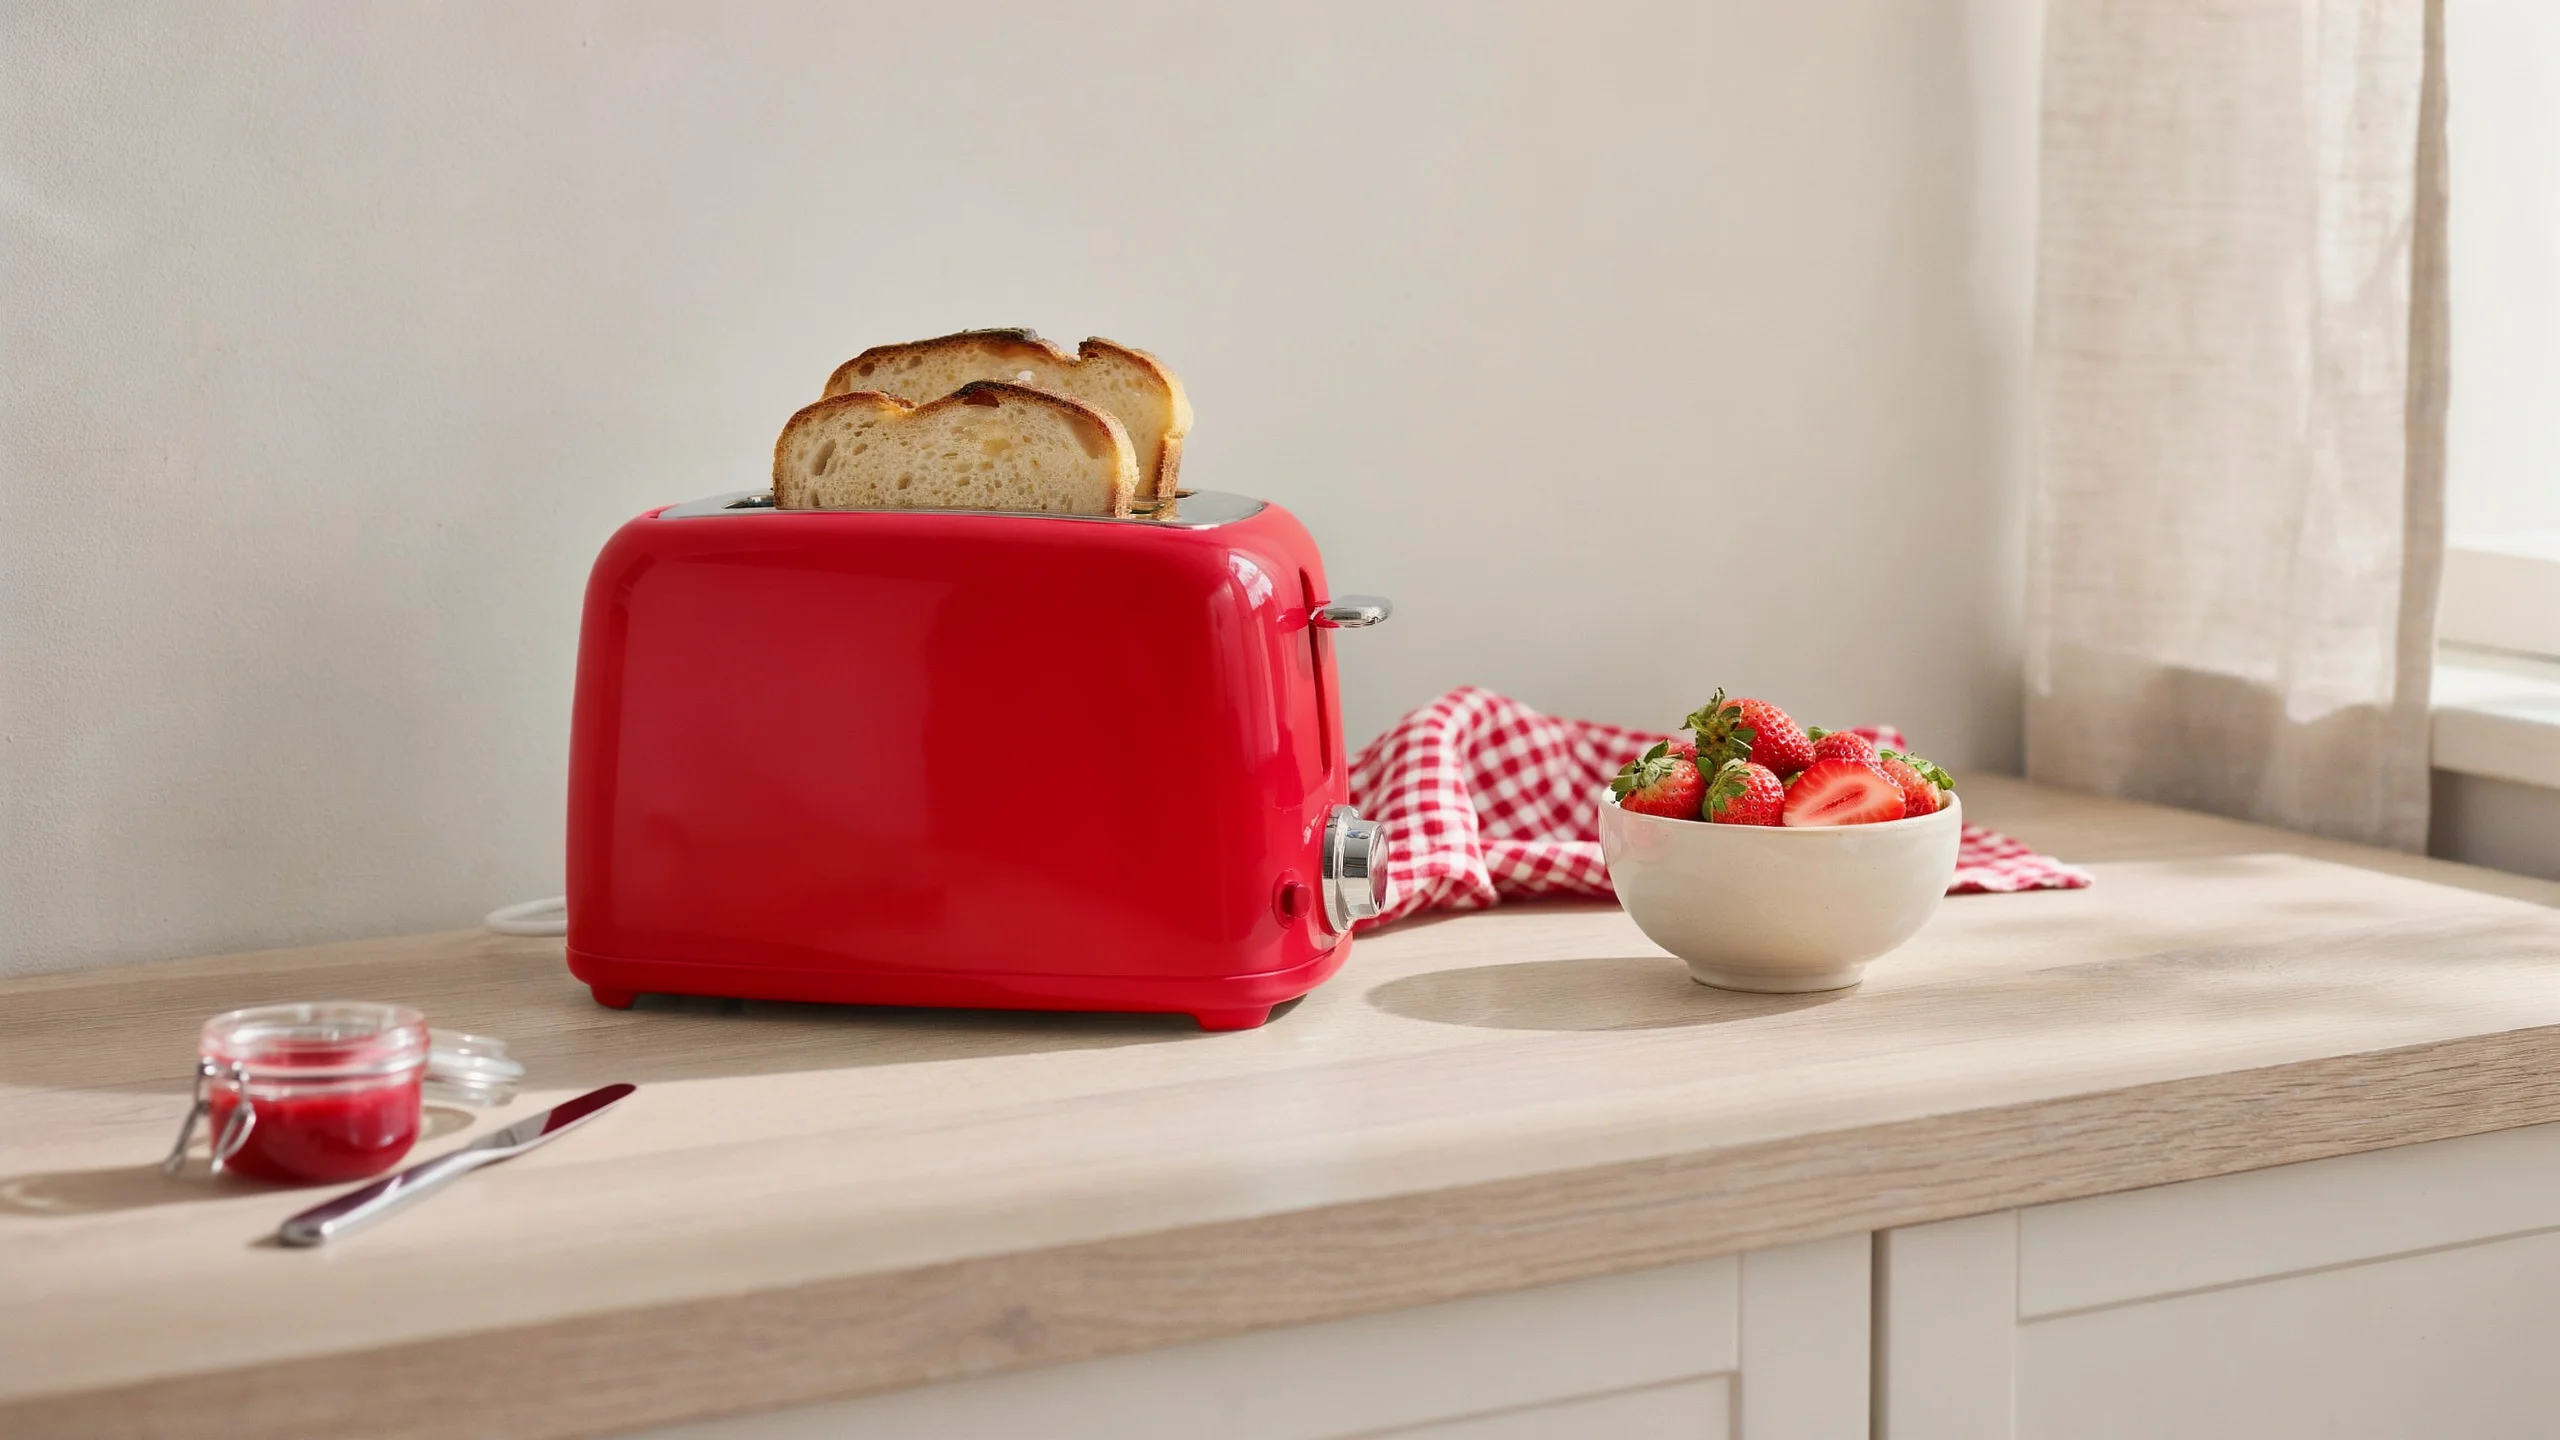
Saved edit 4 prompt
Change the cream linen towel to a red-and-white gingham tea towel, folded the same way. The toaster keeps its exact shape, cherry-red finish, chrome details and position; the camera, framing and everything not mentioned stay exactly the same.
“Folded the same way” asks for a surface change while retaining the towel's arrangement. Inspect how the pattern follows the folds. If you need a particular textile rather than a generic gingham, provide a clear material reference and evaluate the repeat size against the product.
The saved sequence continues with warmer light and a new camera angle. You can explore it in the 4.5 examples. For this styling brief, edit 4 is already a useful stopping point: the props and palette have changed while the original composition remains easy to compare.
Use references and masks for a specific reason
A reference is most useful when words leave the important detail ambiguous. “Blue woven fabric” could describe many surfaces. A well-lit swatch can show the weave, finish, and repeat you mean. Crop out unrelated objects and tell the model which component should use the reference.
In Precise Edit, the main product goes in Image; extra guides go in References. It supports up to four guides without a mask, or three with a mask. A guide supplies visual information and is not the image being edited. Use a mask when a part is hard to identify in words or when a previous instruction changed too much of the scene.
For example, a proposed instruction for a real shoe photo could be: “Apply the knit texture in the reference to the upper panels only. Keep the sole, laces, silhouette, position, and background.” This is an adaptable starting instruction, not a quoted prompt from the demonstrations above. Check that the reference's lighting or background has not been copied into the product scene.
The general Image app has a different arrangement: choose 4.5 and attach up to five
images in total. You can use @ mentions to explain each image's role. With references
attached, the prompt becomes an edit instruction and Magic Prompt is hidden. See the reference-image guide for that workflow's controls. Keep its reference count separate from Precise Edit's main-image-plus-guides
fields.
Save a separate branch before an edit that changes the viewpoint or reconstructs a material. Small color corrections and an entirely new camera angle ask different things of a source image. A new view can reveal areas the camera never recorded; compare it with additional product photographs before treating it as an accurate view of a real item.
Review the result before the next edit or export
Open the original and result at the same display size. Check the changed area first, then scan the rest of the product. This is where the examples become a repeatable workflow: the brief gives you a short list of changes to accept and details to retain.
- Construction: compare seams, fasteners, sole grooves, switches, handles, and the product outline. Count repeated elements such as keyboard keys.
- Text: read labels, legends, model numbers, and small symbols at full size. Keep exact packaging copy available for comparison.
- Color and finish: compare under similar lighting. Check whether metal still looks metallic and knit still has visible structure.
- Scene: inspect contact shadows, reflections, edges, and overlaps. A newly added prop should share the scene's perspective and light direction.
- Delivery: check dimensions, crop, file type, and background requirements in the downloaded file, not just the on-screen preview.
When a result misses the brief, make the next instruction smaller:
| What you notice | What to try next |
|---|---|
| The whole product changes color | Name the component and its current color. Return to the approved source and mask that part if needed. |
| Letters or small hardware change | Revert to the last acceptable version. Reduce the affected region and keep a close-up of the original beside the result. |
| The product seems to float | Specify the supporting surface and contact shadow. Review whether the scene's light direction agrees with the product. |
| The new background tints the product | Compare with the prior version before adding more edits. Restrict the background change or use a cutout workflow. |
| A later edit loses a useful detail | Branch again from the saved version that still has it. Avoid trying to repair several accumulated changes in one prompt. |
Check resolution separately from visual quality
A sharp-looking preview does not tell you the export's dimensions. Whole-image edits can reduce a large source to fit the model's rendering budget. Check the downloaded file before preparing a close crop or large-format layout. If your account offers an Edit Window, use it for a regional correction and inspect the assembled result. The 4.5 regional-edit demonstration shows how an edited crop can fit back into a larger image.
Keep a neutral product version as well as the campaign treatment. The shoe example shows why: warmer light changes the apparent color even when the intended edit is lighting. Name exports with the product, variant, purpose, and approved version so the two files stay distinguishable.
Continue with the right next step
Use Studio when the next task is assembling a layout or adding editable text. If you are generating an initial concept from scratch, the Ideogram 4.0 JSON prompting guide covers structured descriptions for that separate workflow. For a customer story about design exploration and refinement, read the Skechers case study.
To apply the same review process to your own product, start with one source image and one specific change. Save the result only when both the requested change and the product details hold up under inspection. Then move to the next decision.
Examples: saved keyboard, knit running-shoe, and retro toaster sequences from the Ideogram 4.5 gallery. Workflow references: Edit Images, Reference Images, and Precise Edit API reference. Controls and availability can vary by account.