
How to Fix Misspelled Words in an AI Image Without Recreating It
You can correct a misspelled word in an AI image by turning the lettering into editable text or selecting the word for a localized image edit. In Ideogram, use Layerize Text for wording you can type and format directly, or Precise Edit for a masked repair of the word.
We tested both in Ideogram using a sample skincare graphic generated with the deliberate misspelling “DAILY GOLW” above “HYDRATING SERUM.” The bottle, pink background, and layout were already usable. Only the spelling needed attention.
In Studio, Layerize Text reconstructed the lettering as an editable layer and changed GOLW to GLOW during extraction. In a separate Precise Edit test, we selected GOLW and asked for GLOW. That produced the correct word on the first attempt, too.
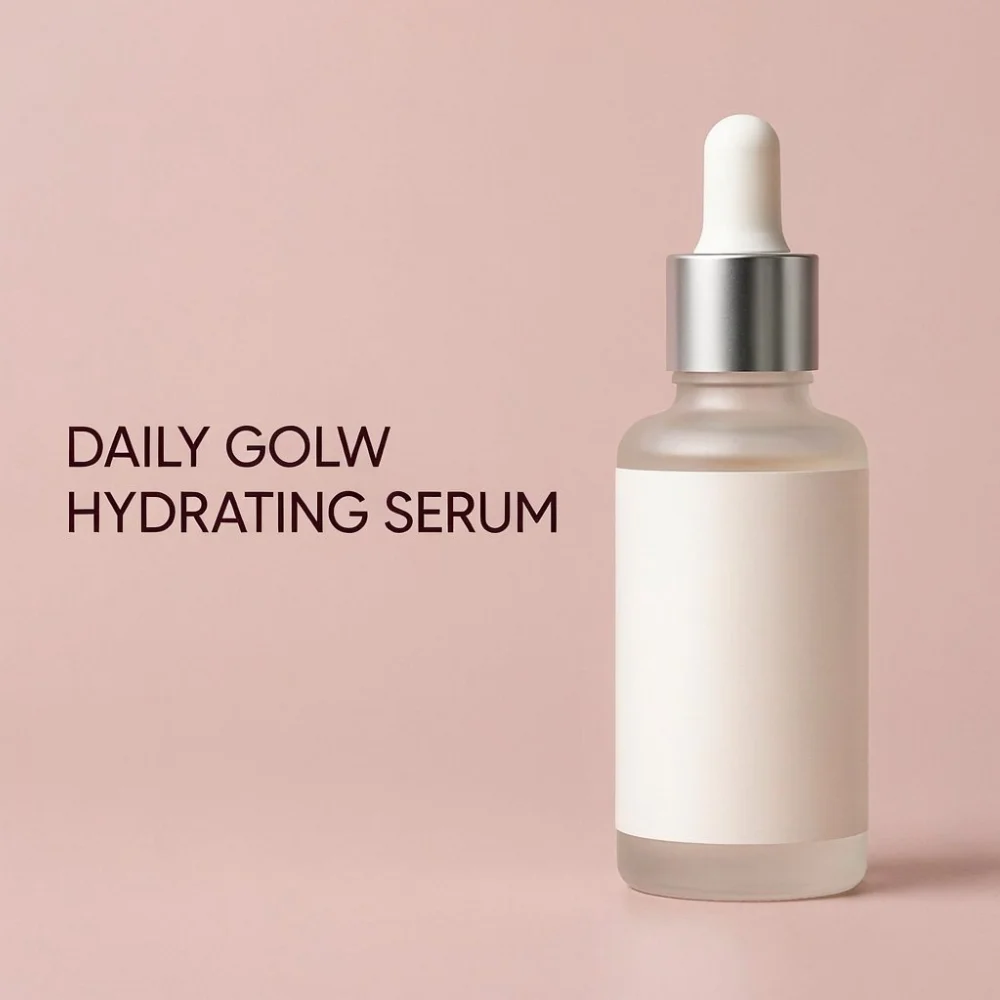
Before: GOLW
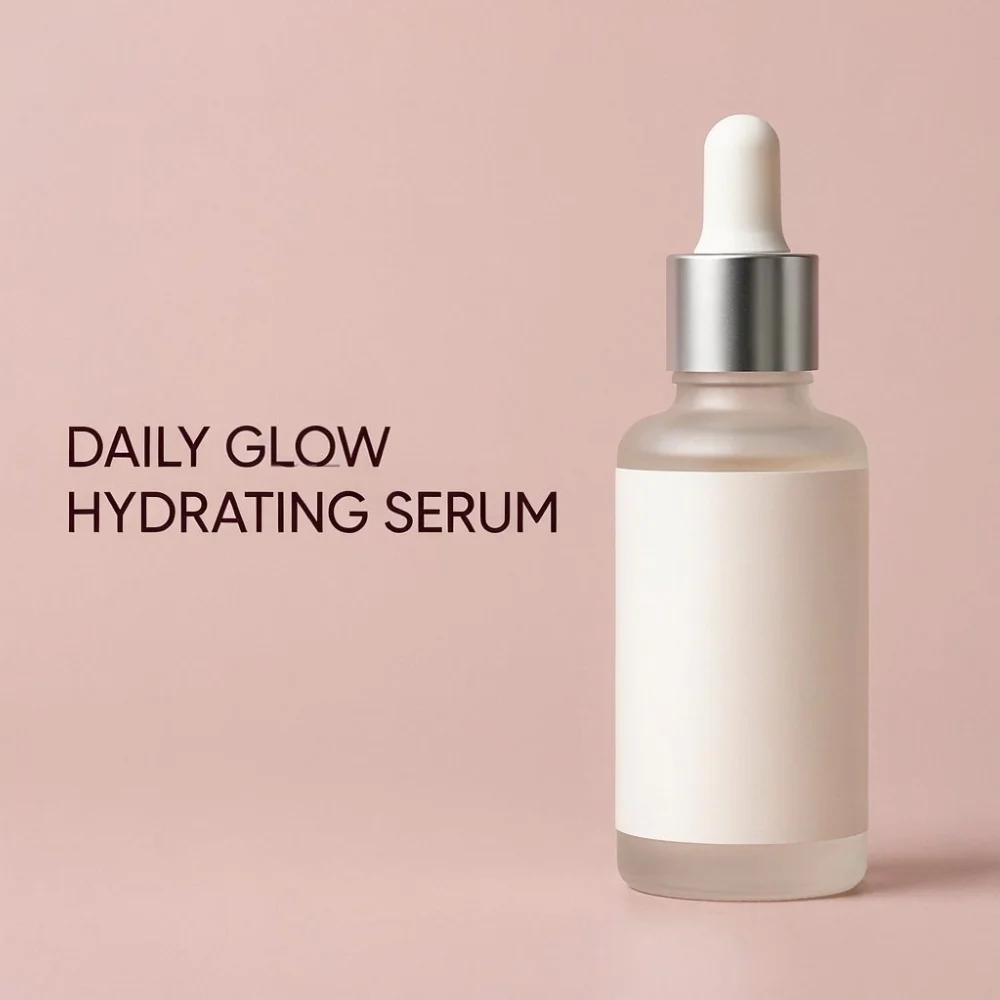
After Precise Edit: GLOW
Overview : Choose how you want to correct the word
Use Layerize Text when you want to type the final wording yourself and control its font, size, color, and placement. This is useful for promotional headlines, event dates, prices, and other copy that may need another revision.
Use Precise Edit when you want the correction rendered into the image. You mark the word, describe the replacement, and Ideogram redraws it in place.
| What you need | Start here |
|---|---|
| Exact wording you can keep editing | Layerize Text in Studio |
| A prompted repair of one word | Precise Edit |
| An exact brand font or approved wordmark | Your original design file |
Layerize Text removes detected lettering, reconstructs the area beneath it, and recreates the words as text layers. Layerize Text uses credits. Compare the result with your source before exporting.
Before starting, keep a separate copy of the original and write down the approved wording. For a campaign graphic, include the whole message: dates, units, punctuation, and any qualifying text. That gives you something concrete to proofread against.
Method 1 : Correct the spelling with Layerize Text in Studio
Step 1 : Open the original image in Studio
Sign in to Ideogram and open Studio from the sidebar. Upload the image you want to repair. If it is already open in Studio, use that version.
If your uploaded JPG or PNG shows only Image 1 in the Layers panel, the lettering is still part of that image. Use Layerize Text to make the detected words selectable.
Step 2 : Click Layerize Text and read what it extracts
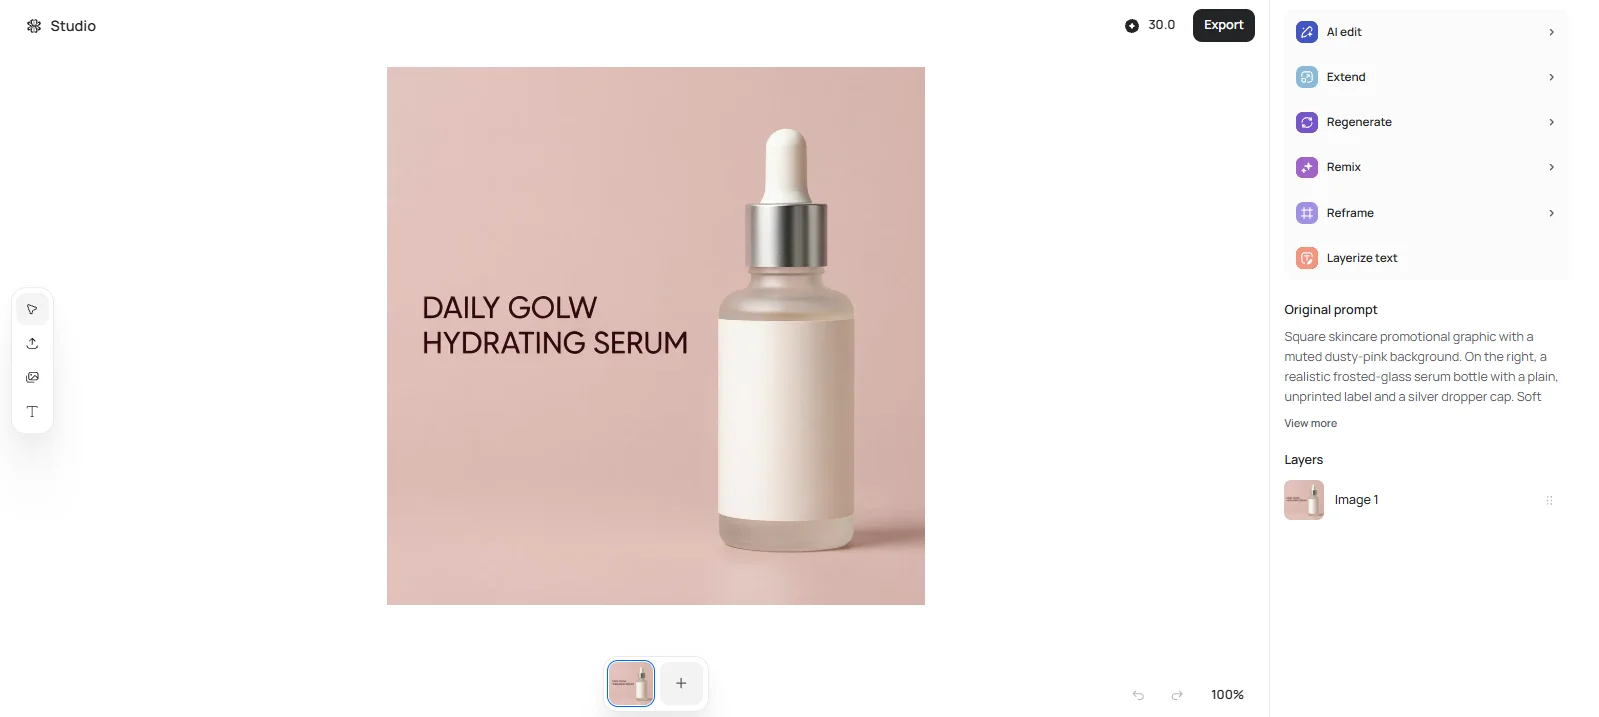
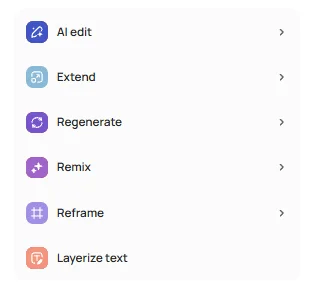
Choose Layerize text in the right panel. When processing finishes, check the canvas and the Layers panel.
In our skincare test, Studio created one text layer containing both lines. The base image remained underneath it, with the detected lettering removed. The new text read “DAILY GLOW / HYDRATING SERUM,” even though the source read GOLW. We had not typed the correction.
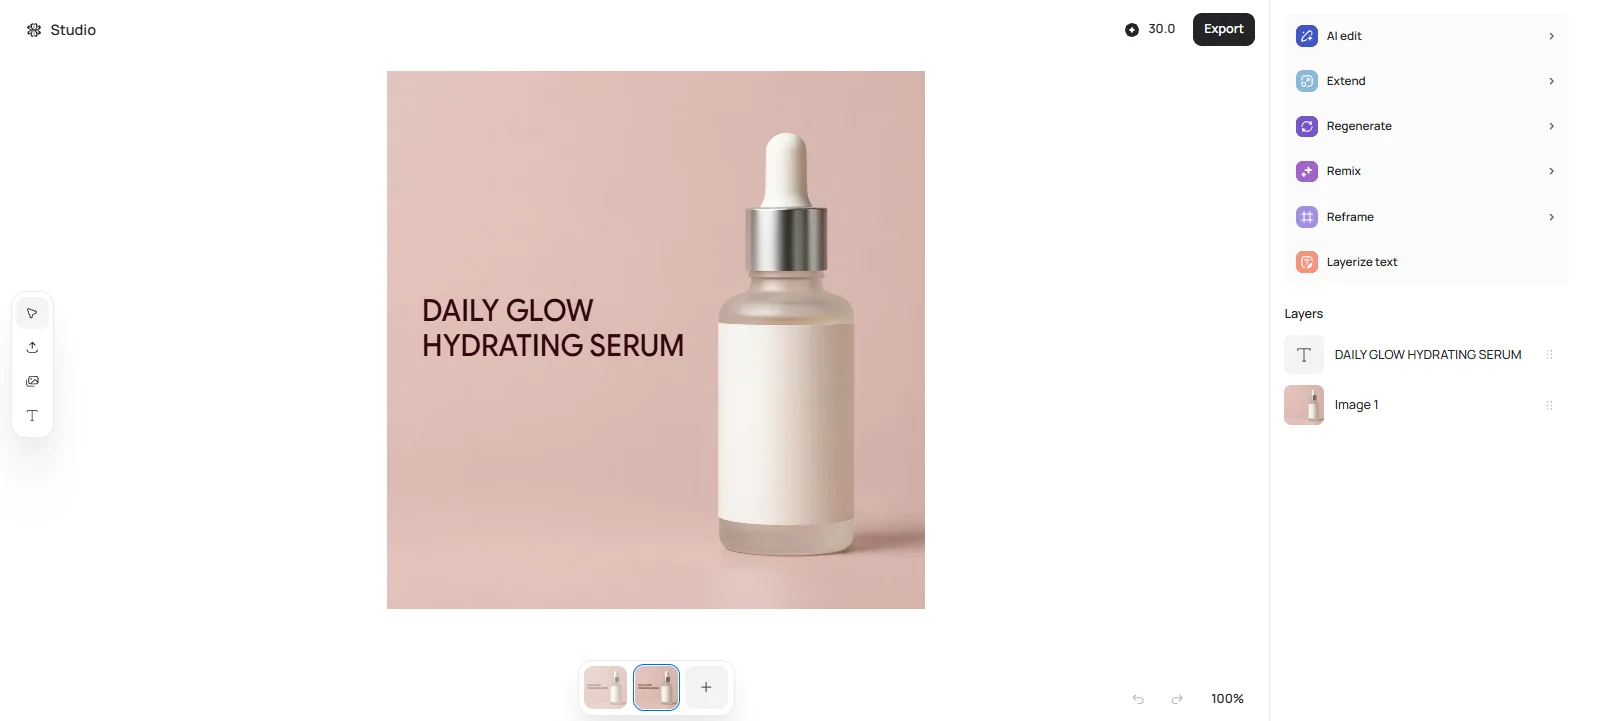
We saw the same behavior in a separate plant-sale graphic: PLNAT became PLANT. Read the extracted words before editing, especially product names and unusual spellings.
Step 3 : Select the text layer and enter the correct spelling
Select the text layer in the Layers panel, then double-click the lettering on the canvas to edit it. Highlight the incorrect word and type the approved replacement. Preserve the other words and existing line breaks unless they also need changing.
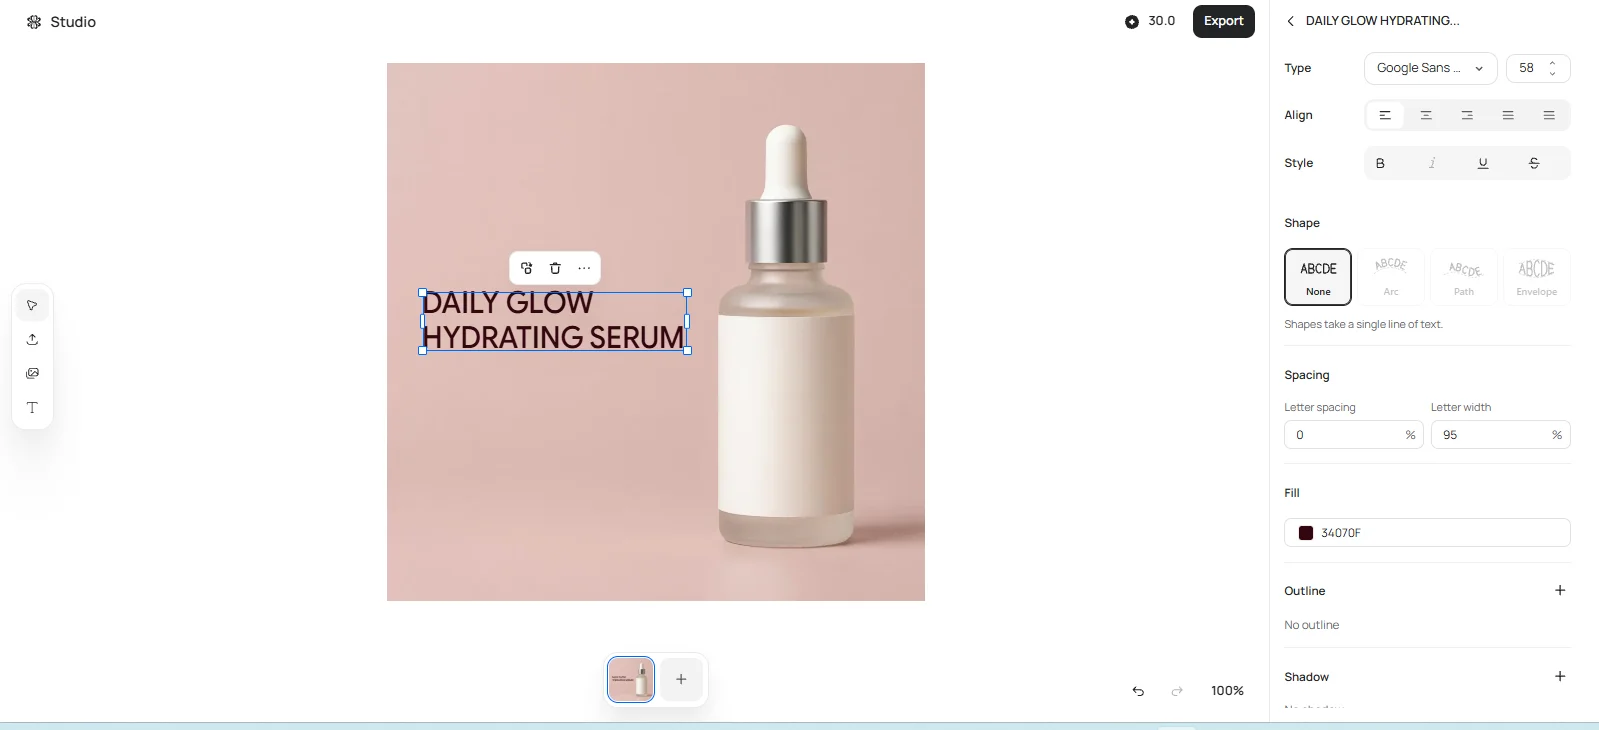
Because Layerize Text had already fixed GOLW, we tested manual editing with a deliberate typo: we typed RADIACNE, then corrected it to RADIANCE.
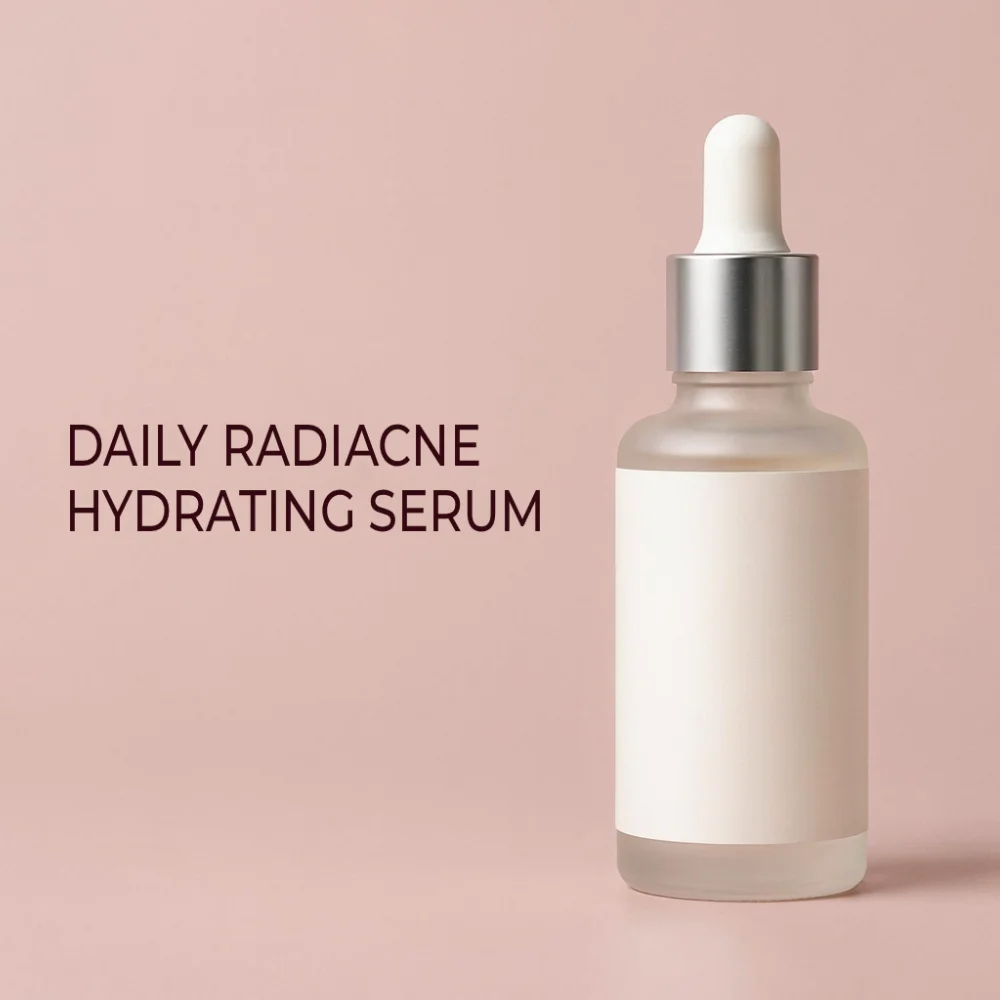
Deliberately introduced typo: RADIACNE
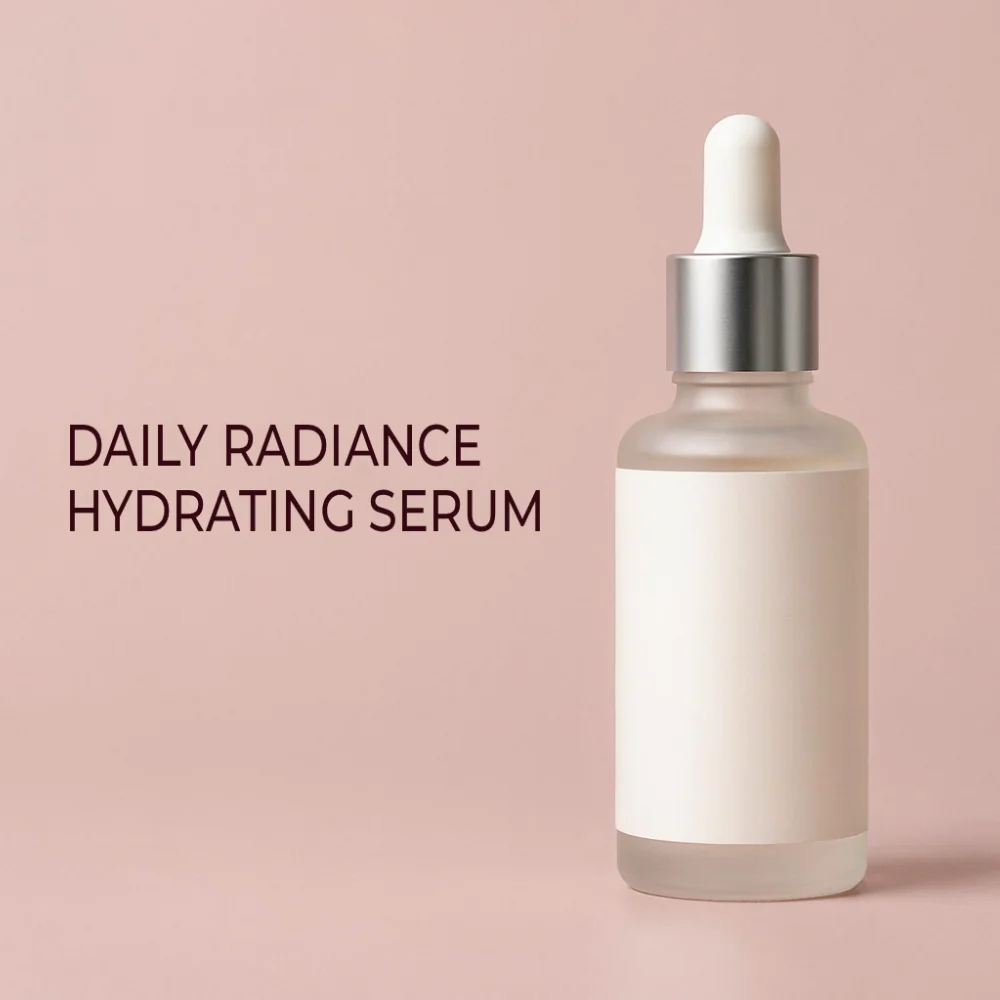
After manual correction: RADIANCE
Step 4 : Match the lettering to the layout
Check the reconstructed type against the original before accepting it. Correct words can still look out of place if the font is heavier, the line is wider, or the text has moved.
With the layer selected, use the right panel to adjust the font, size, alignment, spacing, and fill color. In our first skincare reconstruction, the controls showed size 58, letter spacing 0%, letter width 95%, and fill #34070F.
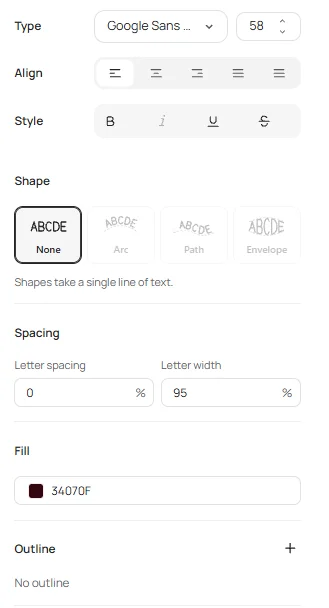
If a longer replacement wraps, first review the text box width and line breaks. Keep the type clear of the product and retain the hierarchy between the headline and supporting copy. Shrinking the whole block can make the second line unnecessarily small.
Look at the background where the original letters were removed, too. Check for faint strokes, uneven color, or a visible patch around the new words.
Step 5 : Export and check the downloaded file
Click Export, choose your file type and size, then click Download. We exported as PNG at 1K (Original size), 1024 × 1024.
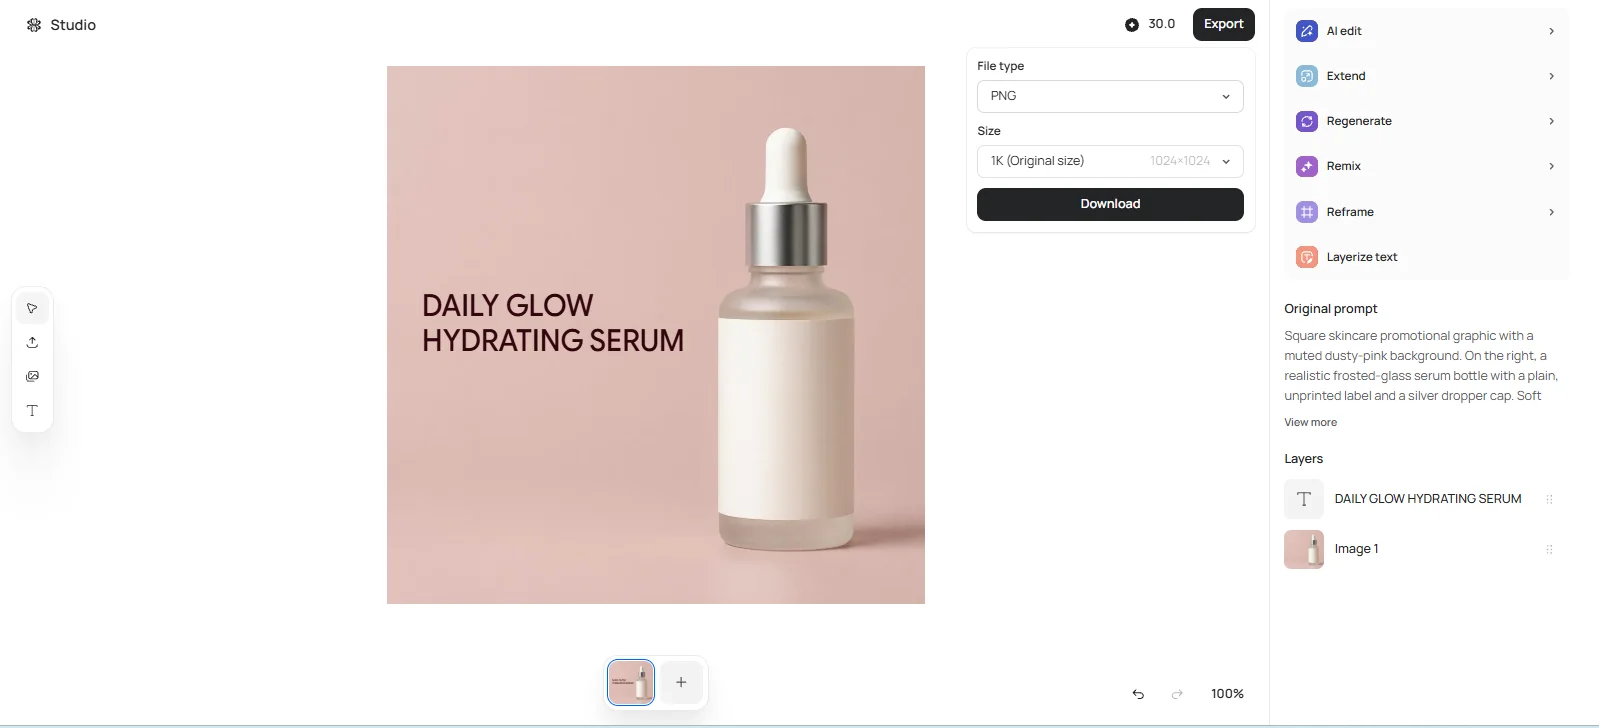
Open the downloaded image and read it again. Check the corrected word at full size, then at the size it will appear in the ad, slide, or product campaign. If the finished asset needs more pixels, run it through Ideogram Upscale, then inspect the lettering in the larger file.
Keep the Studio version for further copy edits. A PNG export flattens the composition; it does not carry the text layers into a new upload. We reuploaded an exported version and used Layerize Text again. Studio reconstructed the lettering again, and the font and spacing settings differed from the first reconstruction.
For more on selecting and formatting layers, see the Studio text and layers guide.
Method 2 : Repair the word with Precise Edit
Step 1 : Open the original in Precise Edit
Use the original image containing the typo. We returned to the GOLW source to test this repair independently of Layerize Text.
From your Library, open the original image and click Edit to enter Precise Edit. Our test used Ideogram 4.5. The edit screen showed the source preview, Mask & context window, and a field labeled What should change?
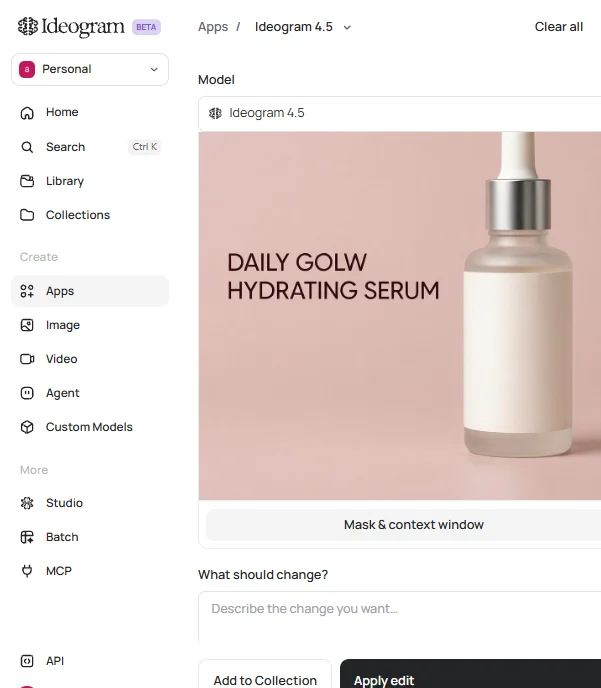
Step 2 : Mask the misspelled word
Click Mask & context window. In the selection dialog, use Add and the rectangular selection tool to cover the complete word, including its letter edges and a little surrounding background.
Our mask covered GOLW. It excluded DAILY, the HYDRATING SERUM line, and the bottle. We left the context window set to Auto, then clicked Done.
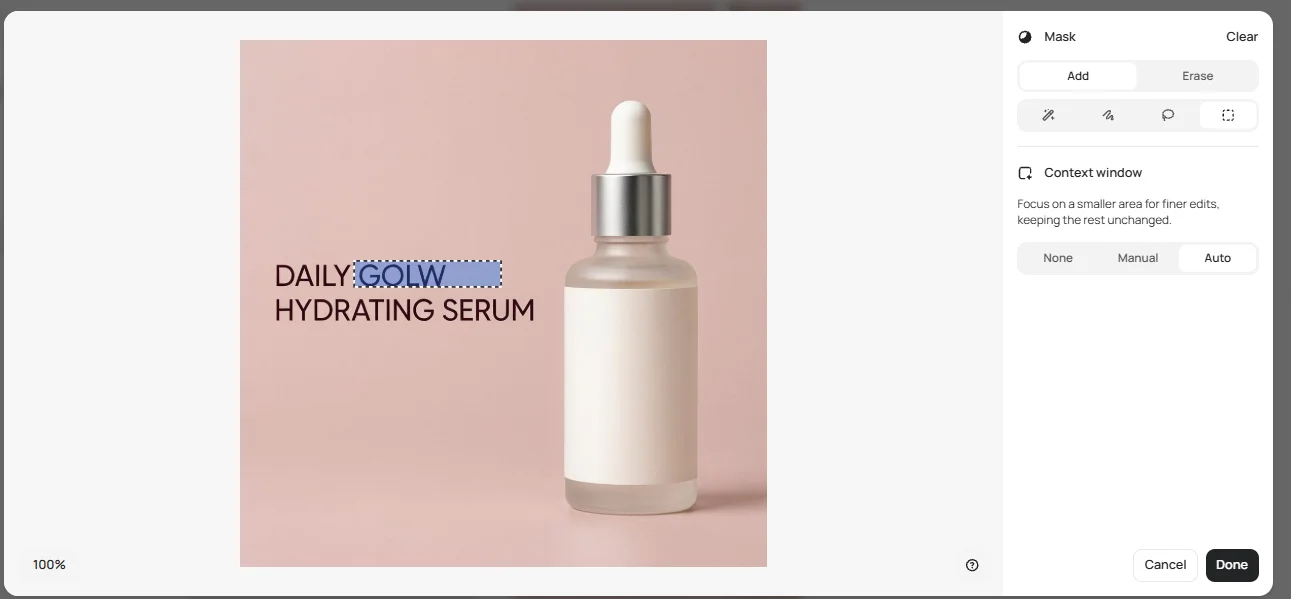
The mask and context window have different jobs. The mask identifies the area to change. The context window defines the surrounding region used for the edit. Precise Edit retains the original image dimensions and leaves pixels outside the context window untouched. We left the context window on Auto for this single-word correction.
Step 3 : Describe the exact replacement
In What should change?, name the incorrect word, put the correct word in quotation marks, and describe the appearance to retain. We used this prompt:
Replace “GOLW” with “GLOW” inside the selected area. Match the existing dark-burgundy lettering, font style, size, weight, baseline, and spacing. Preserve “DAILY,” “HYDRATING SERUM,” the pink background, bottle, lighting, and composition.
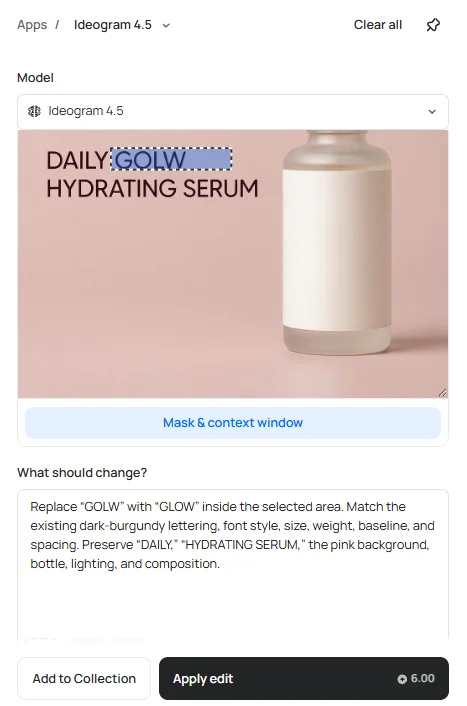
Our request showed a 6-credit quote. Review the amount shown for your edit before clicking Apply edit.
Step 4 : Apply the edit and compare it with the source
Click Apply edit. Our first attempt returned GLOW with the letters in the correct order. DAILY and HYDRATING SERUM remained readable, and the bottle and pink composition looked consistent with the source.
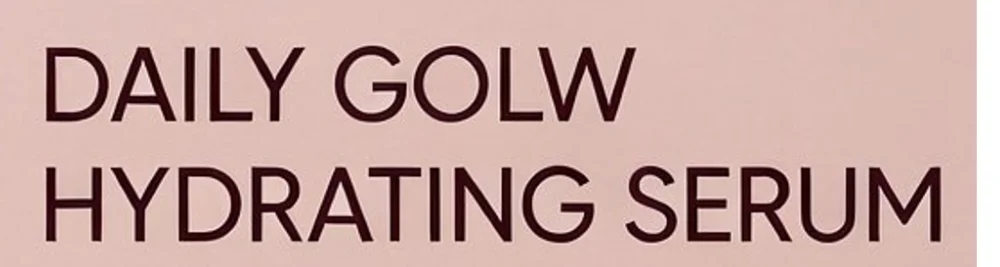
Before: GOLW
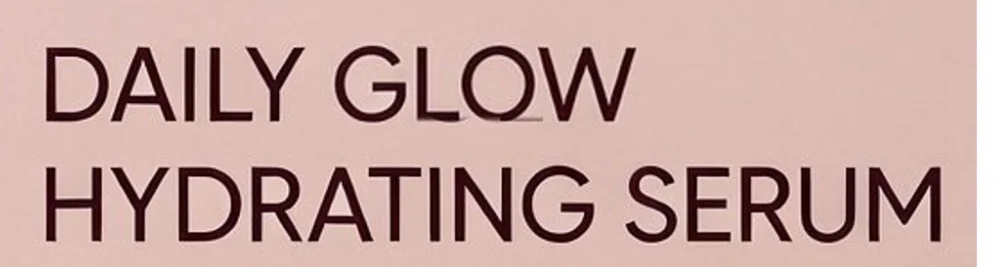
After Precise Edit: GLOW
Read the corrected word letter by letter. Inspect its baseline, weight, spacing, and color. Look just beyond the mask for a pale rectangle, a color shift, or remaining letter fragments.
Compare the other line of copy, bottle silhouette, silver cap, and contact shadow with the source.
Download the accepted result and proofread that file before publishing. If the product photo also needs a color or background change, follow our step-by-step product photo editing guide and review the corrected wording after each edit.
Reference : Fix missed words, font mismatches, and leftover letters
| Problem | Next step |
|---|---|
| Layerize Text misses a word | Look for the word in the base image. Repair that region before adding replacement text, so the old letters do not show through. |
| The reconstructed font looks different | Adjust the font, size, letter width, and spacing against the source. Use the original font or approved artwork when brand typography must match exactly. |
| Replacement copy wraps or crowds the product | Adjust the text box width and line breaks first. Reposition or resize the block if needed, keeping the supporting line readable. |
| Precise Edit leaves letter fragments | Return to the source and extend the mask to include every letter edge. Use the exact replacement prompt, then inspect the new result for remaining strokes. |
If your image needs changes beyond the lettering, our AI image editing tools comparison covers recoloring, object removal, and background edits. For campaign production, make the corrected image your approved version before creating more sizes or scenes. When you resize an ad for different placements, reread the wording in each layout before approving it. Our product-to-campaign workflow covers those later steps, including keeping campaign copy editable.
Reference : Frequently asked questions
How do I fix a typo while keeping the rest of the image?
Start from the original and mask the complete misspelled word in Precise Edit. Request the exact replacement and name the neighboring details to preserve. With context-window editing, pixels outside the context window stay unchanged. Inspect the result inside that window, including nearby lettering and background, before exporting.
What if the corrected word uses a different font?
Select the reconstructed text layer in Studio and adjust its font, size, letter width, and spacing against the source. If the work requires an exact brand font, use your original editable text or approved artwork for finishing. In a Precise Edit prompt, specify the existing font style, weight, color, and baseline, then compare the generated letters with the original.
Does Layerize Text automatically correct spelling?
In our two examples, it reconstructed PLNAT as PLANT and GOLW as GLOW without a manual correction. Confirm the extracted wording against your approved copy and enter the correct spelling yourself when needed.
Can I edit the text again after exporting a PNG?
You can upload the PNG and reconstruct its text again, but the PNG itself does not retain Studio’s editable text layers. In our reupload test, another Layerize Text pass produced different typography settings. Continue from the layered Studio version when you need further wording changes without another reconstruction.
Correct your own image
To correct your own image, sign in to Ideogram, open Studio, and upload the source. Choose Layerize Text for editable copy or Precise Edit for a masked word repair.