
8 Best AI Mockup Generators in 2026

A logo on a flat canvas tells you little about how it will look printed on a folded tote or wrapped around a bottle. A mockup gives you that view before you order a sample or send the design to a client.
The harder part comes with revisions. You may need to shrink the print, replace the artwork, or change the setting while keeping the product recognizable. Some tools give you a design layer to adjust. Others generate a new image from your reference and instructions.
We put the same NORTHLINE artwork on a tote in Ideogram and Recraft, then changed the studio background in each. We also made the print smaller in Ideogram. Those results sit alongside tools for reusable merchandise templates, 3D packaging, and team presentations, so you can choose the workflow your project needs.
Overview : Which AI mockup generator fits your project?
A mockup previews a design on a product or surface. The tools below take different routes to that result.
- Template mockups: Put your artwork into a prepared scene.
- Generative mockups: Create or edit the presentation from prompts and references.
- 3D mockups: Apply artwork to a model with camera and surface controls.
Some platforms combine these methods.
| Tool | Use it for | Free / paid access | What to check |
|---|---|---|---|
| Ideogram | Branded scenes and successive revisions | Free plan; Plus $20 monthly | Lettering and placement after edits |
| Recraft | Custom scenes and artwork placement | Free noncommercial; Basic $12 monthly | Reference generation versus Mockup mode |
| Dynamic Mockups | Reusing designs across products and batches | 50 starter credits; Pro $19 monthly | Credits per operation; API watermark rules |
| Mockey | Merchandise templates with optional AI tools | Free personal use; paid commercial plans | AI allowance differs by billing plan |
| Pacdora | Packaging artwork on actual 3D structures | Free access; Business for commercial use | Package structure, license, render tier |
| Canva | Mockups inside decks, ads, and shared designs | Free selection; paid features and assets | Template choice and export entitlements |
| Adobe Firefly AI Assistant | Combining a logo with a blank product photo | Eligible paid Adobe plan | Beta access and final file requirements |
| Pixelcut | Uploading a logo and describing a product | Advertises free HD, watermark-free download | Generation allowance and actual pixels |
Prices above use monthly billing where a dollar figure is shown. Ideogram Plus is also $15 a month billed annually at $180; Recraft Basic is $10 a month billed annually at $120. Dynamic Mockups advertises $15 a month on annual billing. A lower annual equivalent means an upfront commitment, not monthly cancellation at that price.
Overview : One design, from source artwork to product presentation
We used one generated source graphic throughout: a serif NORTHLINE wordmark, a burgundy horizontal rule, and the smaller wording EVERYDAY OBJECTS. The source was a transparent PNG. Keeping that file fixed let us inspect the same lettering and layout across tools.
We chose a canvas tote because the test needed more than readable text on a flat background. The artwork had to look printed on fabric, with folds, weave, and shading around it. The smaller EVERYDAY OBJECTS line gave us another detail to inspect after editing.
From artwork to tote: In Ideogram, we opened the original graphic directly in Precise Edit. Background was set to Auto. We used this prompt:
Create a studio photograph of an ivory cotton-canvas tote bag standing on a pale-gray surface against a solid pale-gray background. Print the supplied NORTHLINE artwork once on the center of the front panel. Keep “NORTHLINE,” “EVERYDAY OBJECTS,” and the burgundy underline clearly readable. Show the entire bag and both handles, nearly front-facing. The bag is made of solid, opaque, tightly woven canvas with continuous fabric across every panel, subtle folds, and neat stitching. Use soft daylight and a natural shadow beneath the bag. Keep the composition simple, with no additional objects or graphics.
In Recraft, we attached that same source PNG to the Image workflow, using a square format and the model selector on Auto. The prompt made the artwork-preservation request explicit:
Create a photorealistic ivory cotton-canvas tote bag standing upright on a pale-gray studio surface against a matching solid background. Apply the supplied NORTHLINE artwork once, centered on the front at approximately 60% of the bag’s width. Preserve “NORTHLINE,” “EVERYDAY OBJECTS,” the serif lettering, and burgundy horizontal rule. Show the complete bag and both handles, nearly front-facing, with continuous opaque canvas, subtle folds, visible weave, soft daylight, and a natural contact shadow. No extra text, graphics, or props.
Both briefs used the same artwork. Recraft returned two variations; we carried the first one into the background edit.
Change the setting, keep the design: We edited each generated tote image, instead of starting again from the logo. For Ideogram, the instruction was:
Change only the background and surface to a warm beige studio setting. Keep the tote bag, handles, fabric, folds, artwork size and placement, “NORTHLINE,” “EVERYDAY OBJECTS,” and burgundy rule unchanged. Maintain soft lighting and a natural contact shadow.
The Recraft instruction requested the same change, with preservation phrased as:
Change only the background and surface to a warm beige studio setting. Preserve the tote’s shape, handles, fabric, artwork size and placement, “NORTHLINE,” “EVERYDAY OBJECTS,” and burgundy rule. Maintain soft lighting and a natural contact shadow.
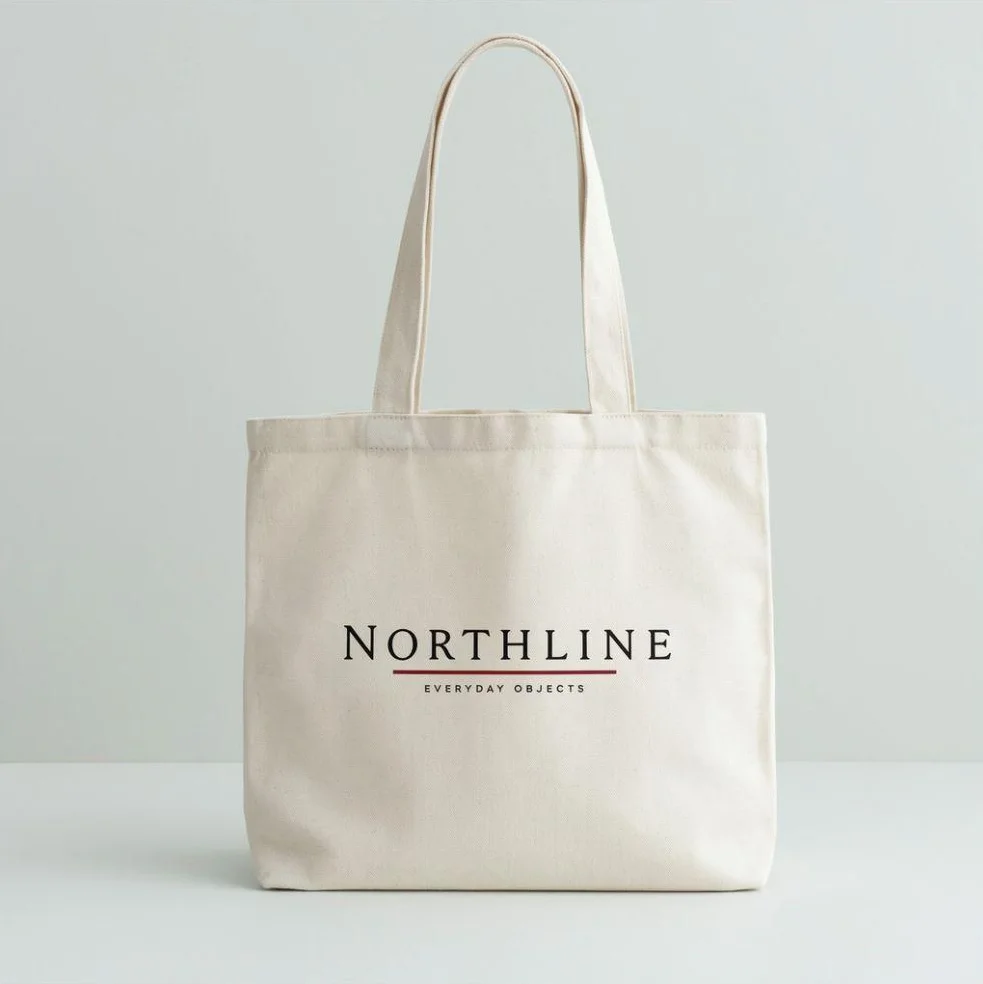
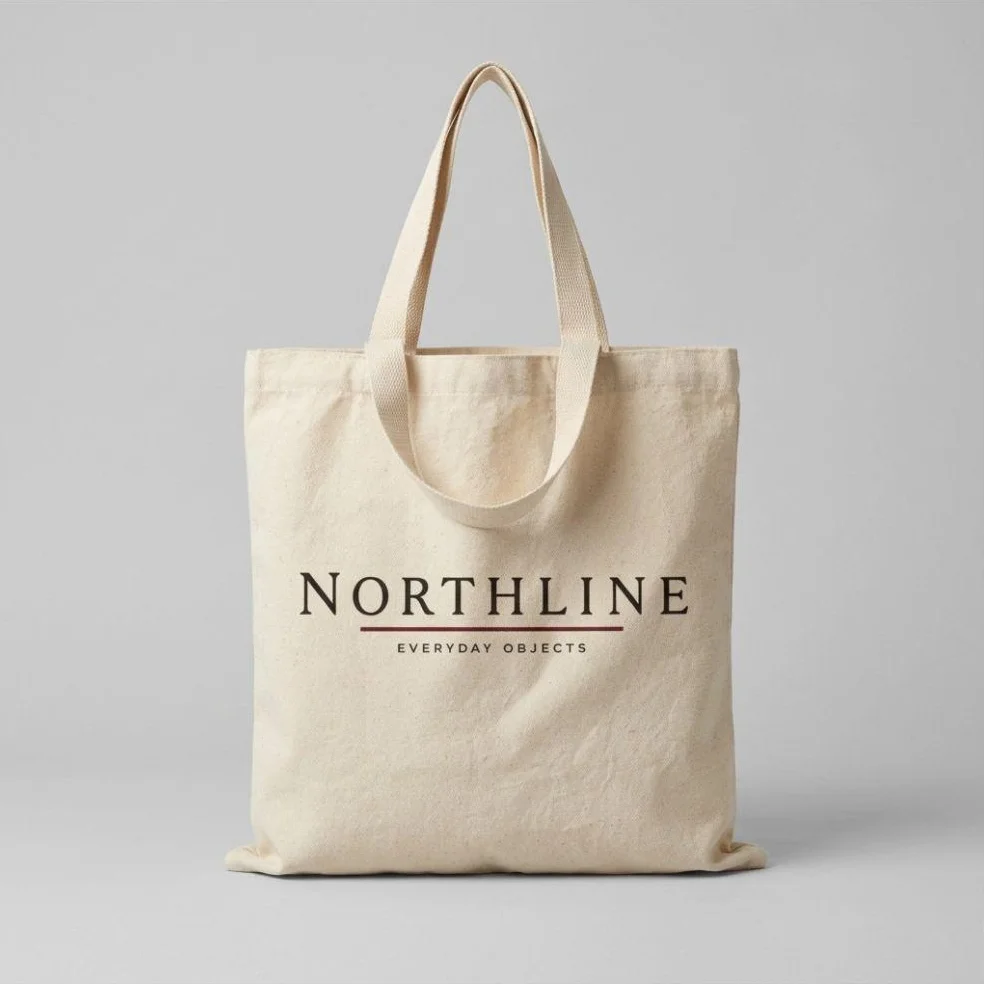
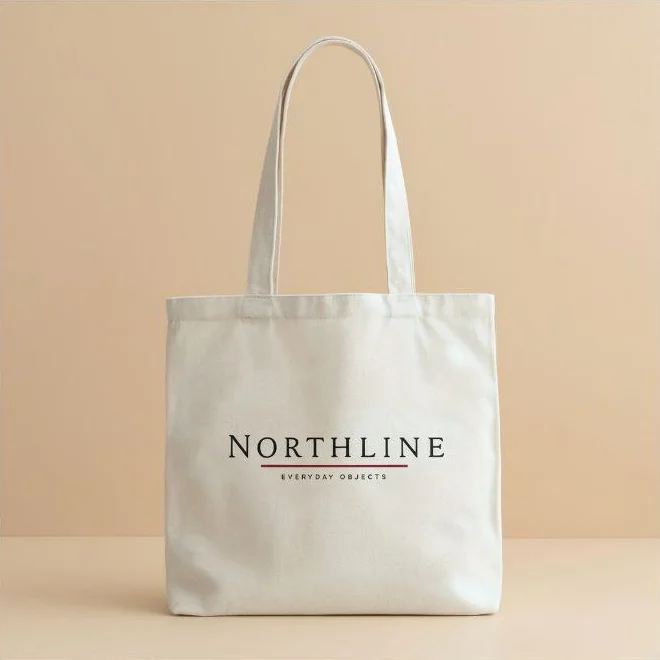
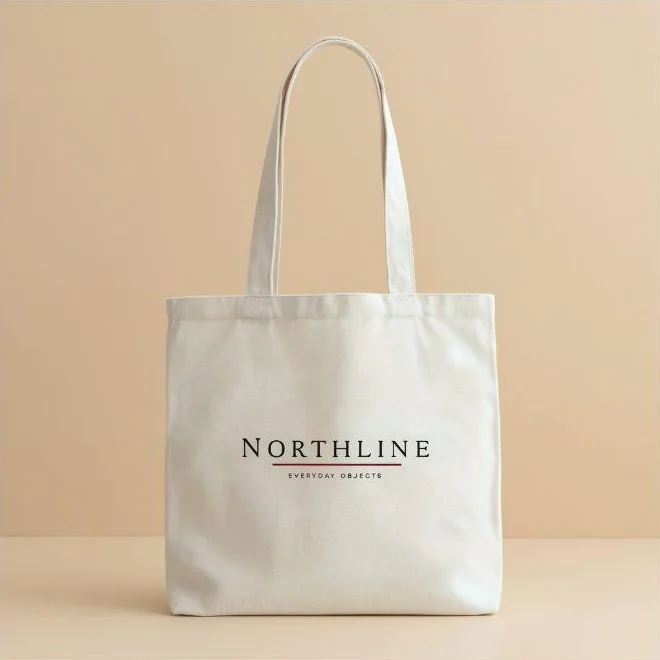
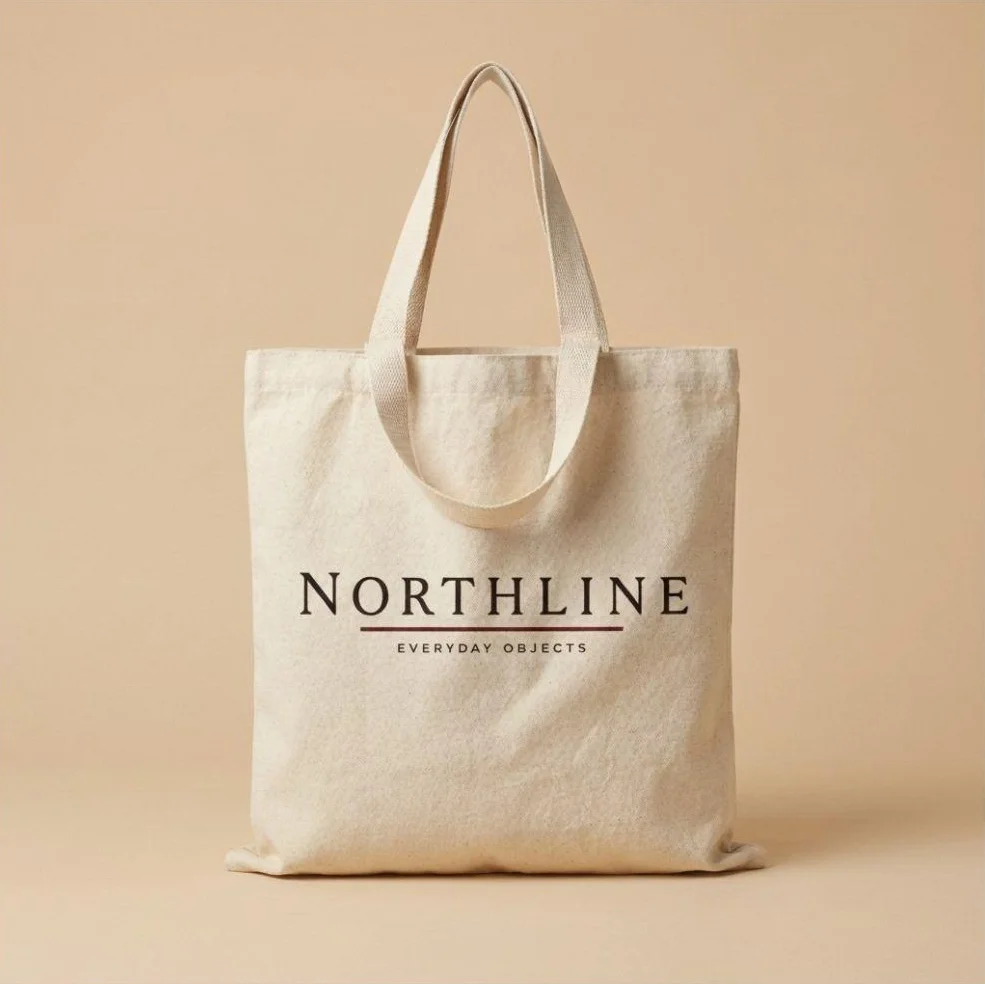
We checked the wording and rule first, then the handles, bag outline, folds, and lighting. The beige edit kept the design readable in both tools. Ideogram’s framing and folds shifted slightly; Recraft’s fabric appeared warmer with the new setting.
A smaller print on the approved tote: In Ideogram, we then edited the beige result with this instruction:
Make the complete printed artwork approximately 25% smaller, keeping it horizontally centered on the tote’s front panel. Preserve “NORTHLINE,” “EVERYDAY OBJECTS,” the serif lettering, and burgundy rule. Keep the beige studio setting, bag shape, handles, and fabric unchanged.
The print became visibly smaller and stayed centered. Both wording lines remained readable. That’s a typical client revision, done without rebuilding the presentation. Recraft’s smaller-print revision wasn’t run.
We assessed spelling, artwork placement, surface realism, and product consistency.
| Observed result | Ideogram | Recraft |
|---|---|---|
| Initial presentation | Clean studio tote with readable artwork | Two tote variations |
| Lettering | Both lines readable | Both lines readable |
| Beige scene edit | Completed; framing and folds shifted slightly | Completed; bag appeared warmer |
| Smaller print | Visibly reduced and centered | Not tested |
| Downloaded files | 2048 × 2048 PNG | 1024 × 1024 JPG |
No visible watermarks appeared on the files we downloaded.
The Recraft results below come from reference-led generation and editing in its Image workflow.
Ideogram
Recraft
The tools : The tools to consider for your mockup workflow
Tool 1 : Ideogram: create a branded presentation, then revise it
Ideogram is best for creating branded product presentations and refining the scene through successive edits.
Editable artwork and presentation layers: Keep editable source artwork as SVG with Ideogram Vector, then build the presentation around it. In Studio, use separate image layers and editable text layers for the product preview, campaign headline, and supporting copy. You can revise the presentation text while keeping the product image on its own layer.
Start with artwork or a product reference and describe the presentation you need. You might show a logo on a tote, develop a bottle concept, or present a poster in an interior. Our reference-image workflow gives the generation a visual starting point alongside your prompt.
Our tote revisions: For the NORTHLINE test, we opened the source graphic in Precise Edit and generated the tote. From the clean result, we changed the studio background to beige and then reduced the printed artwork. Both wording lines survived those revisions, and the smaller print stayed centered.
Studio mockup
Beige background
Smaller print
For local changes: Precise Edit provides masks and an edit window. A mask identifies the area to change; the window defines the area the model processes. Use those controls to revise one part of a presentation.
Color and material variations: You can also explore garment colors with Colorways or apply a fabric, texture, or finish reference with Material Swap.
For a studio scene, describe the background and surface you want. Choose transparent output when you need a cutout.
Plans and edit credits: Plus costs $20 monthly or $180 annually and includes 2,400 monthly priority credits and private generation. Our screenshots showed six-credit quotes for Precise Edit operations.
If you’re preparing a store listing, compare the result with the item you’ll actually sell. For production artwork, follow the file-preparation steps in our print-on-demand guide.
To try this with your own design, open your artwork in Precise Edit and adapt the tote prompt above to your product. Save the presentation, then request one scene or print-size change and compare the design with your source.
Tool 2 : Recraft: work with the artwork separately from the mockup surface
Recraft is worth considering when you want a custom scene plus controls for how artwork sits on it.
Placement and surface controls: Recraft’s dedicated Mockup workflow supports position, size, rotation, masks, tiling, and surface appearance settings. AI Blend adds generated shading based on the product’s folds and contours, alongside conventional blend modes.
That gives a designer more to adjust than a prompt alone. Its documentation lists PNG, JPG, PDF, and CMYK TIFF mockup exports.
Our reference-led test: Recraft produced two canvas totes with readable lettering and a burgundy rule. Their handles and bag shapes differed. The beige-background edit retained the first result’s recognizable construction and artwork placement, with warmer overall color.
Gray studio
Beige studio
If placement control is why you’re choosing Recraft, try your own artwork in Mockup mode, including small lettering and a curved or folded area.
Commercial use and private generation: Basic starts at $12 monthly or $120 annually. Free-plan generations are public and aren’t licensed for commercial use; images generated under paid plans receive commercial rights and private visibility.
Tool 3 : Dynamic Mockups: keep the setup and replace the design
A seller with dozens of graphics needs a repeatable setup. Dynamic Mockups combines template rendering, custom Photoshop mockups, batch exports, and AI scene tools.
Reuse a product view: Dynamic Mockups’ template workflow keeps the same product view across many designs or color variants. Custom PSD support lets you bring a prepared mockup into the system without rebuilding its composition for every item.
Generated backgrounds and lifestyle scenes: AI Photoshoot creates backgrounds, while MockAnything AI turns images into lifestyle mockups. Treat smart-object swaps and generated scenes as different jobs when you compare costs.
API rendering and file retrieval: Its render API supports custom mockups, and the documentation says rendered image links remain available for 24 hours. Download and store completed files as part of your workflow.
The vendor quotes 0.6–2.8 seconds for template rendering, depending on complexity and asset size. Time AI scene generation independently when estimating a production run.
Batch costs and watermarks: Pro is $19 on monthly billing, with an advertised $15 annual equivalent. Batch export still uses credits, so budget by operation and output count. Free web exports can be watermark-free while free API exports are watermarked. Match the plan and operation allowances against the number of finished images you need.
Tool 4 : Mockey: choose merchandise templates, then add AI where needed
Mockey suits sellers working across apparel, accessories, print products, packaging, and device presentations. You can use its regular mockup library for prepared product views, then use AI tools for other presentation needs.
Regular downloads versus AI credits: Making and downloading regular mockups doesn’t consume AI credits. AI Photoshoot, Multi Shot, AI Mockup and Design, and other AI operations do.
A shop that needs the same artwork on several standard products may get more value from template selection and bulk downloads than repeated scene generation. Use the AI tools when you need a one-off campaign scene.
Free downloads and paid allowances: Free access allows three smallest-size JPG downloads a day for personal use. Starter adds full-quality PNG/JPG downloads, bulk downloads, and commercial use.
Monthly Starter includes no AI credits; annual Starter includes 600 per year. Creator includes an AI allowance. Mockey directs buyers to its checkout for current regional prices.
Compare its plans to choose between regular mockup downloads and an AI allowance.
Tool 5 : Pacdora: see how packaging artwork wraps around the structure
A label that looks good from the front can still meet awkwardly at a seam or disappear under a fold. Pacdora addresses that problem with packaging templates and actual 3D previews.
From brief to 3D preview: Pacdora’s AI product workflow can develop a packaging design from a brief and open it on a dieline-based structure. You can inspect the design around the package, including the folds and seams.
Panels, folds, and seams: For an approved label or carton design, use the appropriate structure and inspect artwork across panels, lids, folds, and seams. The package model needs to match the product you intend to make.
Render resolution and commercial rights: The pricing table distinguishes render tiers, including 4K on Pro and 8K on Business. It lists Lite and Pro for personal use, with commercial permission on Business. Verify the license for the work you’re delivering, not just the render resolution.
A preview still needs a supplier’s check of dimensions, bleed, substrate, and production artwork. Our packaging and CPG comparison covers the broader packaging workflow beyond presenting the design.
Tool 6 : Canva: put the mockup into the presentation your team already uses
Canva makes sense when the mockup is one part of a pitch deck, social ad, launch announcement, or shared brand presentation.
Templates and AI image edits: Its mockup selection covers physical products and digital screens. Canva also documents AI surface identification for turning a branded photo into a mockup template, plus Magic Edit and Magic Expand for image changes. Choose a prepared template for an existing product view, or use its AI tools to change the image.
Shared layouts and review: The practical benefit is keeping the product preview, campaign headline, layout, and team review together. You can share editing access and use the mockup inside the larger design.
Transparent exports and asset access: Make sure your plan includes the template, stock elements, and AI features you want to use.
Transparent PNG download requires an eligible paid or organizational plan. Review the license for each stock asset and select transparent background when that’s the required deliverable.
Canva’s mockups are a reasonable starting point for teams already building their presentations there.
Tool 7 : Adobe Firefly AI Assistant: combine your logo with a blank product image
Logo plus product photo: Adobe’s Mockup Studio skill starts with two inputs: your logo and a blank product image. The Assistant combines them, scales and aligns the logo, and accounts for surface texture and lighting. You can request refinements through prompts.
That input structure suits designers who already have a product photograph and want to explore a branded treatment. It also gives you a different starting point from asking AI to invent the product itself.
Eligible plans and beta access: Firefly AI Assistant is a beta available through eligible Creative Cloud Pro, Firefly Pro, Pro Plus, or Premium plans. Adobe’s overview video includes upcoming technology, so don’t assume every demonstration is available in your account.
Editable file handoff: Before choosing it for a client handoff, inspect a sample download to see which elements remain editable. If your client needs a PSD with a replaceable smart object, confirm that handoff before starting.
Tool 8 : Pixelcut: upload a logo and describe the product
Pixelcut offers a direct route for a small shop or marketer: upload the logo, describe the product and setting, and generate a branded preview.
Upload requirements and downloads: Pixelcut’s mockup tool accepts JPG, PNG, and HEIC uploads up to 50 MB and 6000 × 6000 pixels. The product page advertises free HD downloads without a watermark, with examples including totes and other merchandise.
That makes it worth trying for a straightforward logo-on-product concept.
Store and client use: Pixelcut’s help permits commercial use when you have rights to the imported material. Look at the generation allowance before planning a batch of store or client images. Check the exported pixels against your required print size.
Reference : What happens when the client changes the brief?
“Move the logo and make it smaller”
For an approximate visual revision, a prompt can be enough. Our Ideogram result had a visibly smaller, centered print with both wording lines intact.
For exact measurements, such as a logo 80 mm wide and 50 mm below the neckline, set them in the production file.
If your next task is still creating the shirt graphic itself, our T-shirt design tool comparison covers that earlier step.
“Use this new design in the same scene”
A replaceable artwork layer, smart object, or reusable mockup template is valuable here. It lets you change the design while retaining the prepared product view.
In a generative workflow, attach the replacement artwork and compare the result against both the new source and the approved scene. Look at letterforms, spacing, product shape, shadows, and seams.
“Show the back, a close-up, and the whole range”
Use real product references, matched template views, or a 3D model when construction must stay consistent. A generated back view can invent stitching, closures, or label positions that weren’t visible in the front reference.
For a range of designs, reuse the setup before generating new scenes. For a range of materials, keep the source product and change the selected surface. For a campaign background revision, our guide to successive product-photo edits shows how to carry a reference through multiple changes.
For automated catalogs: Confirm the API supports the actual operation you need. A template render API, an image-generation API, and a masked-edit API solve different problems. For catalog-scale Precise Edit work, use our API to submit images and edit instructions, with masks and reference images where needed.
Reference : Before the mockup goes to a client or store
Artwork and surface detail: A correctly spelled logo can still have different letterforms or spacing. A realistic fold can distort a label. Look at whether the design follows the product’s perspective without crossing seams, handles, folds, or printable boundaries it should avoid.
Ask for the right transparent file: Specify which of these three deliverables you need:
- Source artwork: The logo or design with no background rectangle.
- Product cutout: The product with its surrounding scene removed.
- Final mockup: The product and applied design together, with no background.
Open the exported file against another background to check its edges and transparency.
Pixels and print size: A 1024-pixel image can work in a small web placement but provides about 3.4 inches at 300 PPI. A 2048-pixel image provides about 6.8 inches. Calculate print size from the actual pixel dimensions, not just the DPI metadata. Match the file to the final placement, whether that’s a store thumbnail, an ad, a slide, or a printed brochure.
Keep the production file separate: For production, retain the approved artwork and the supplier’s specifications, including editable logo paths, print separations, bleed, and a checked dieline where required. Exporting a photographic mockup as PDF still gives you a presentation image.
Commercial rights: Recraft’s free generations and Mockey’s free downloads carry noncommercial or personal-use restrictions. Pacdora distinguishes commercial permission by plan. Review the permissions for generated outputs, uploaded artwork, templates, fonts, and stock assets.
Unreleased products and customer designs: Find out whether your uploads are public, how long they’re stored, and whether they train any models. For brand teams, also confirm who can view, edit, export, and remove customer designs. For unreleased collections or customer designs that require those controls, talk with our enterprise team about Microsoft and Google SSO, configurable retention, a DPA, and the commitment not to train shared models on enterprise inputs.
Reference : Frequently asked questions
Can an AI mockup generator preserve my exact logo?
It can keep your logo recognizable and readable. In our tote tests, NORTHLINE and EVERYDAY OBJECTS stayed readable through a background change in both tools, and through a print-size change in Ideogram. For exact brand geometry, keep your source artwork as a separate file and compare any edits against it.
Are there free AI mockup generators without watermarks for commercial use?
Pixelcut advertises watermark-free HD mockup downloads, and its help permits commercial projects with appropriately owned inputs. Dynamic Mockups offers watermark-free starter web exports, while its free API exports are watermarked. Recraft’s free generations aren’t licensed commercially, and Mockey’s free plan is personal-use only.
Do I need AI, a PSD mockup, or a 3D mockup?
Use generative AI to explore a scene or presentation. Use a PSD or reusable template when you need to swap artwork repeatedly in a fixed view. Use a 3D model when camera angles, packaging structure, or material controls drive the decision. Showing a finished app screen inside a phone frame is also a mockup task; generating the app’s interface is a different job.
Are AI mockups print-ready?
A mockup can have enough resolution to print in a presentation or brochure. Manufacturing the pictured product requires separate production files. Printing a tote requires the artwork and print specifications; producing a carton requires checked structural files and supplier approval. Ask for the file your printer or manufacturer needs for the next step.